Month 1: How to Cut Fabric and Make Basic Chicken Body Units for Quilty Chicks Quilt


Are you ready to start making your Quilty Chicks quilt? I can’t wait to help you get started! If you don’t have a Quilty Chicks pattern yet, click the buttons below to purchase. There are pdf and print options.
In December, I made a video that walked you through the fabric requirements and gave tips and examples of what to look for when choosing fabric. If you haven’t watched it yet you can find it here.
This month I made another video with all of my cutting and sewing tips for this month. Not a video person? I’ve got you covered! Keep reading for all the details.
There is a lot to do this month and you can take one of two routes.
Ambitious - Do all of the prep work and sewing for future months
Enough - Do the necessary prep and sewing for this month only
Either is fine, do what works best for you.

Step 1: Cut Background Fabric
I’m not going to lie, cutting background fabric is not my favorite thing to do, but we are going to get it out of the way so we can do some fun sewing! Here are a few things to note:
The fabric requirements are based on cutting the background fabric as shown in the cutting diagram. There is enough yardage for some mistakes and deviations, just don’t start cutting totally freestyle or you might have issues.
Be sure to label your fabric pieces. Write the measurements on a scrap of paper and pin or clip it to the fabric pieces. This will help you to avoid a lot of stress in future months.
Gather the Chick pieces and store together until needed in September.
Ambitious - Cut all the Chick and Chicken Background pieced
Enough - Cut the Chicken Background pieces then cut the Chick Background in September

Step 2: Cut Chicken Fabric
Next, cut the chicken body pieces using the diagrams on page 4.
Label the pieces as you cut them. You may want to label with both the measurement and the body part found in parenthesis.
Save time by cutting all of the Chicken fat quarters now. Iron and stack 4 Chicken fat quarters on top of each other and cut out all the indicated pieces. Stack and cut the remaining 3 Chicken fat quarters. Pin all body pieces of the same size together and label. Don’t divide the pieces up by chicken.
Save the scraps from the Chicken fat quarters. We will use them to make the interior quilt blocks.
You can wait to cut the Chick pieces until September.
Ambitious - Cut all of the fabric on page 4, including all 7 Chicken fat quarters
Enough - Cut the Red and Orange pieces and 1 of the Chicken fat quarters
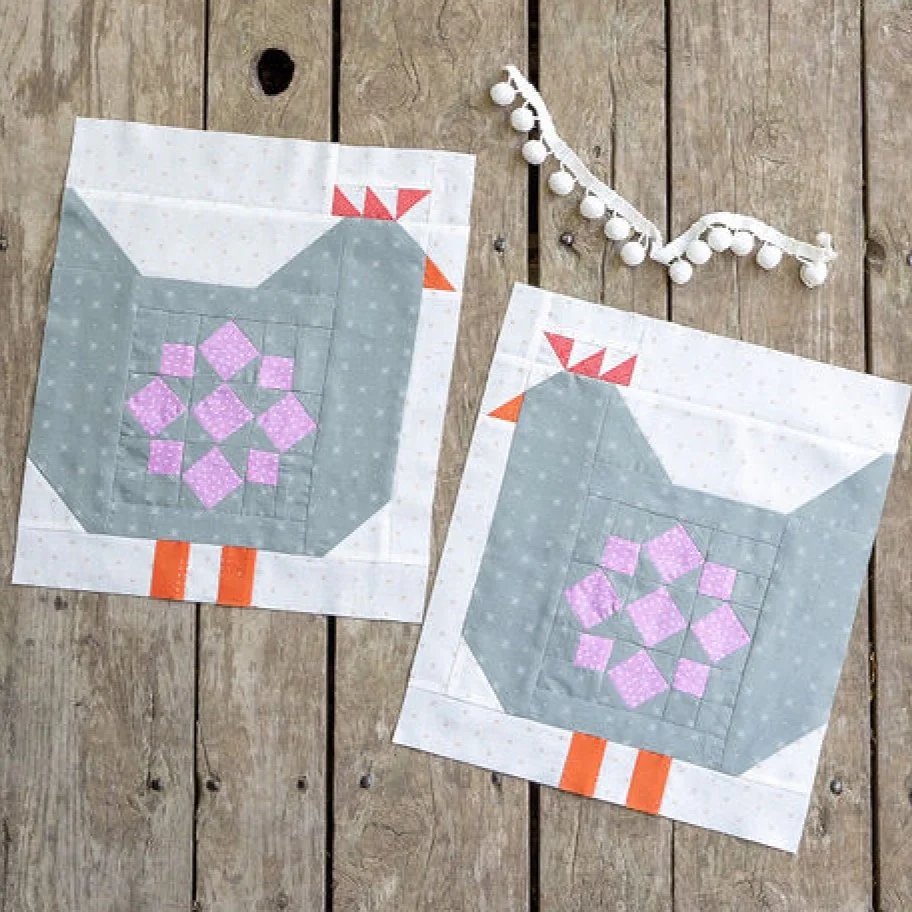
Step 3: Make the Combs
Making the combs in bulk instead of 2 each month will save time. That being said, all you really need to make this month are the Comb 1 Units. You can make the remainder of the combs another month.
Comb 1 Tips:
This comb is made with small half-square triangles and spacing strips.
Pay attention to layout and orientation of the pieces. Each comb has a left and right-facing option. Double check before sewing the pieces together.
Super Ambitious - Make all of the three combs
Enough - Make Comb 1 units
Step 4: Make Beak/Wattle Units
The Chickens 1 and 2 only have beaks - no wattles (that red thing that hangs below the beak).
If desired, you can skip making the wattles (top of page 9) and just make the beak units.
If you decide to make just the beaks for the first two sets of chickens, skip steps 1 & 2 in the Assembly instructions on the bottom of page 9 and follow the instructions in step 3 to make the beak-only units.
You will need to go back in March and make the remaining Beak/Wattle units.
Ambitious - Make all Beak/Wattle units
Enough - Make the Beak only units
Step 5: Make the Leg Units
The leg units come together quickly and I suggest making all 14 this month. You will rotate half of the legs 180 degrees (upside down) to use as left-facing legs.

Step 6: Make Chicken Body Parts
If you are making the Quilty Chicks quilt quickly - not as a year long project - I suggest piecing all of the body parts in bulk. For example, don’t just make the chicken breast units for Chicken 1, make the chicken breast units for all of the chickens at the same time. Chain piecing all of the units will help you stay in the zone and complete all the units faster. As you sew, remember that there are right and left-facing options for the chicken body parts. Pay close attention to placement and orientation of the fabric pieces and drawn lines.
If you like the idea of bulk sewing, but are feeling overwhelmed, piece the body parts for Chicken 1 this month and make the body parts for Chickens 2-7 in February.
This month, make sure you choose a Chicken fat quarter that will work well with the fat eighth chosen for the interior quilt block (page 14).
Ambitious - Piece the body parts for all 7 chickens
Enough - Piece the body parts for Chicken 1
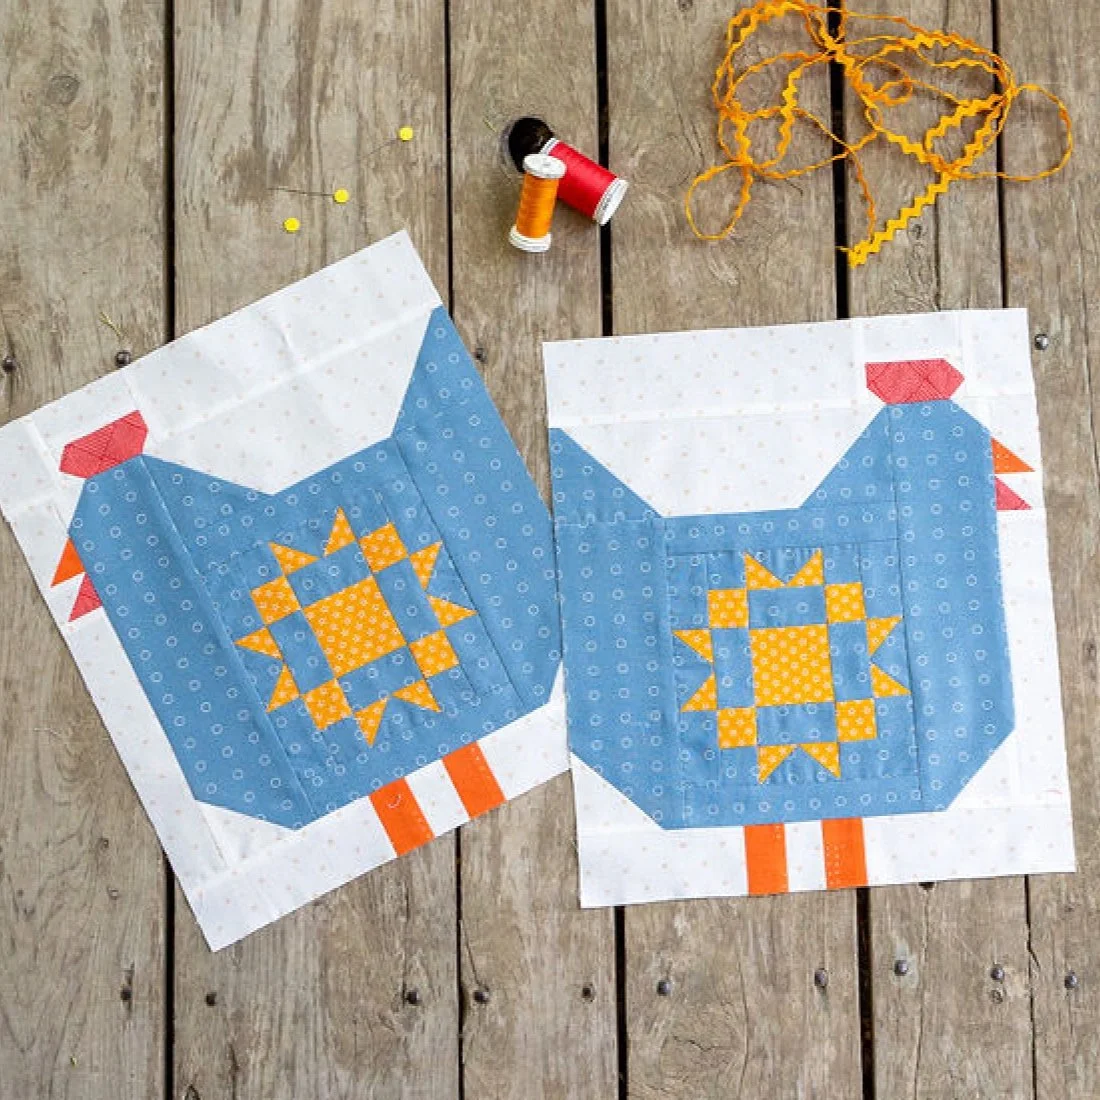
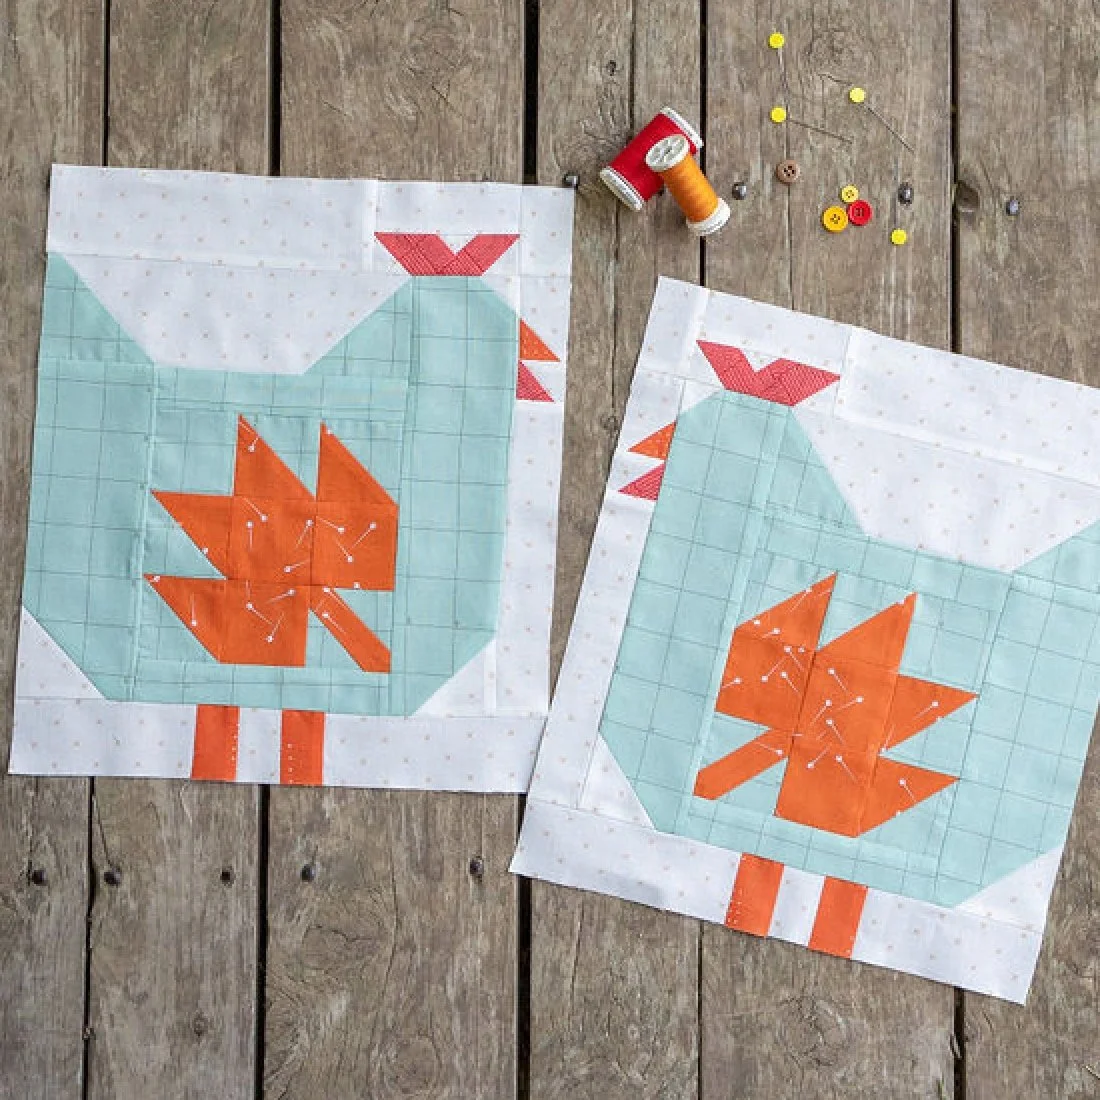
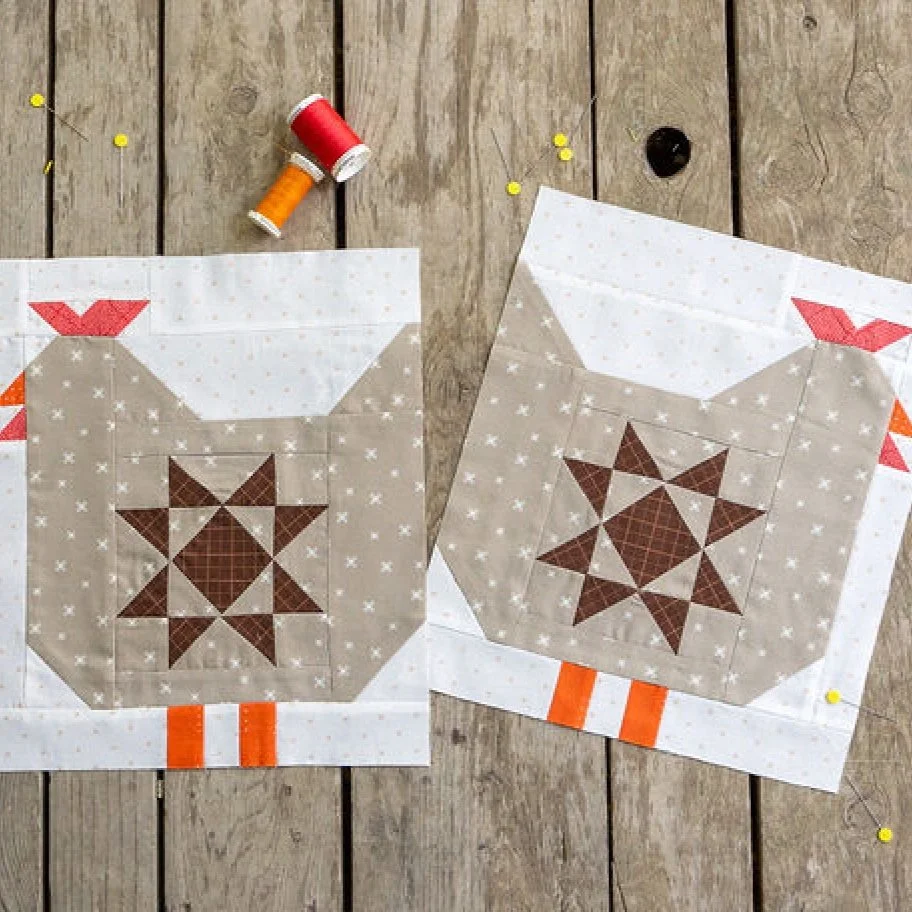
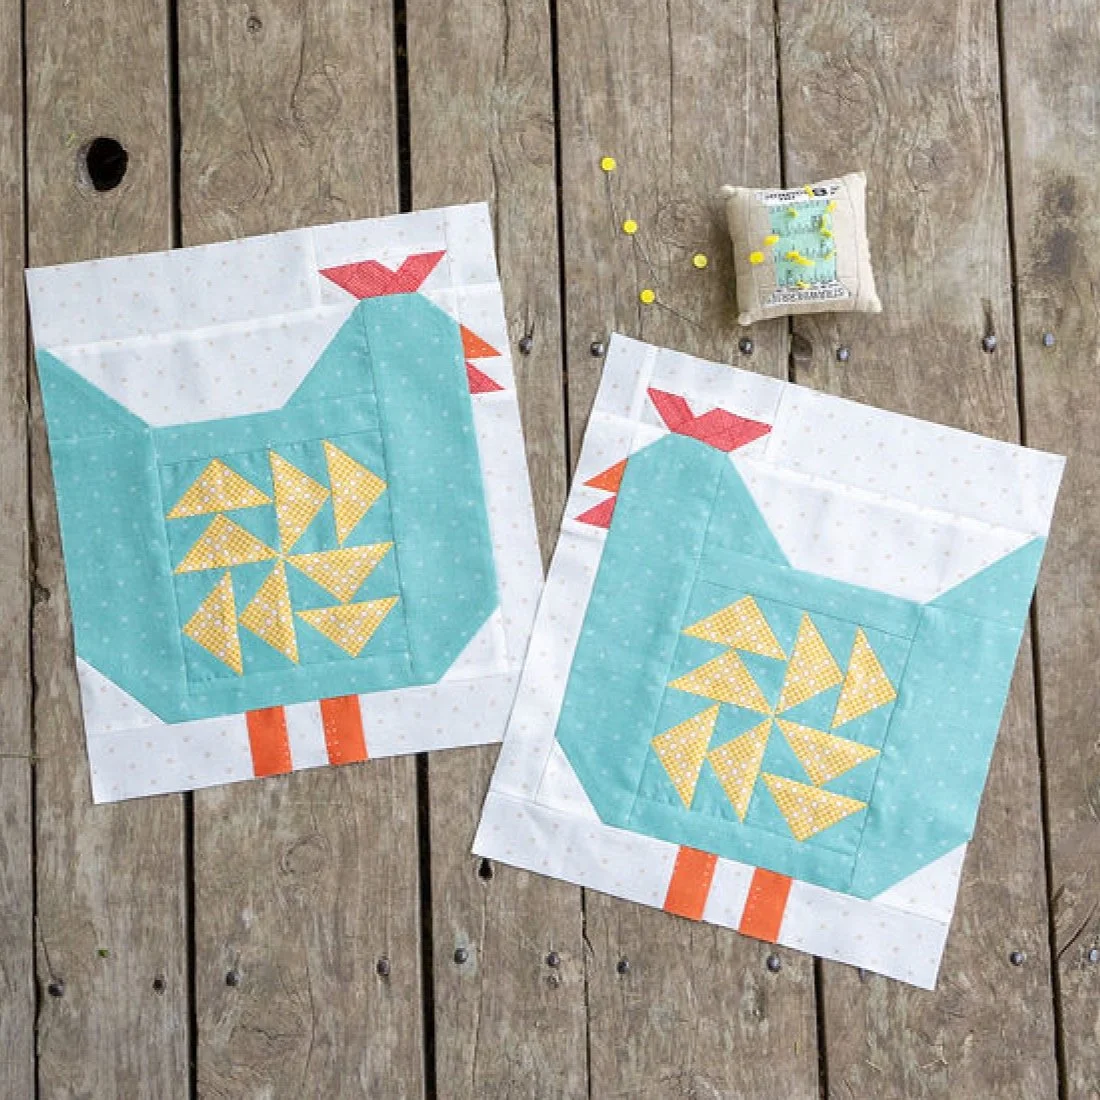
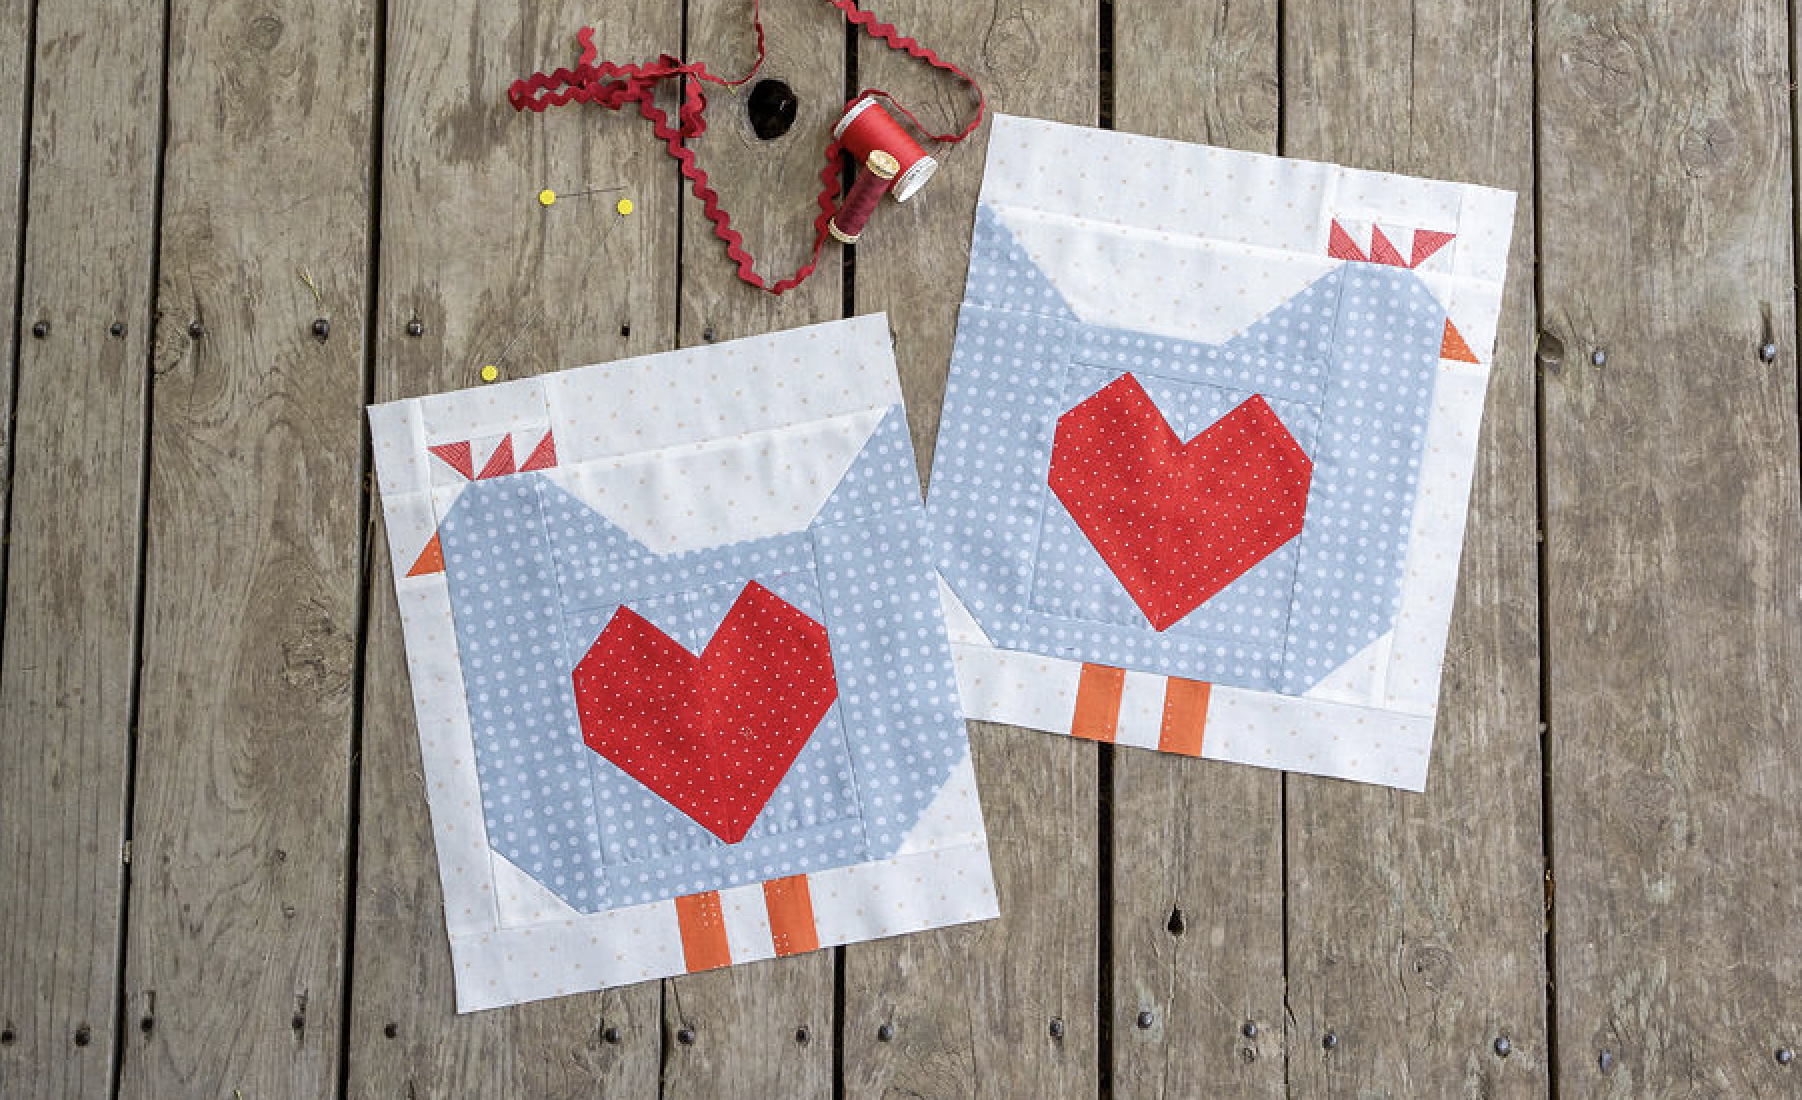
Step 7: Make the Interior Quilt Block for Chicken 1
Skip the assembly instructions on pages 12-13 until you make the interior quilt block unit for Chicken 1 on page 14.
I chose a simple heart quilt block for the first month. We’ve done enough work!
The hearts are made with the stitch-and-flip method that you will be a pro at after making the chicken body parts. Make 2 heart blocks, then go back to the assembly instructions on pages 12-13 to assemble Chicken 1.
Step 8: Final Assembly
Lay out all of the chicken units before starting to sew them together. Double check that all pieces are oriented and arranged correctly to form both a right and left-facing chicken. Sew units together in the order specified on page 12.
And that’s all for this month! It is a lot! But if you can push through, it is smooth sailing for the rest of the year! You can do it!
Let me know if you have any questions. You can leave a comment below or email me directly.