Week 2 - Scrappy Mountain Range Quilt Along!

Let’s Start Sewing!
It’s Week 2 of the Scrappy Mountain Ranges Quilt Along and this week we are piecing Rows 1-3. In this post I’ll talk about:
Choosing and labeling foundations
Foundation Paper-Piecing
Stitch Length
Sewing the Rows Together
Removing the Foundation Papers
But before we get started, lets’s look at what fabric people are using for their Mt Range quilts.

Look at all these great fabric pulls posted on Instagram! It looks like there is going to be a great mix of both bright and muted colors. I can’t wait to see them all start to come together this week. I randomly choose a winner out of all the fabric pictures posted on Instagram and the winner of this week’s $25 Etsy gift certificate is Jess @craftsandcarbs! I’ve messaged her on Instagram and will be sending them the gift certificate.
To be entered for next week’s prize post of picture on Instagram of your first three finished Mt Range rows with the hashtag #mountainrangeqal, #scrappymountains, and @leila.gardunia in the caption. To be entered to win the Grand Prize of free edge to edge quilting from Trace Creek Quilting, you will need to post at least 3 photos during the quilt along and a picture of your finished quilt by May 31st.

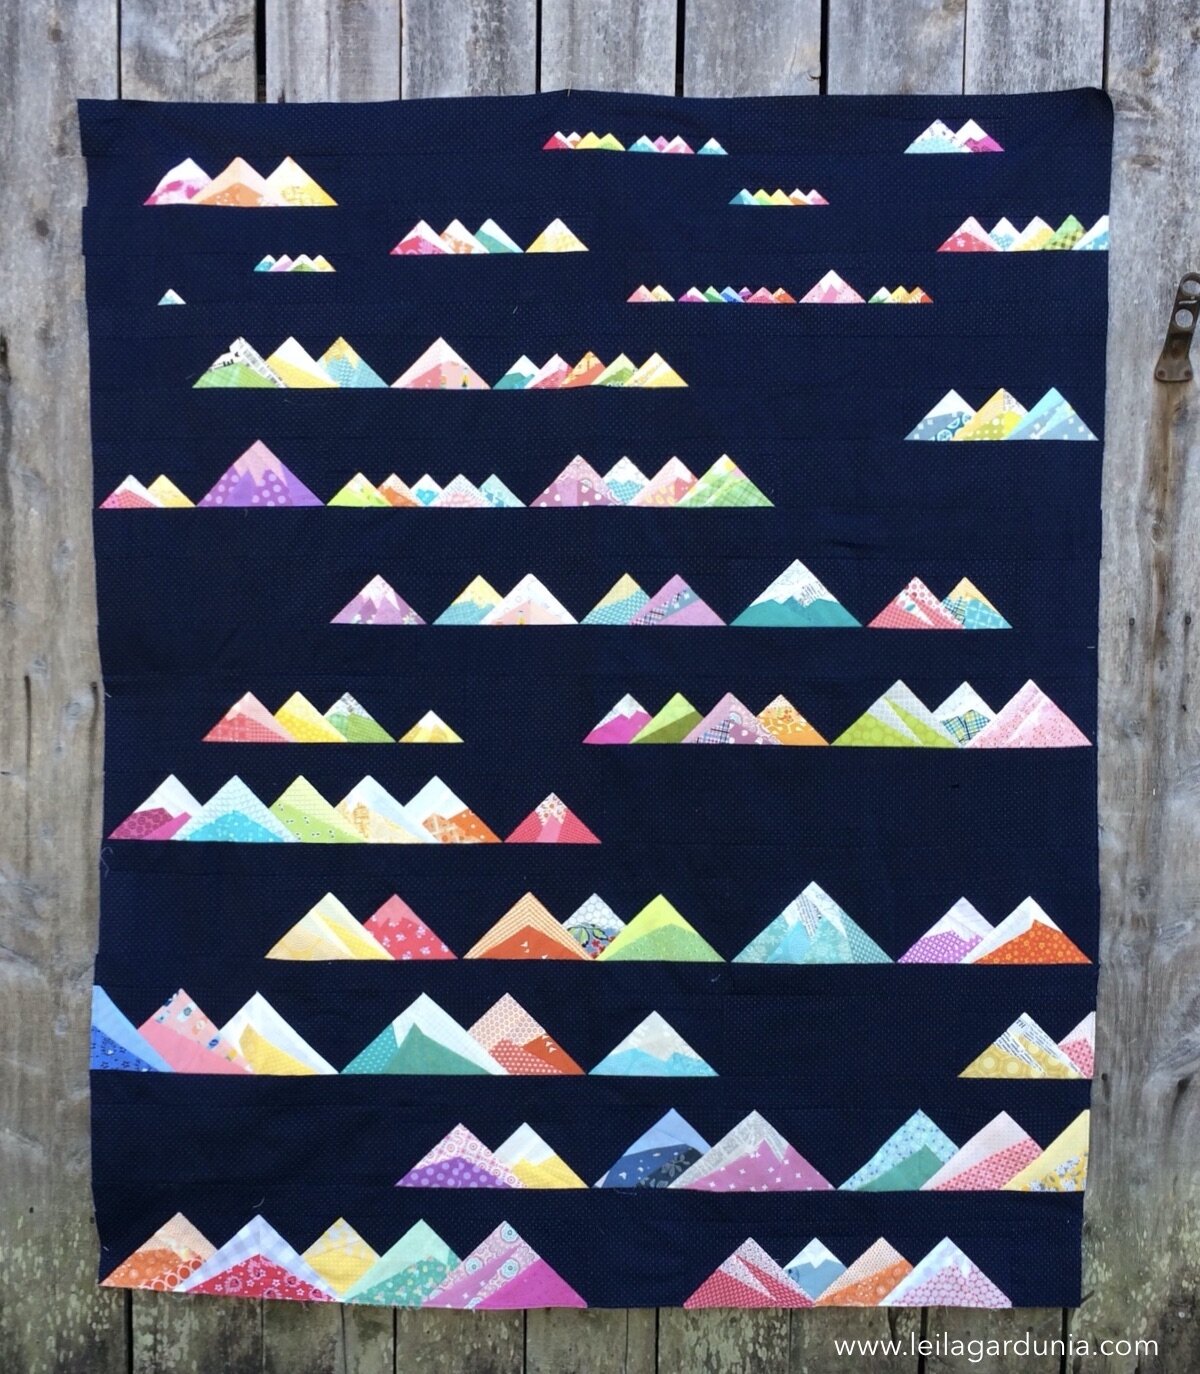
Piecing Overview
Each row of the quilt has its own set of instructions. The top line shows which foundations are need. The line drawings represent the foundations, printed side up. The foundations should be pieced, trimmed, and sewn together in the order they are shown. The shaded mountains on the lower half, represent the fabric side of the foundations after they have been sewn together. After sewing the mountains together, sew any narrow strips to the top or bottom of the mountains. Then sew the mountain ranges and spacing strips together from left to right. Press toward the strips.
Foundations
Many of the mountain range shapes look very similar. Pay close attention to which shapes are indicated in the first line of row instructions so the foundations you printed are used in the correct rows.
However, if you mix up some shapes of mountain foundations, it is not the end of the world. In fact, as long as you are using the correct size of foundation, you can use whatever mountain shape that you would like. Just make sure the half peaks on one foundation meet up with the half peaks on the neighboring foundation. Note that if you choose to use different shapes of mountains the number and type of foundations you use will be different than those indicated in the foundation printing instructions in the pattern.
Label the Foundations

After you have layed out the foundations, following the diagram on the first line of row instructions, decide which fabric you want to use for each mountain. Write the color of fabric you want to go in each section of the foundation. The mountain ranges flow from one foundation across into others. Labeling the foundations will ensure that you don’t get mixed up and that your mountains aren’t half red and half green. :)
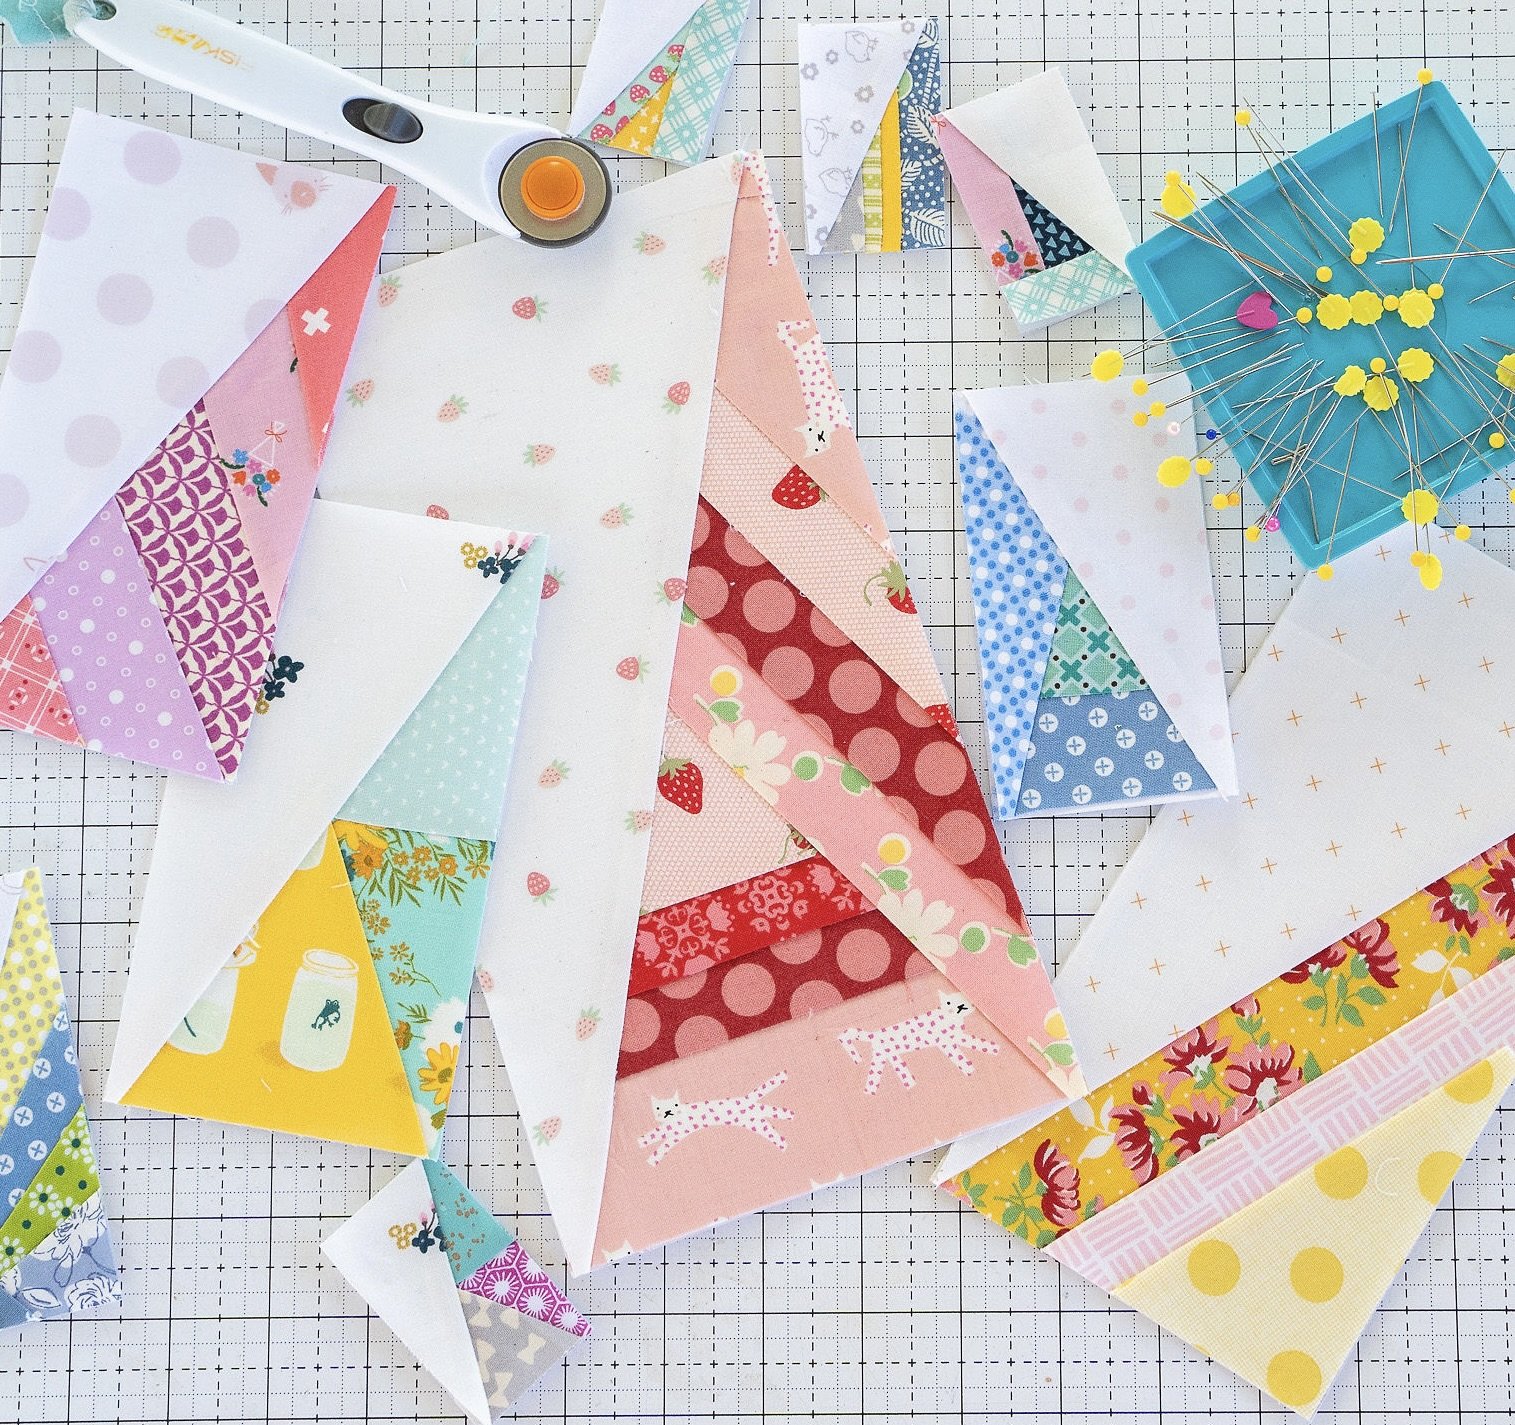
Foundation Paper-Peicing
The Scrappy Mt Ranges are foundation paper-pieced (FPP). If you need a FPP refresher, you can refer to my How to Foundation Paper-Piece blog post. If you are brand new to FPP, you may want to make some of the 3” x 6” mountain blocks in Row 7 as a warm up. The smaller foundations are much easier to manage than the larger 5” x 10” mountains. After two or three you will feel comfortable and ready to move on to the larger mountains.
Stitch Length
Remember to reduce your stitch length to 1.3-1.5 when foundation paper-piecing. The shorter stitch length will make it easier to remove the foundation papers. Most people who have issues removing papers are using too long of a stitch length.
Sewing the Rows and Spacing Strips Together
After the mountain rows are pieced it is time to sew them together. Most mountain rows of the quilt are divided by 2 1/2” or 3 1/2” spacing strips. Refer to the layout diagram on page 10 for details. It is important to pin the spacing strips and mountain rows together before sewing to ensure they line up and one row/strip doesn’t feed through the sewing machine faster than the other. Find the center of both the mountain row and spacing strip by folding them in half. Pin at the half way marks and at the beginning and end of the row. Add additional pins along the length to stablize. Keep your stitch length small so it is easy to tear out the foundations. After sewing, set the seams and press toward the strips.
NOTE: The mountain ranges in the final layout diagram on page 10 are not filled in because I wanted the diagram to double as a coloring page. However, I recently realized that the line drawings could be mistaken for the foundation side of the block. This is not the case. The mountains are fabric side up in the final layout diagram.

Removing Foundation Papers
I wait to remove the foundation papers until the foundation is completely surrounded by other quilt blocks. The surrounding blocks/fabric stablize the FPP block and keep any bias edges from stretching. If the foundation is on the edge of the quilt, stay stitch a scant 1/4” away from the edge of the quilt, using a short stitch length. The stay stitching will stablize the edge of the quilt and keep the fabric from stretching once the edge papers are removed. Consider removing papers as you make each set of rows. Future you will thank you. :)

Let me know if you have any questions and thanks again for joining the quilt along! I’m excited to get piecing!
Quilt Along Schedule:
April 10-16 - Review the pattern and prepare for sewing.
April 17-23 - sew rows 1-3
April 24-30 - sew rows 4-6
May 1-7 - sew rows 7-9
May 8-14 - sew rows 10-12
May 15-21 - sew rows 13-14
May 22-30 - catch up and sew rows together
May 31st - very last day!
August 1st - Last day to receive 25% off edge to edge quilting from Trace Creek Quilting