
HST String Block Tutorial
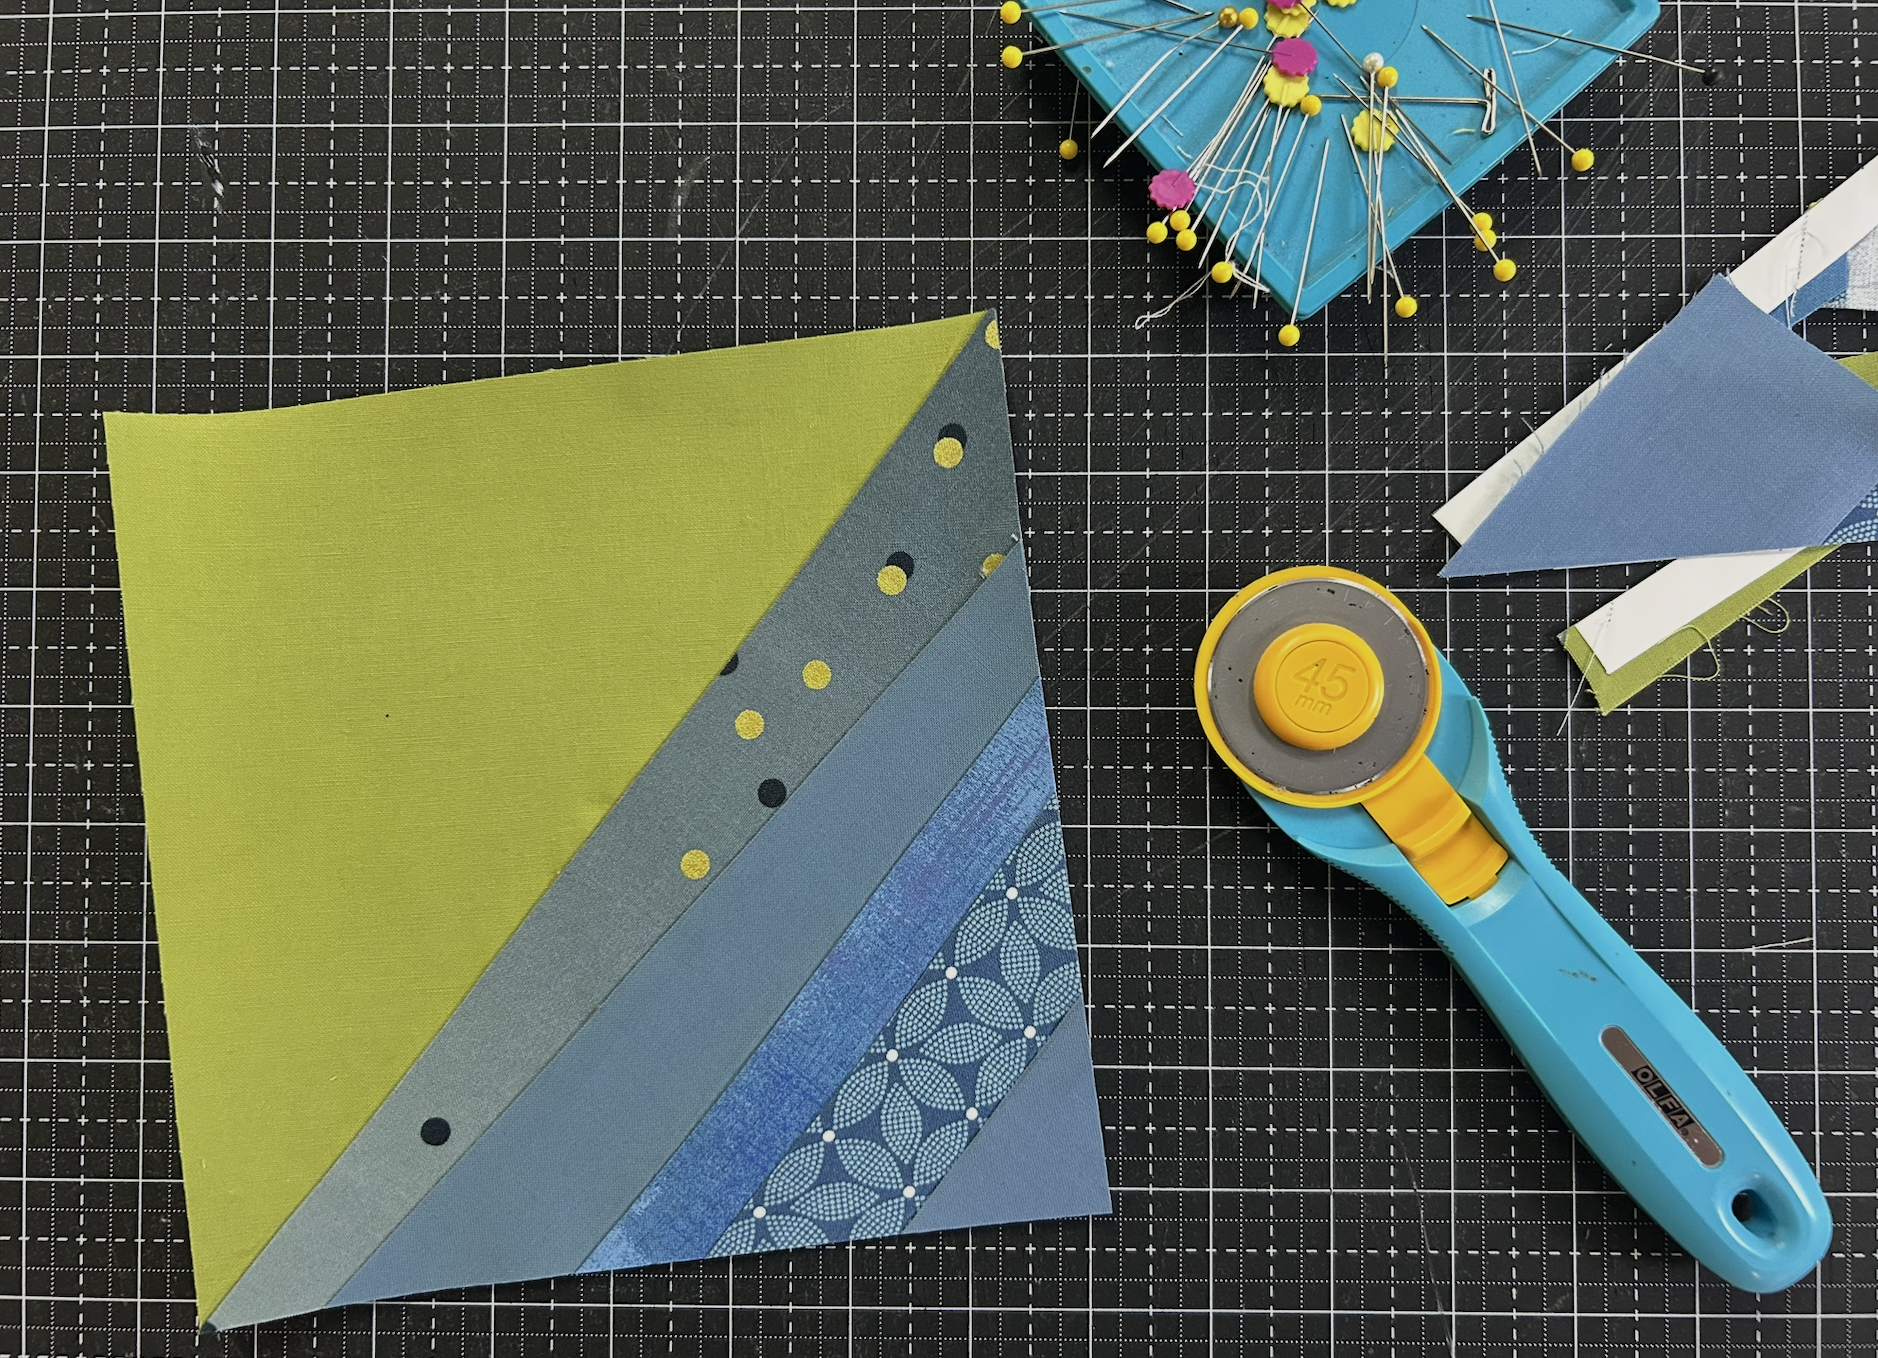
Hi, St Louis Modern Quilt Guild Members! Here are instructions on how to make the half-square triangle string blocks we will use for our 2027 Community Challenge quilt.
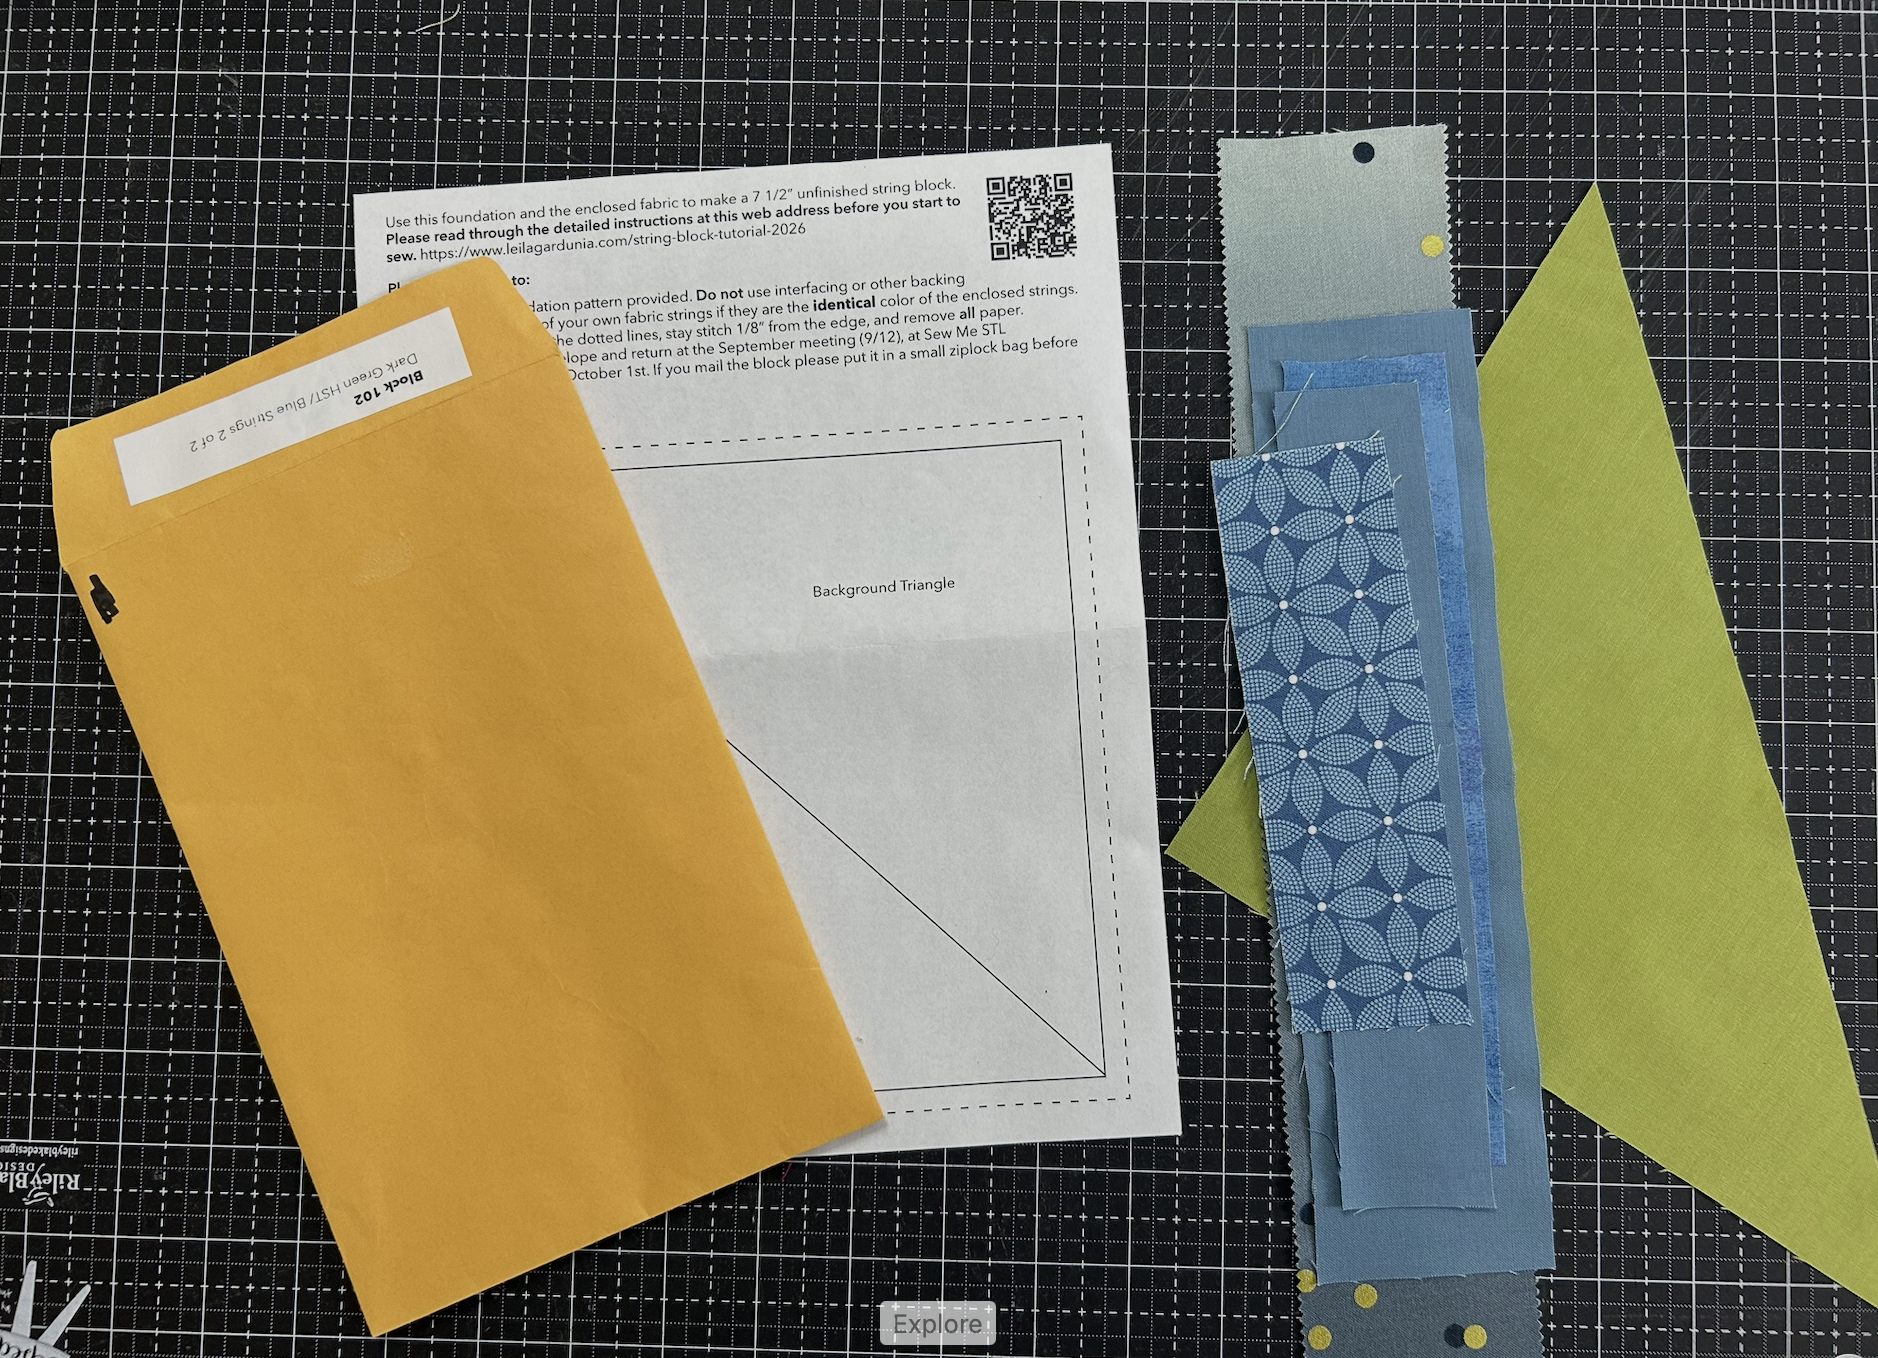
You can check out a packet with materials to make the string at the August and September meetings.
Your packet includes the following items:
- 1 paper foundation with brief instructions
- 1 large triangle of fabric for the background area of the string block
- many strings of various lengths and widths
- 1 small chunky rectangle for the final corner string
There are many different colors of blocks in the quilt. Use the fabrics provided in the envelope.
You may add one or two narrow fabric strips from your stash if they EXACTLY match the color of the enclosed strings. If in doubt only use the strings in the envelope.
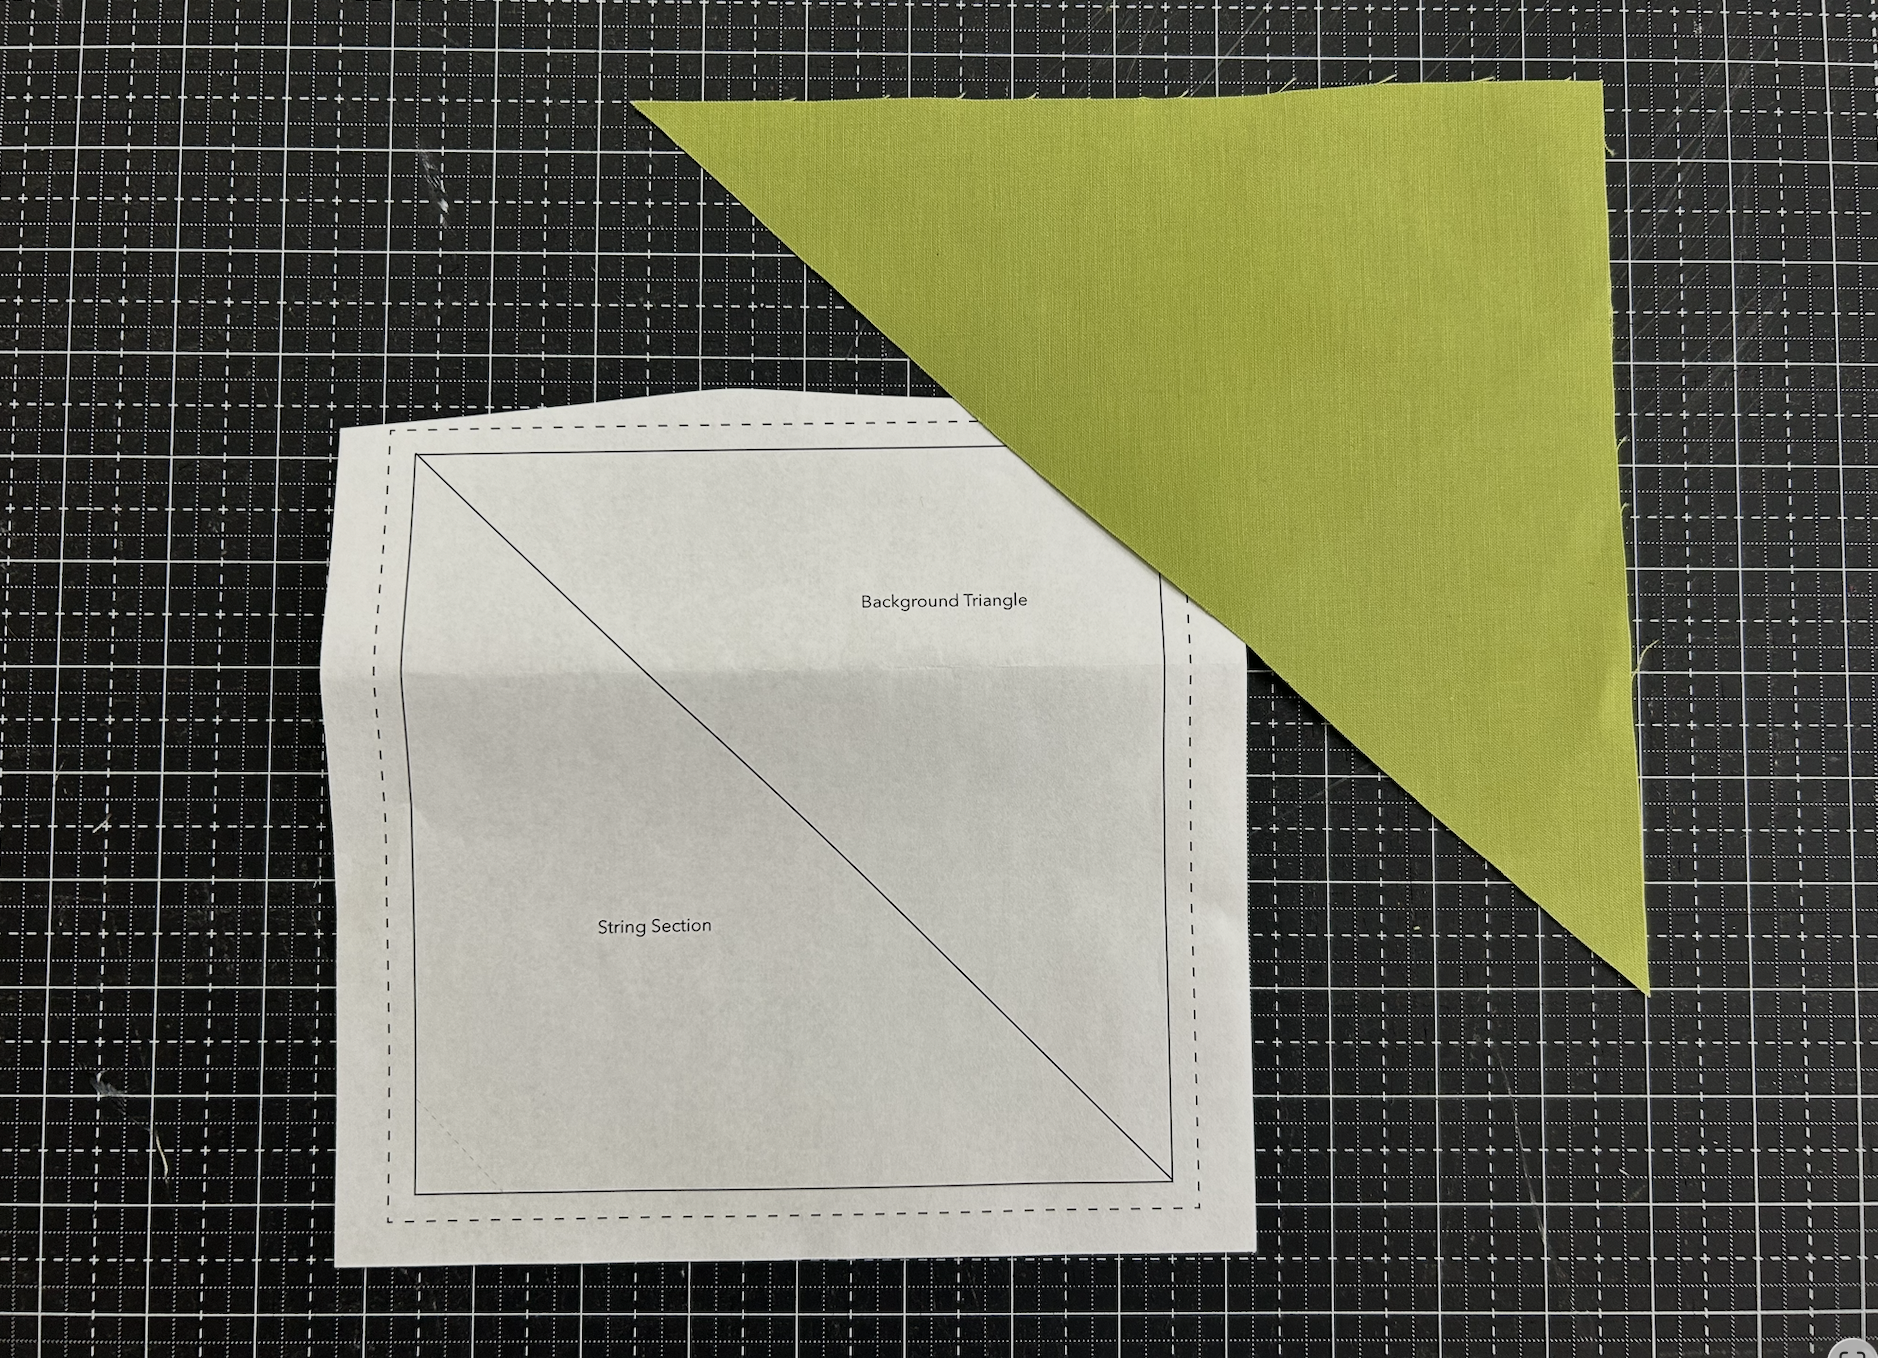
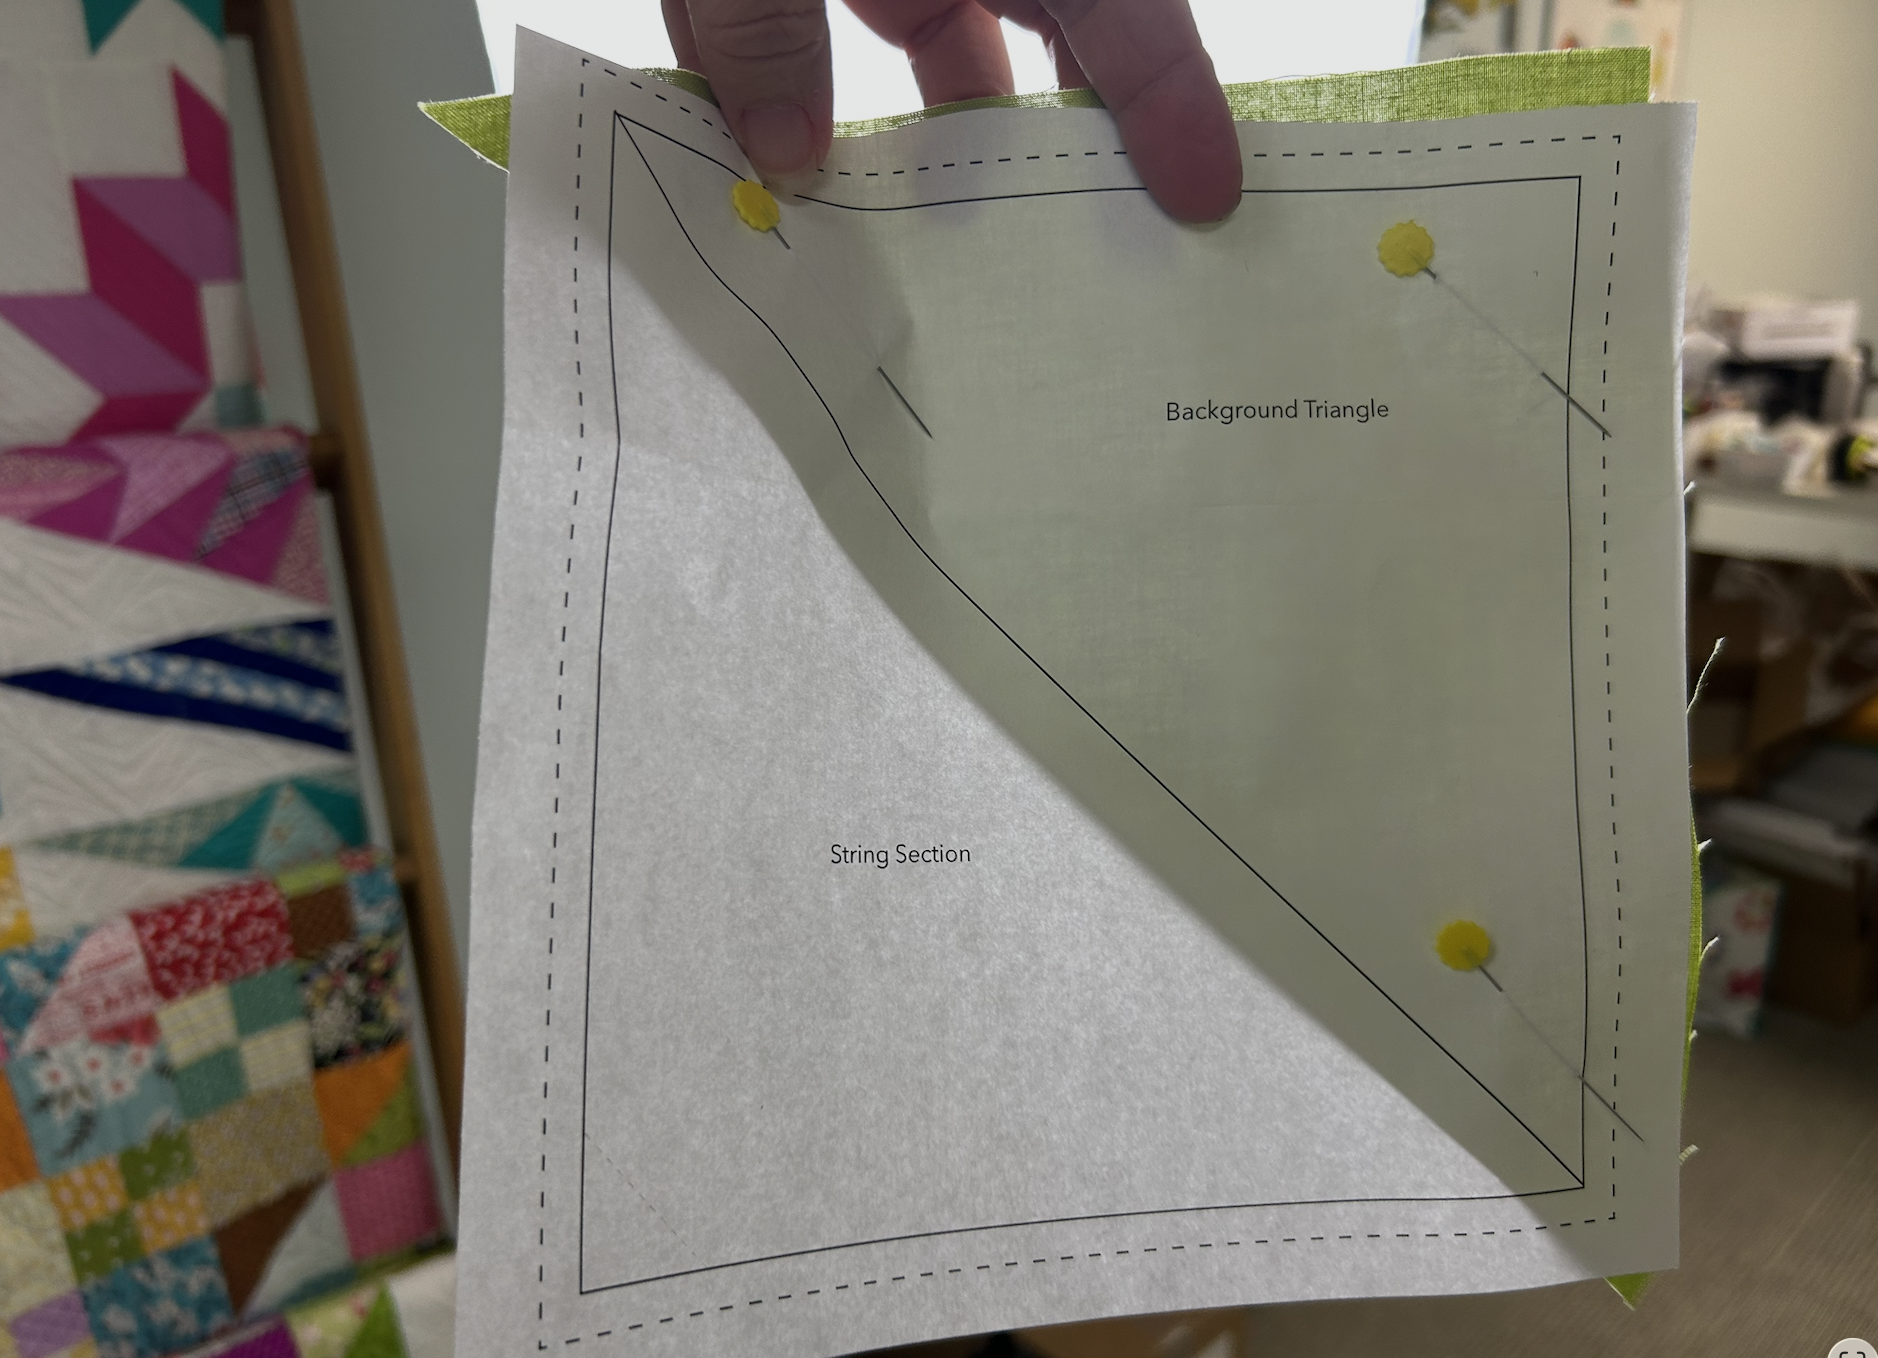
Step 1: Attach Large Triangle
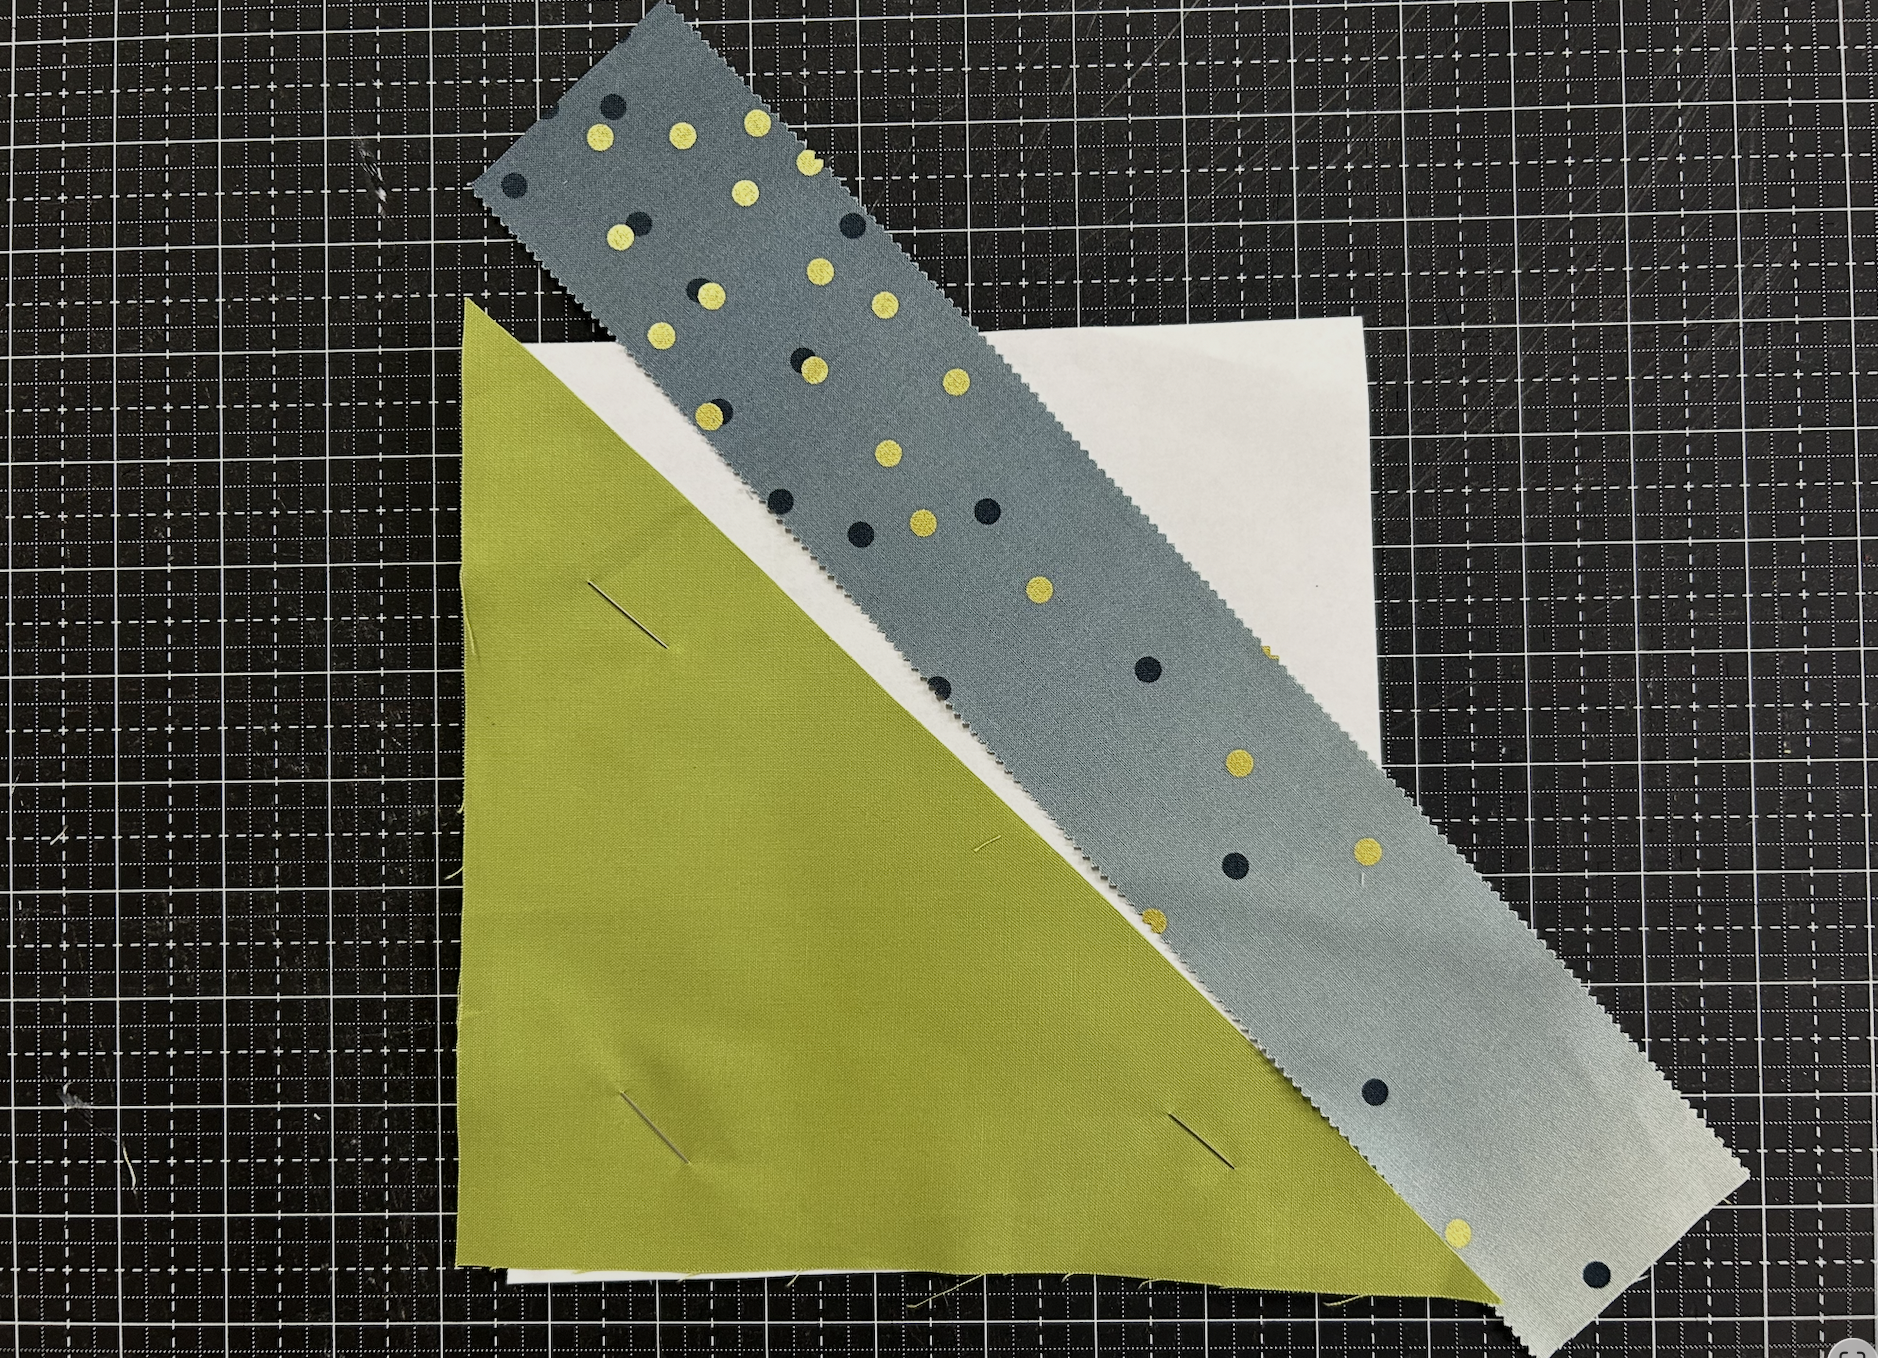
Trim the instructions off the top of the paper. Use a tiny bit of glue stick or flat headed pins to attach the large fabric triangle to the back (unprinted side) of the paper foundation. Lift the paper up to the light and make sure that the fabric extends 1/4” past the solid diagonal line and extends beyond the dotted outer lines as shown.
Step 2: Sew on the first strip
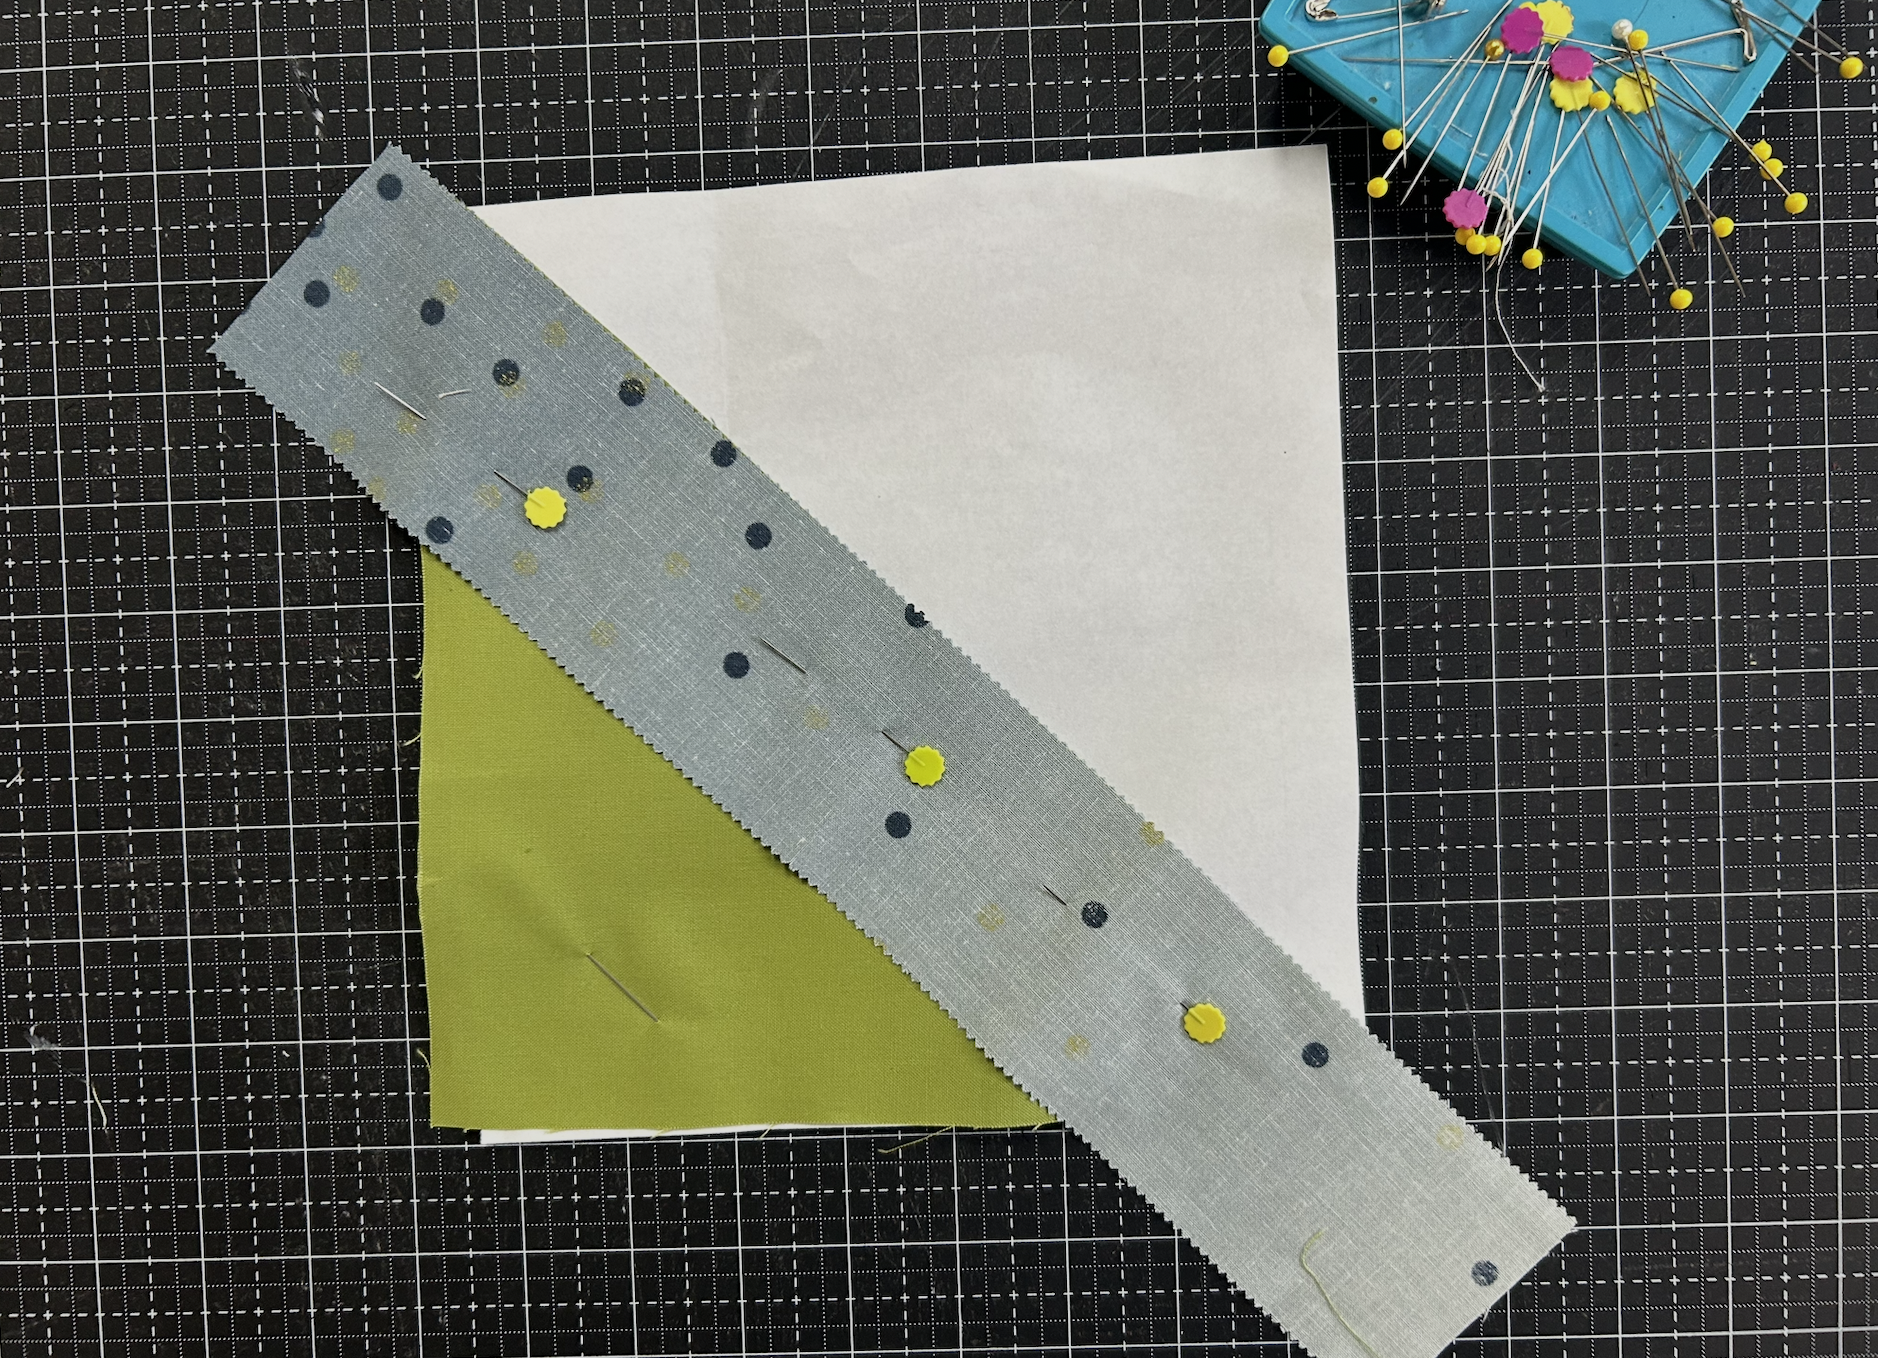
Place the edge of the longest fabric strip along the long diagonal edge of the background triangle, right sides together. Make sure that the ends extend past the paper. Pin well.
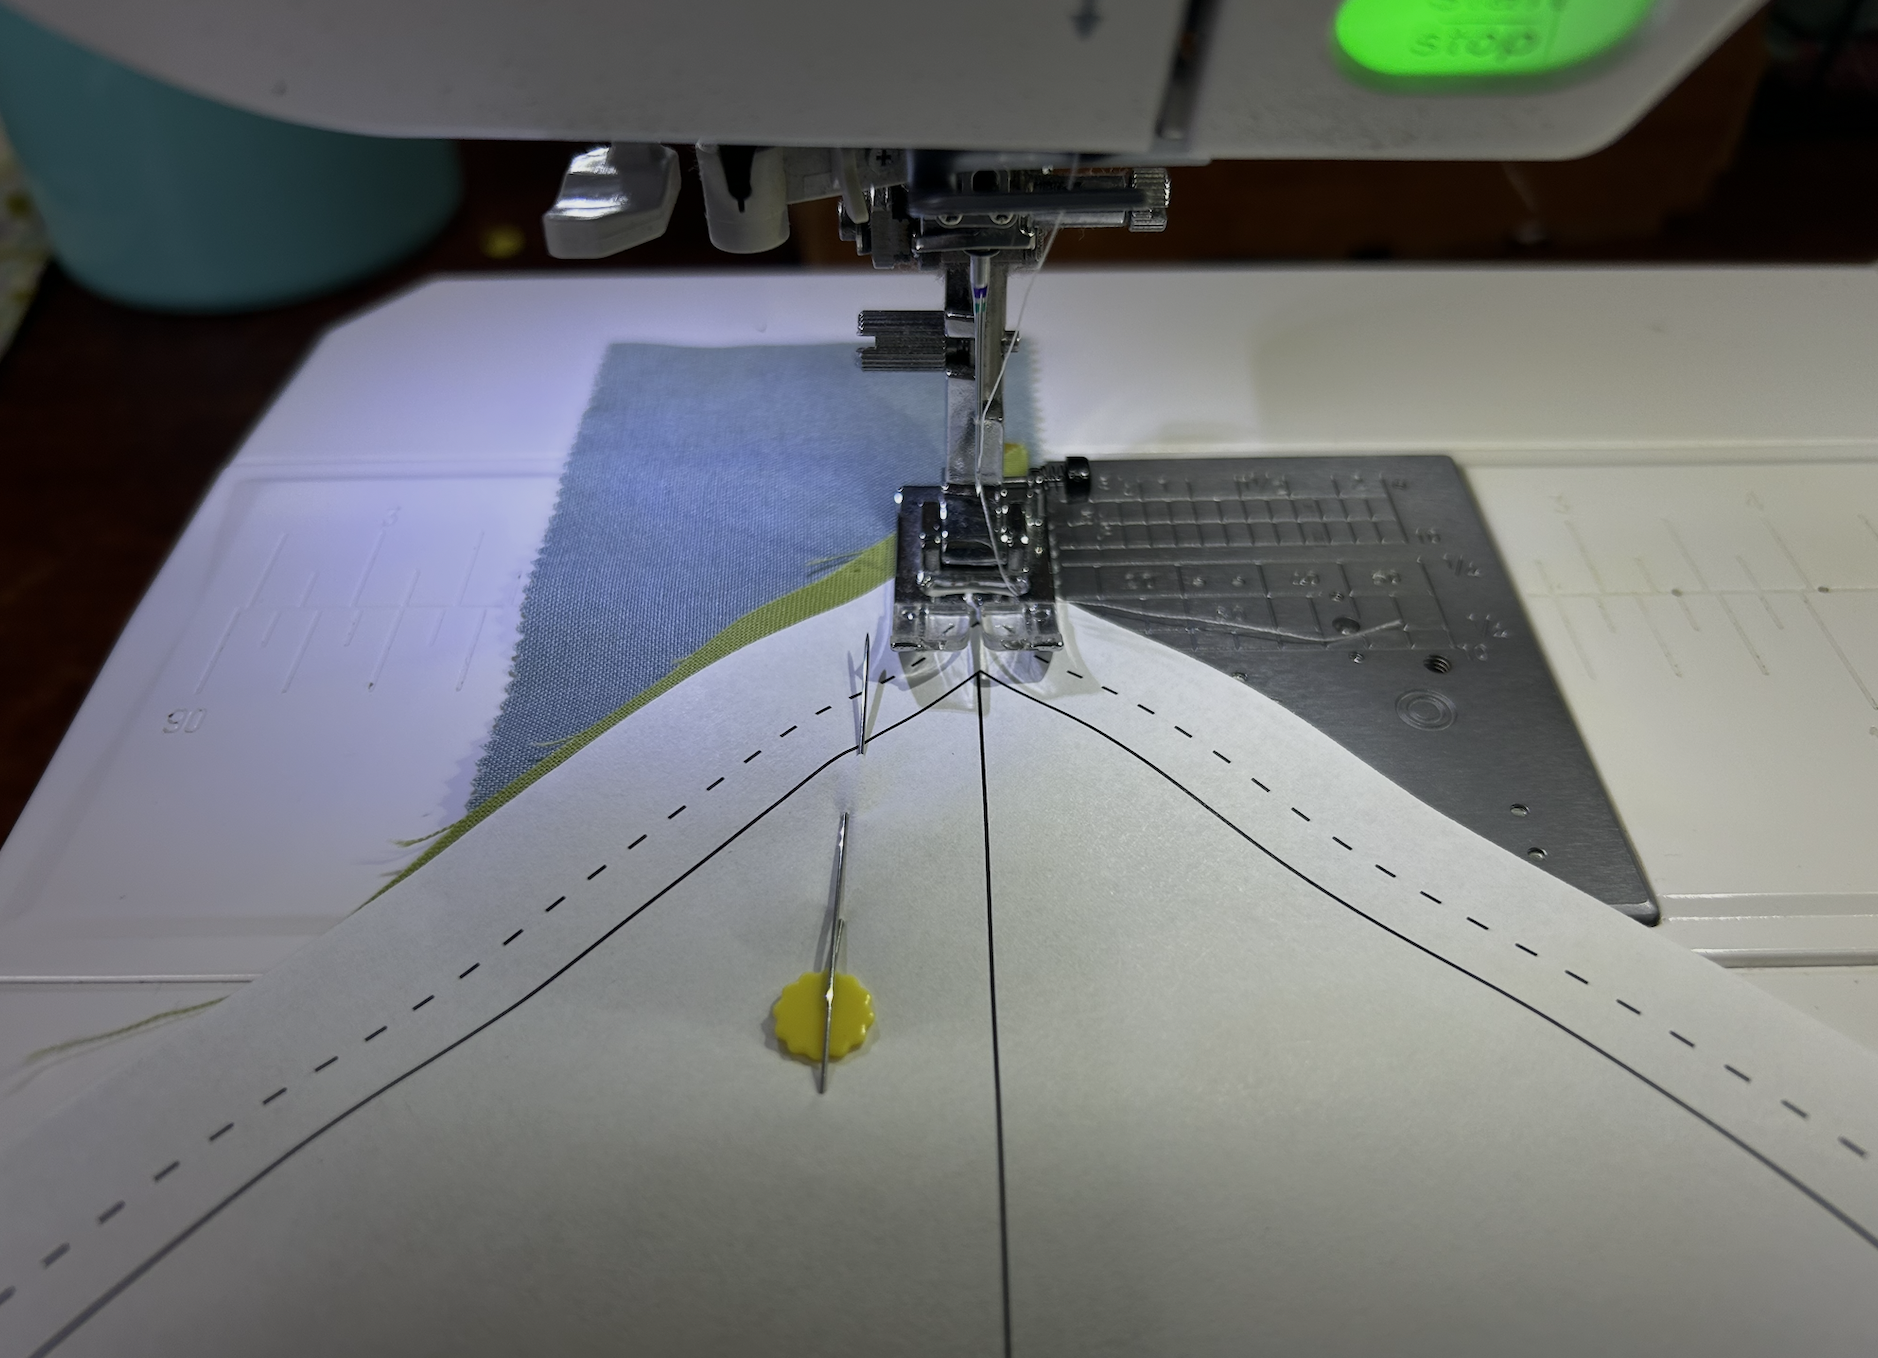
Decrease your sewing machine’s stitch length to 1.5. Turn the paper right side up and, starting outside the dotted line, sew along the diagonal line that divides the block.
Step 3: Press
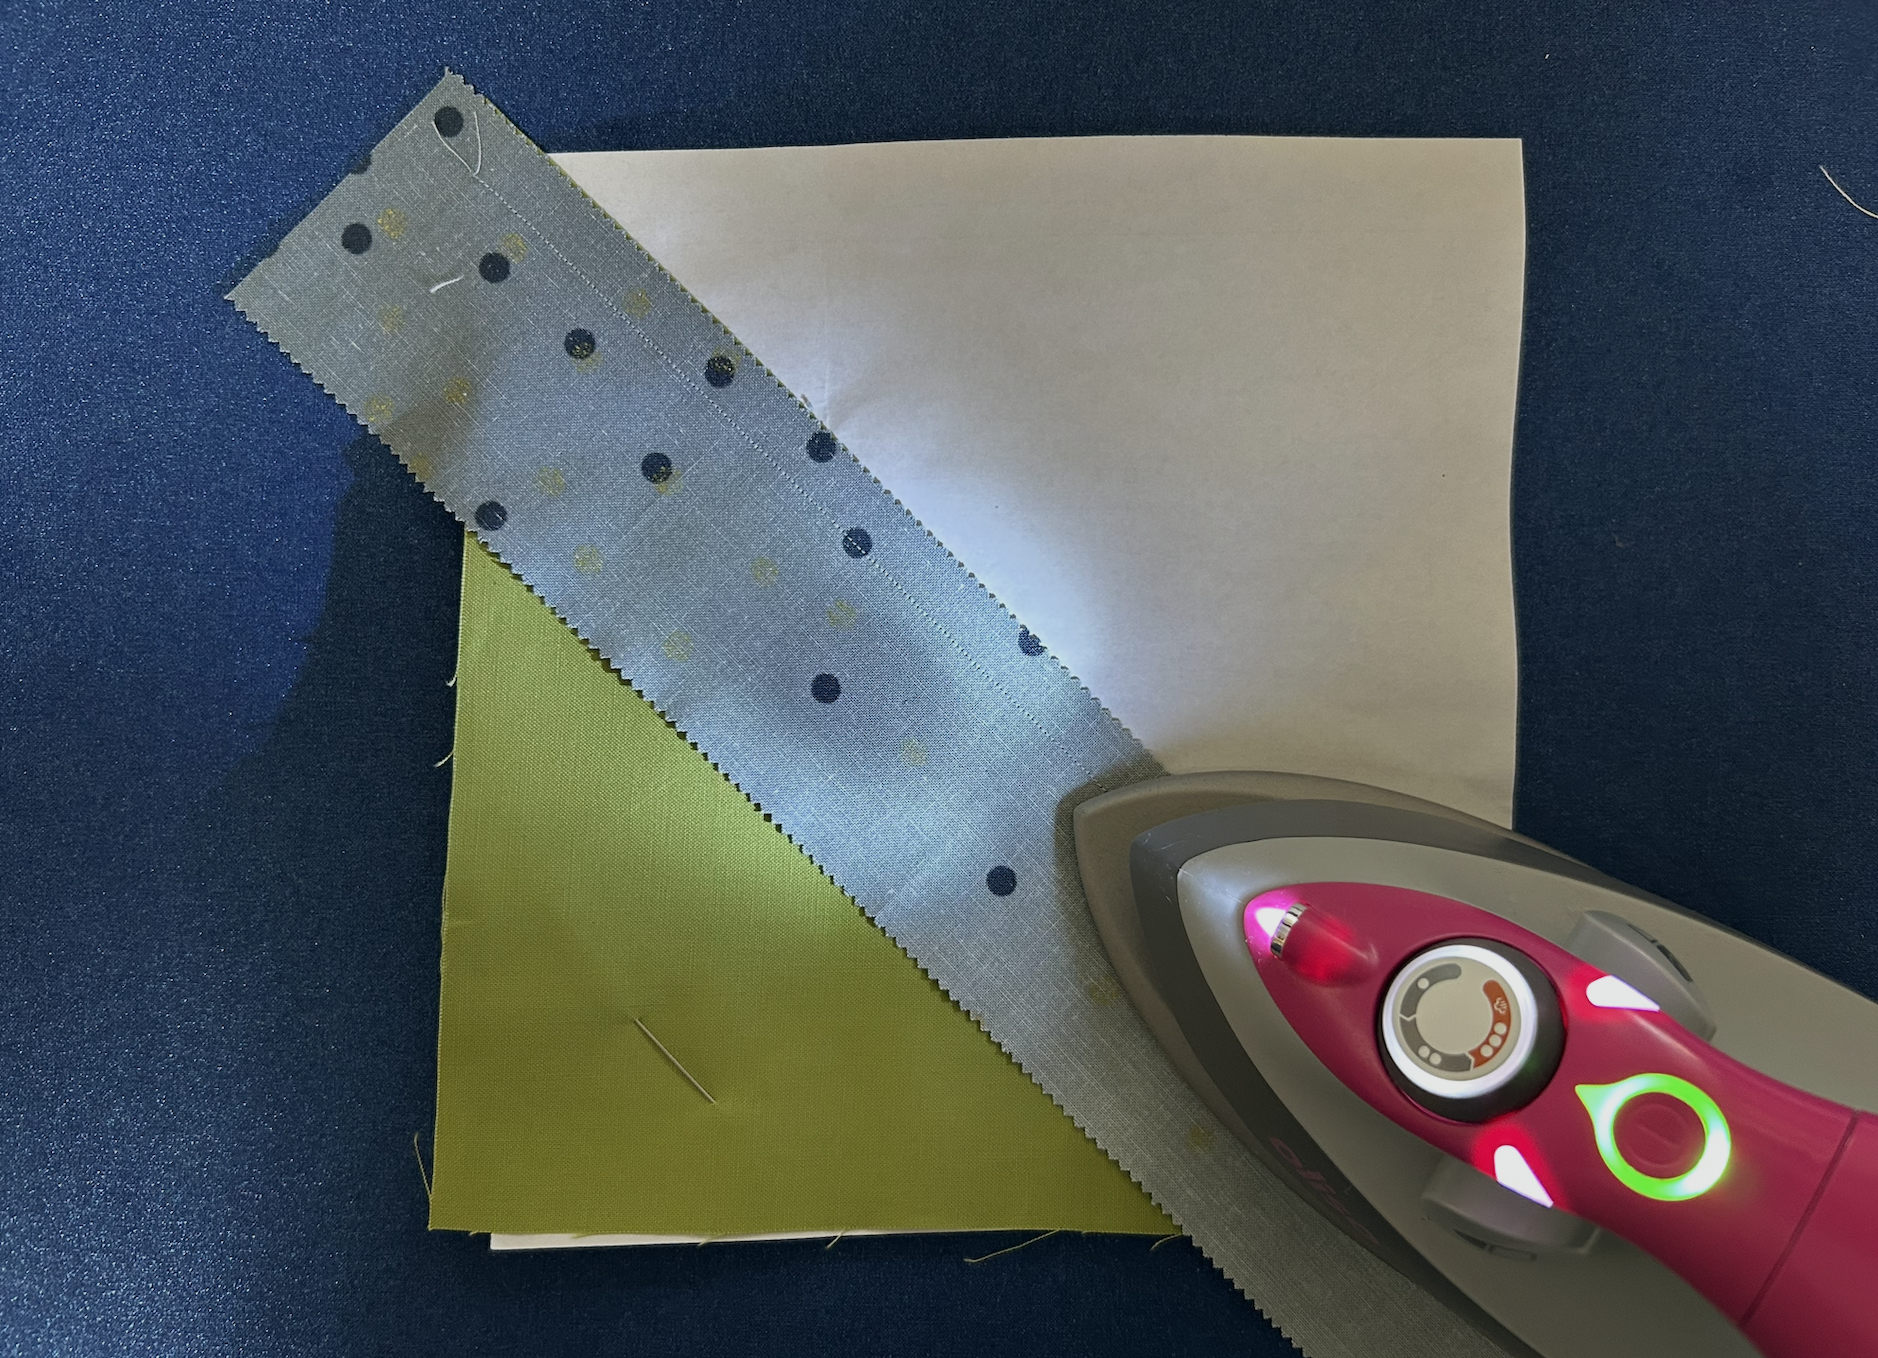
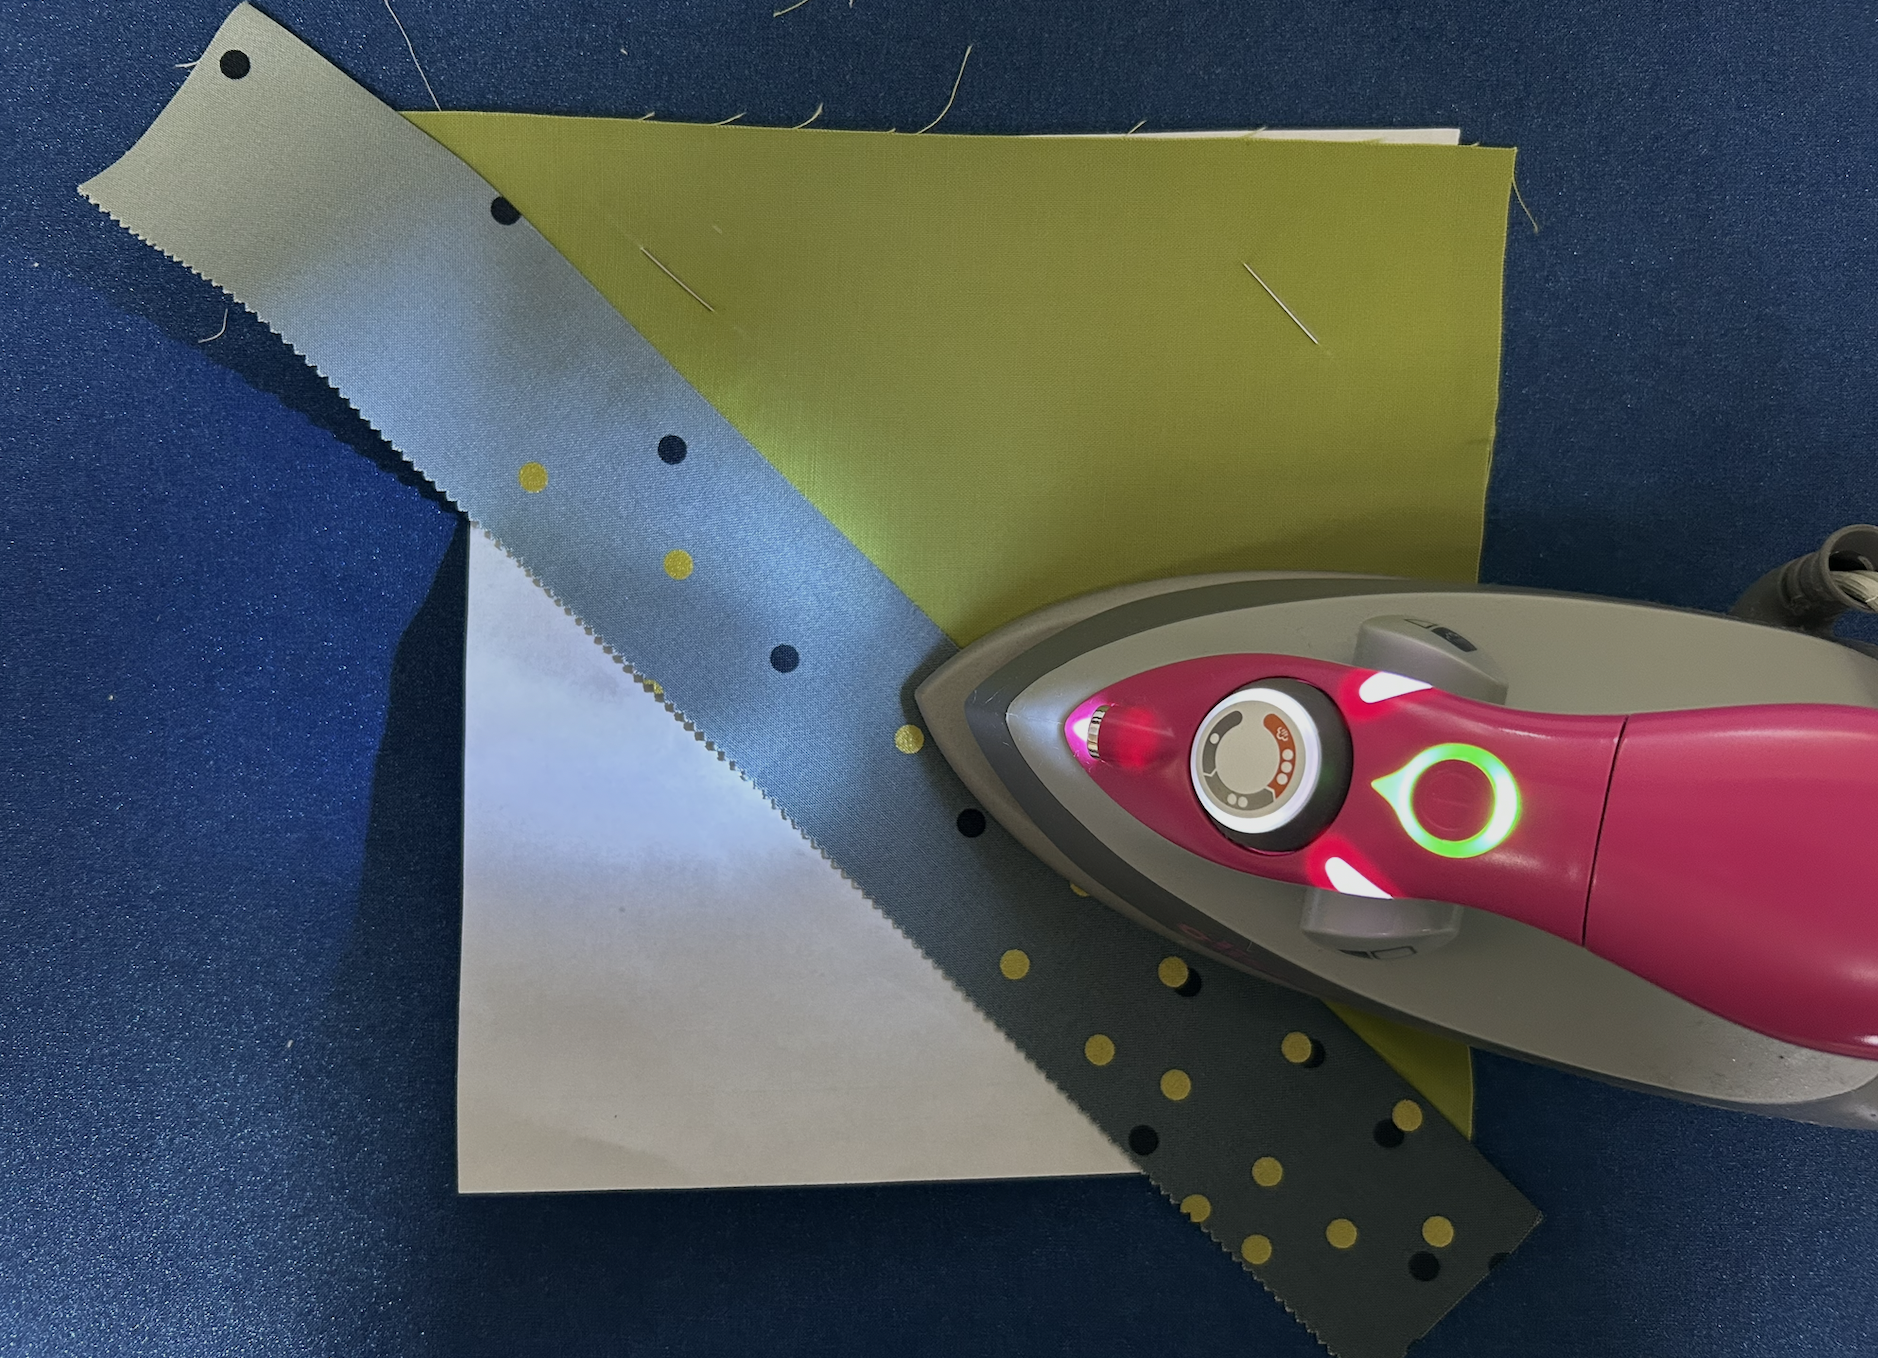
Set seam and press the strip away from the background triangle.
Step 4: Trim
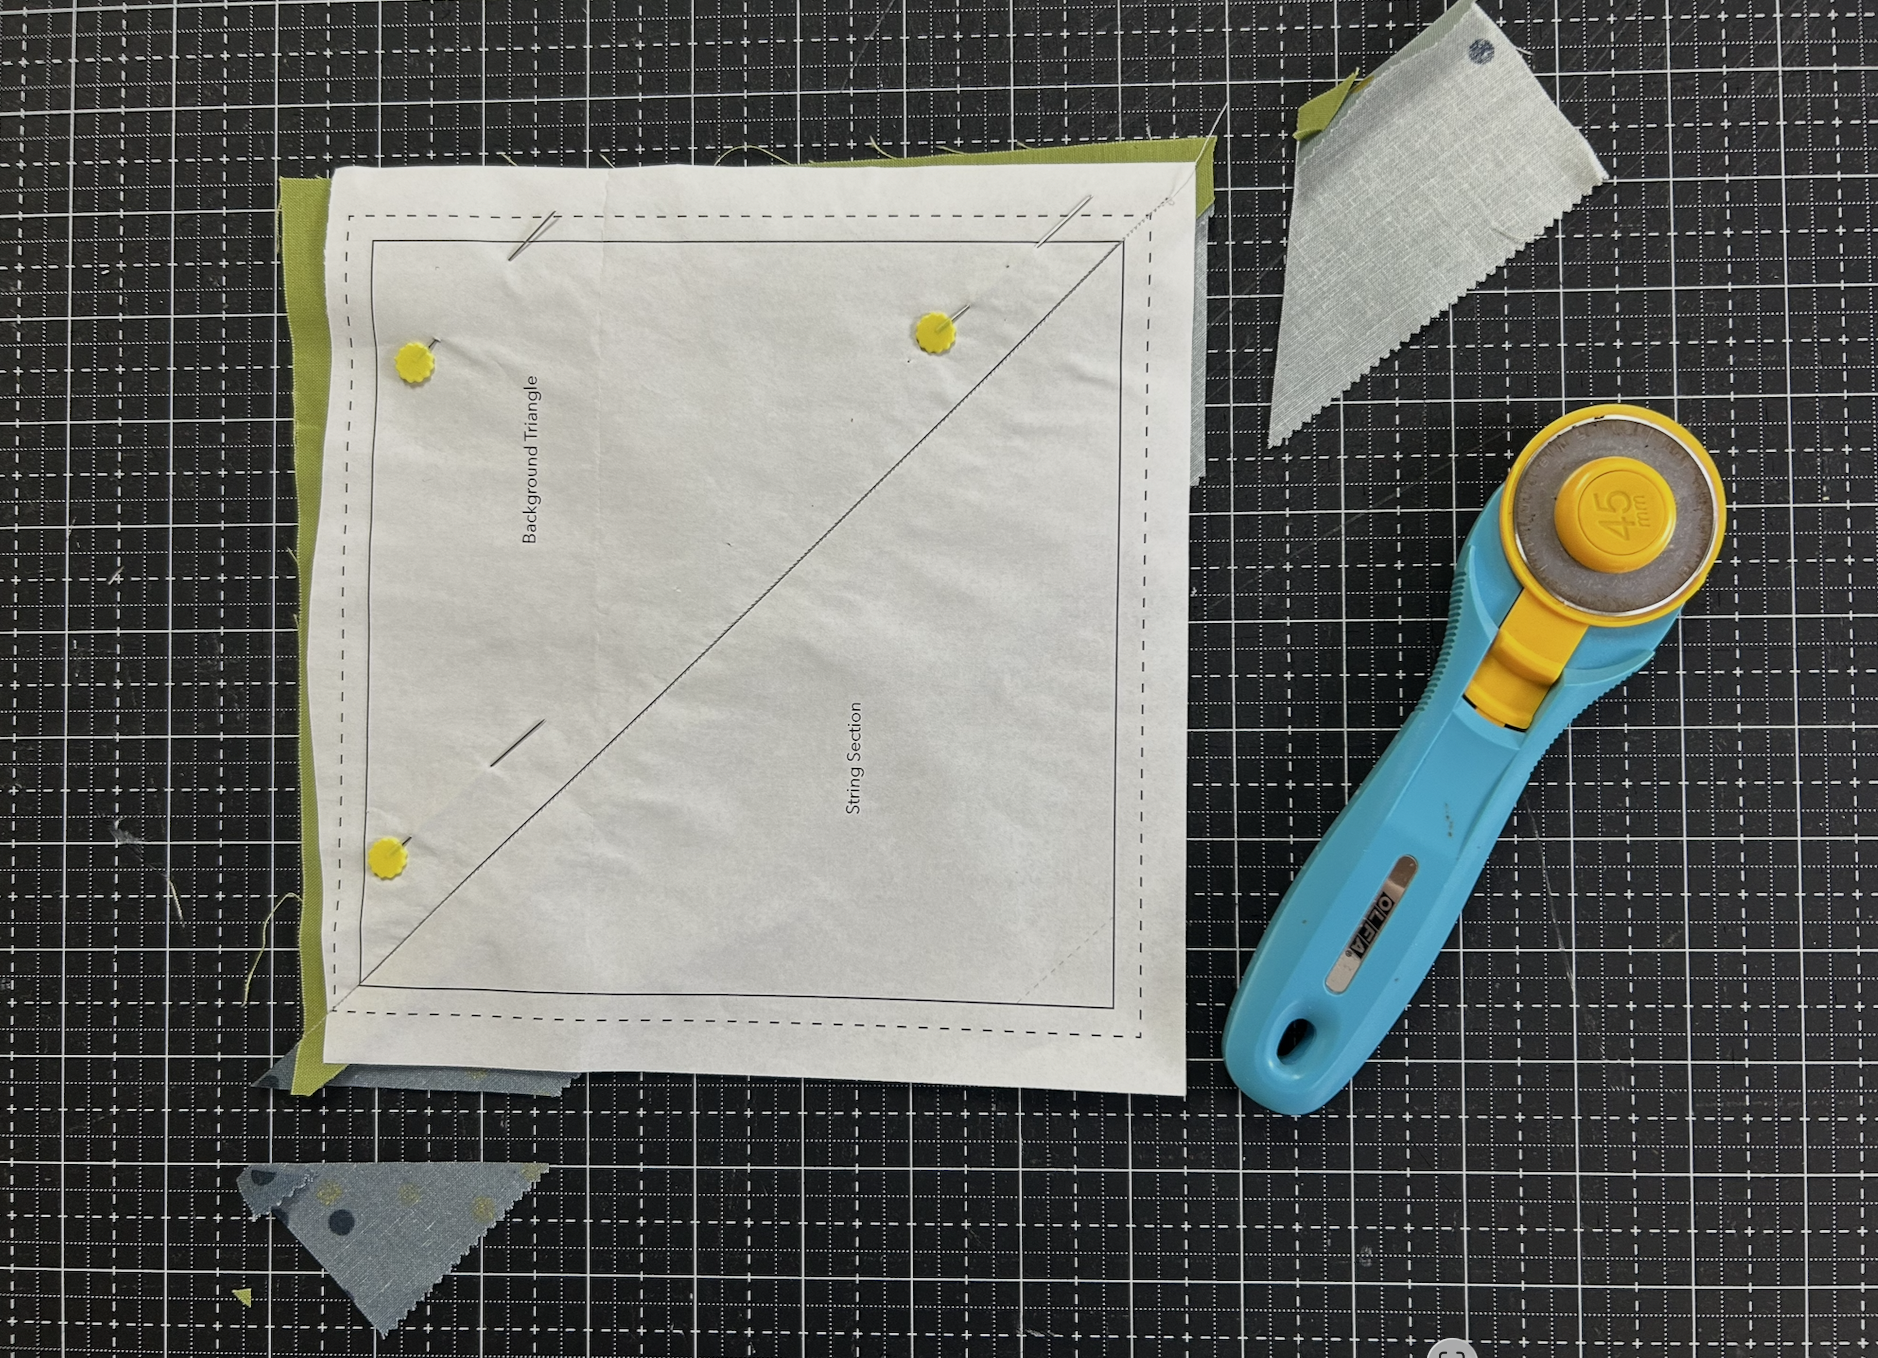
If desired, trim off fabric that extends past the paper.
The strings are fairly wide. You may keep them as is or trim so they are narrower or ‘wonky’.
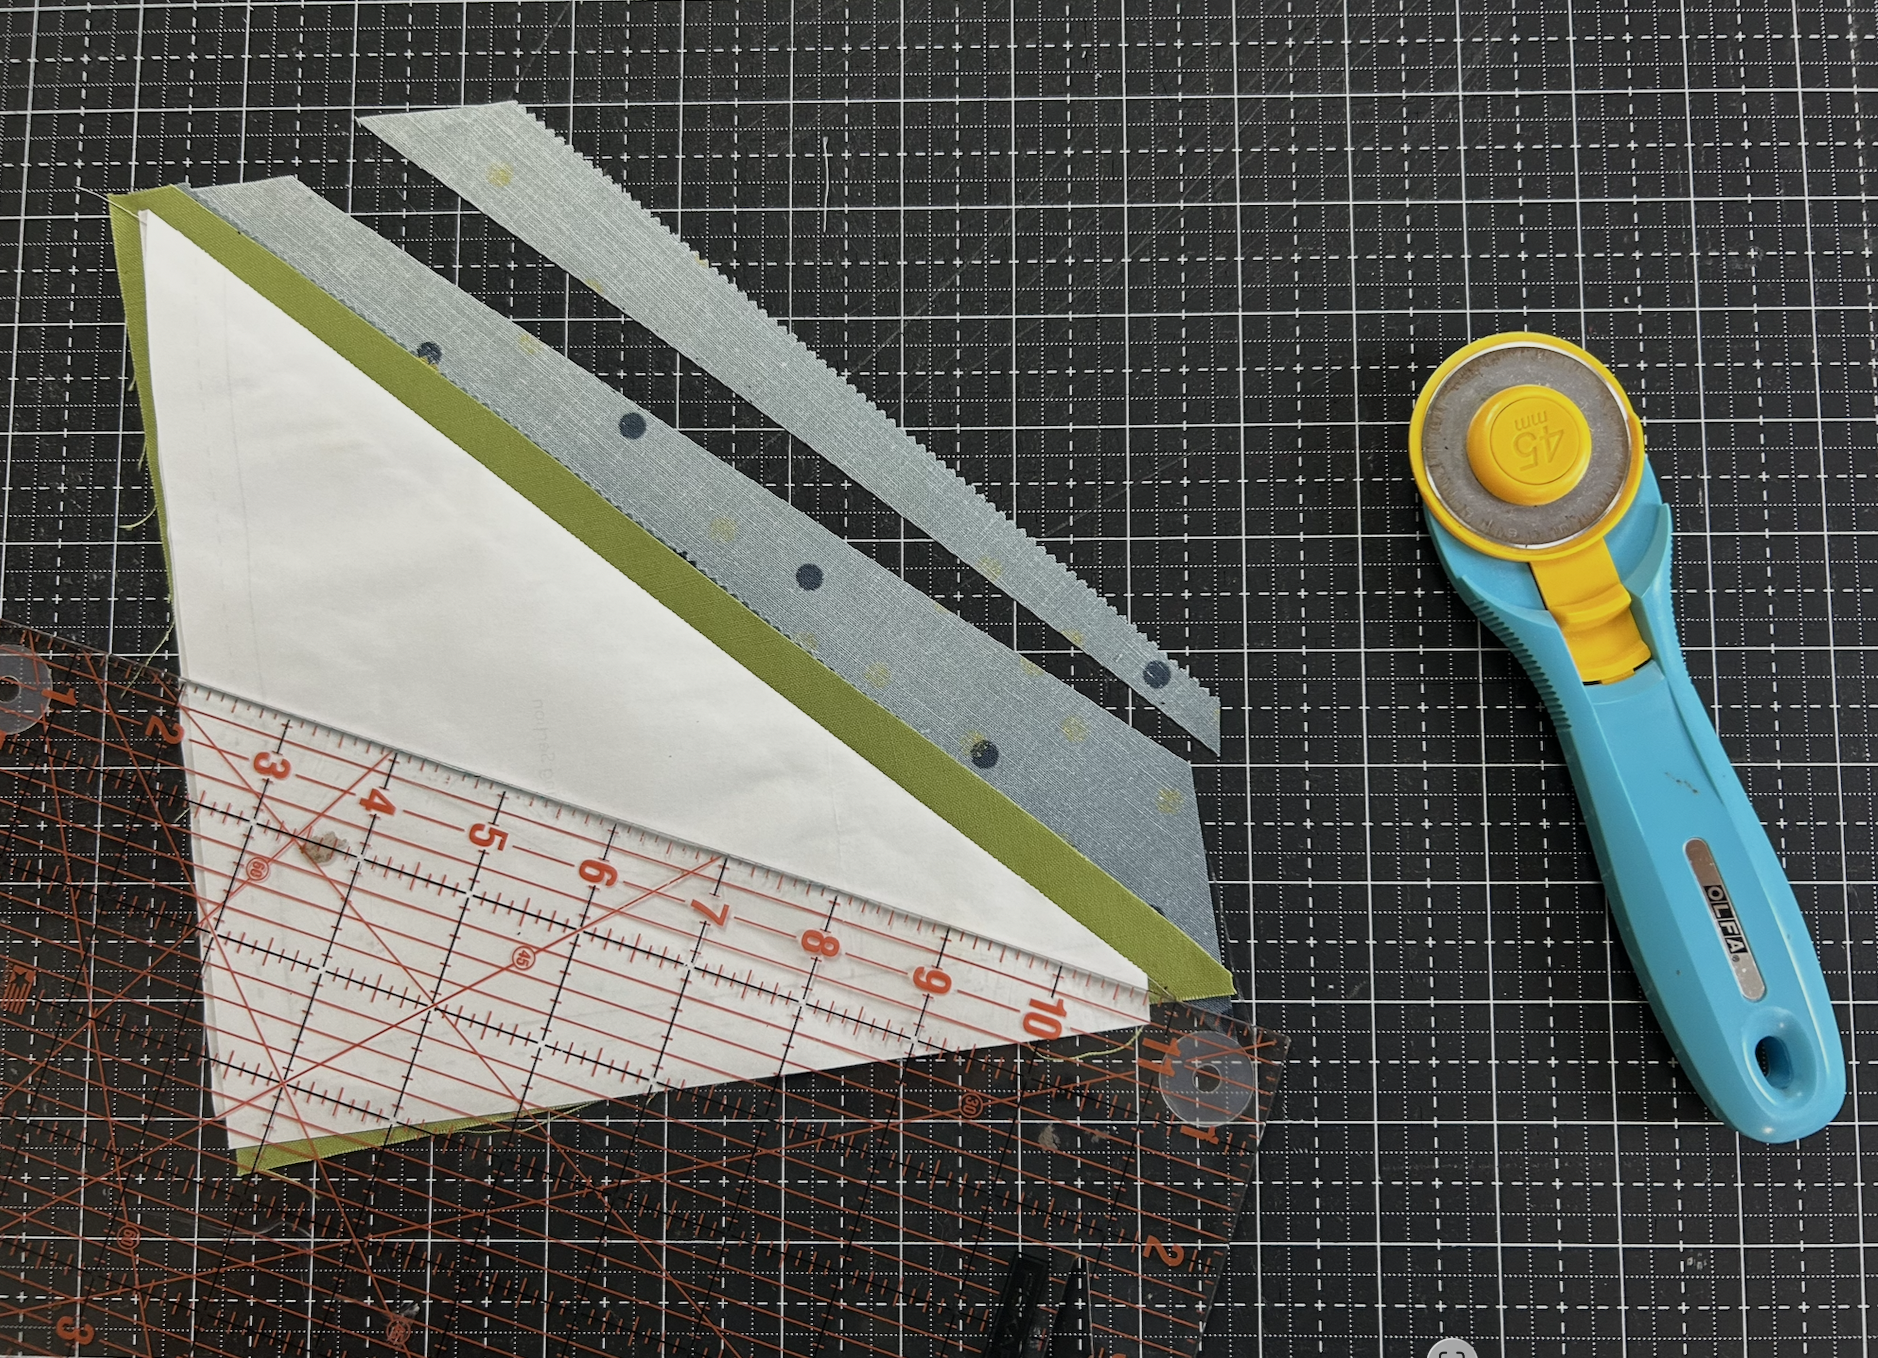
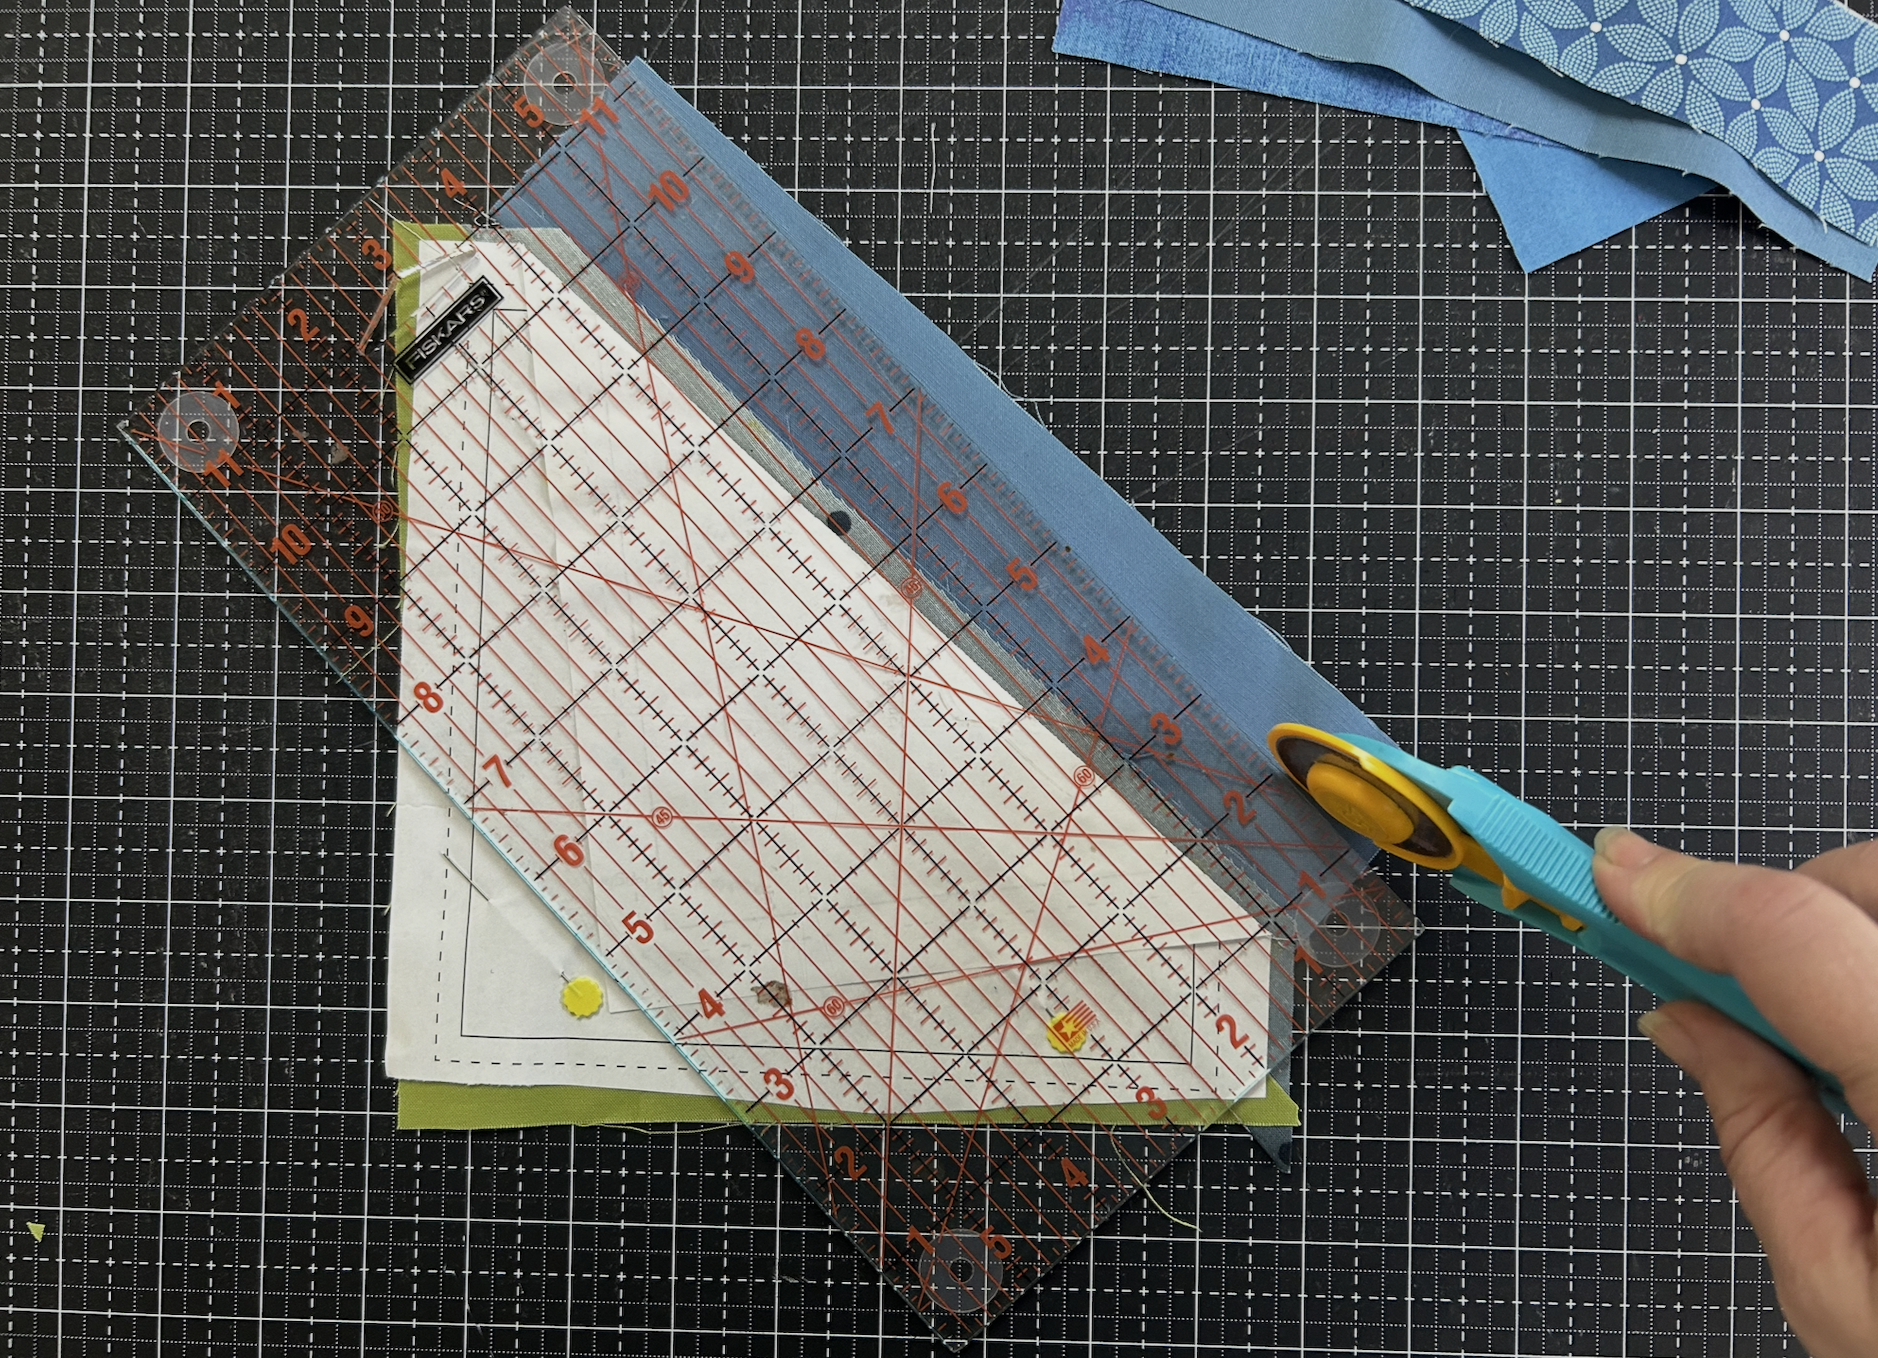
To trim the strings, fold back the paper along the stitched line. Using a ruler and rotary cutter, trim the exposed edge of the string. The trim may be straight or at an angle.
Do not trim off so much that you will run out of strings before the block is pieced.
Step 5: Add the second string
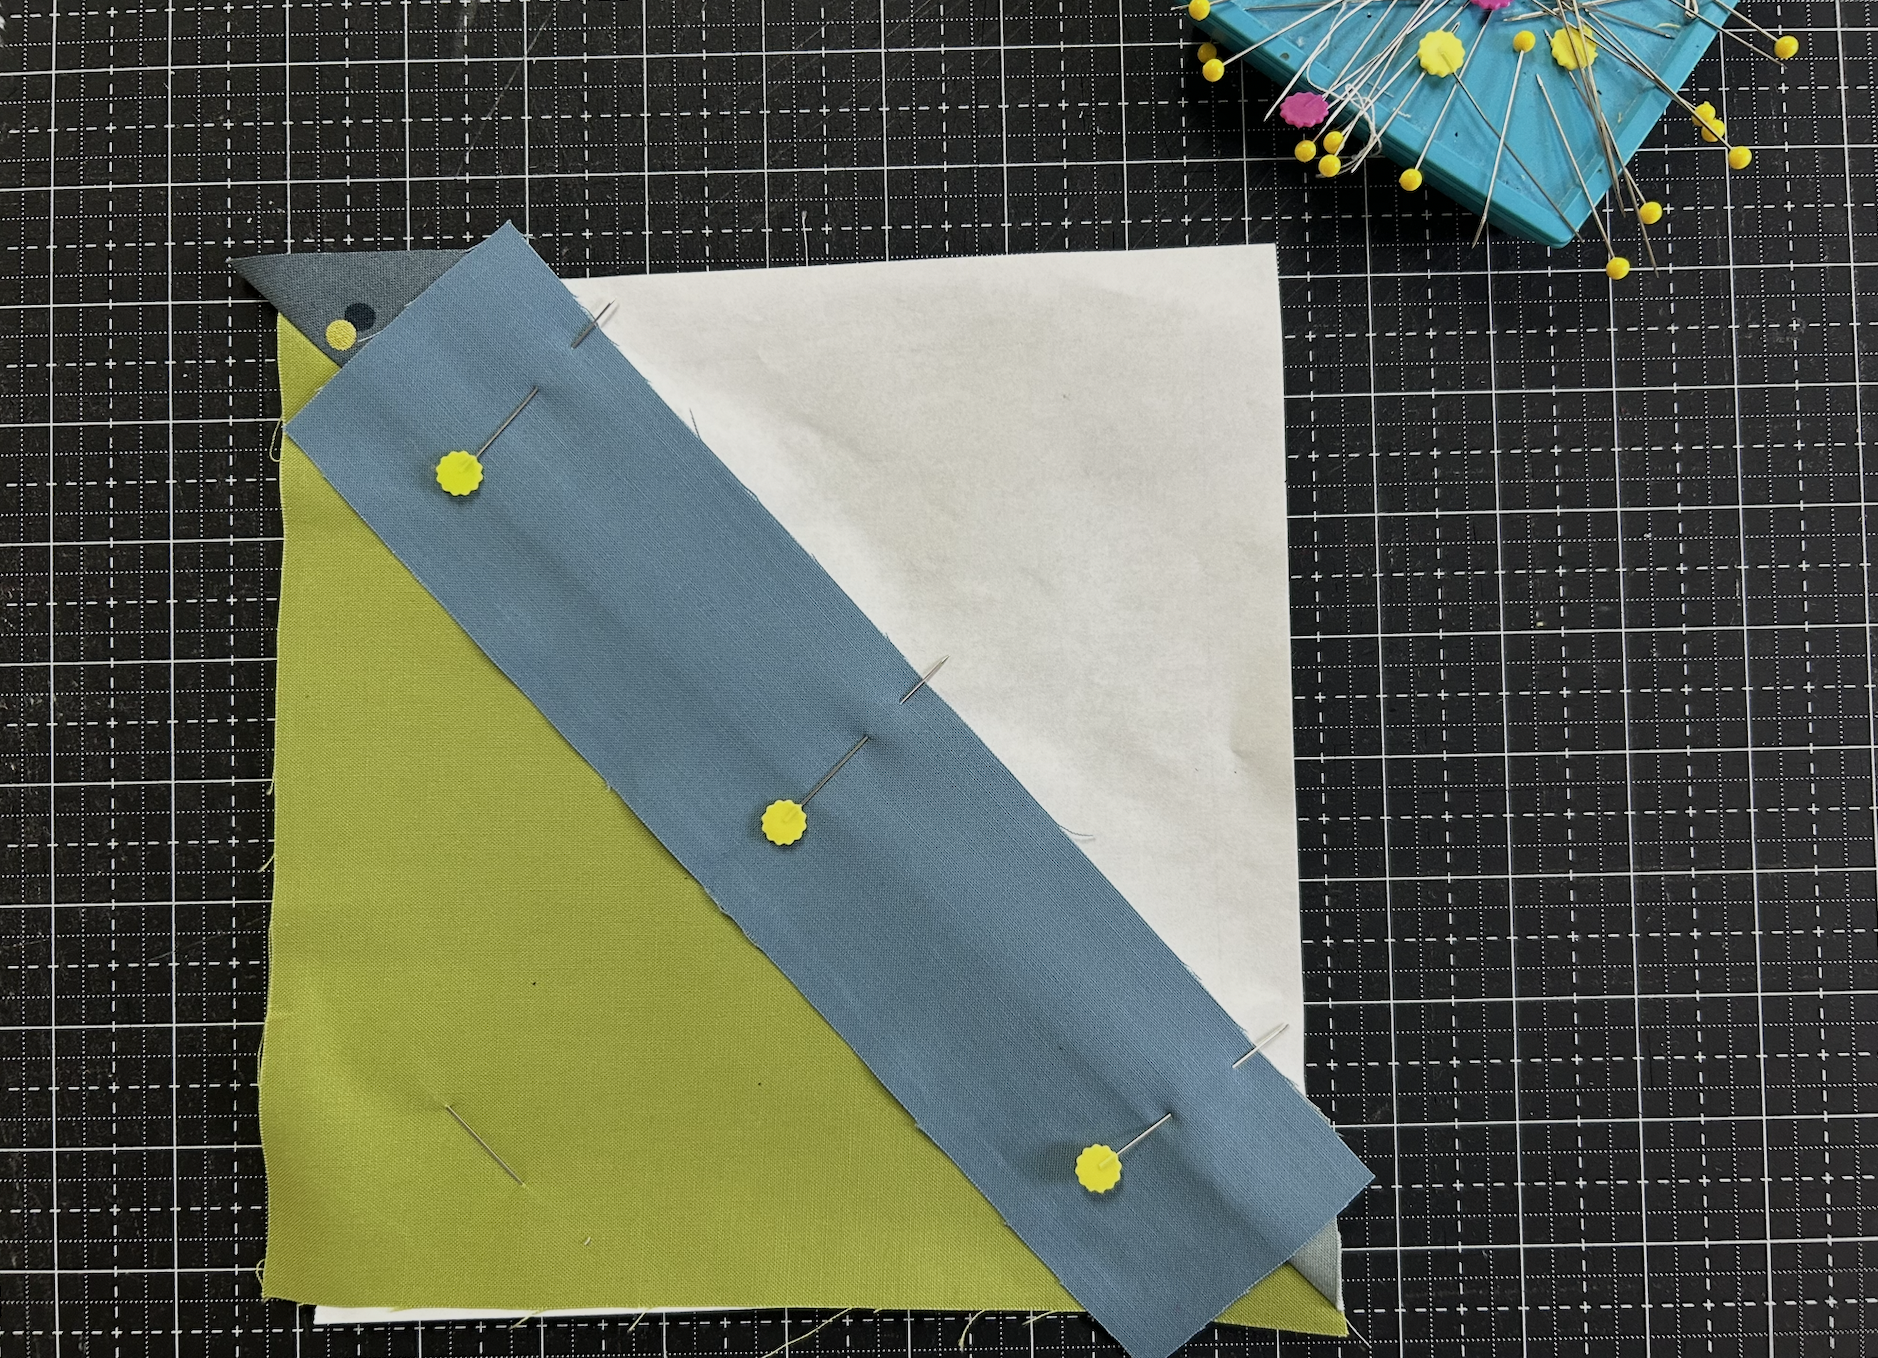
Place the second strip on top of the first, right sides together with the edges lined up. Pin well.
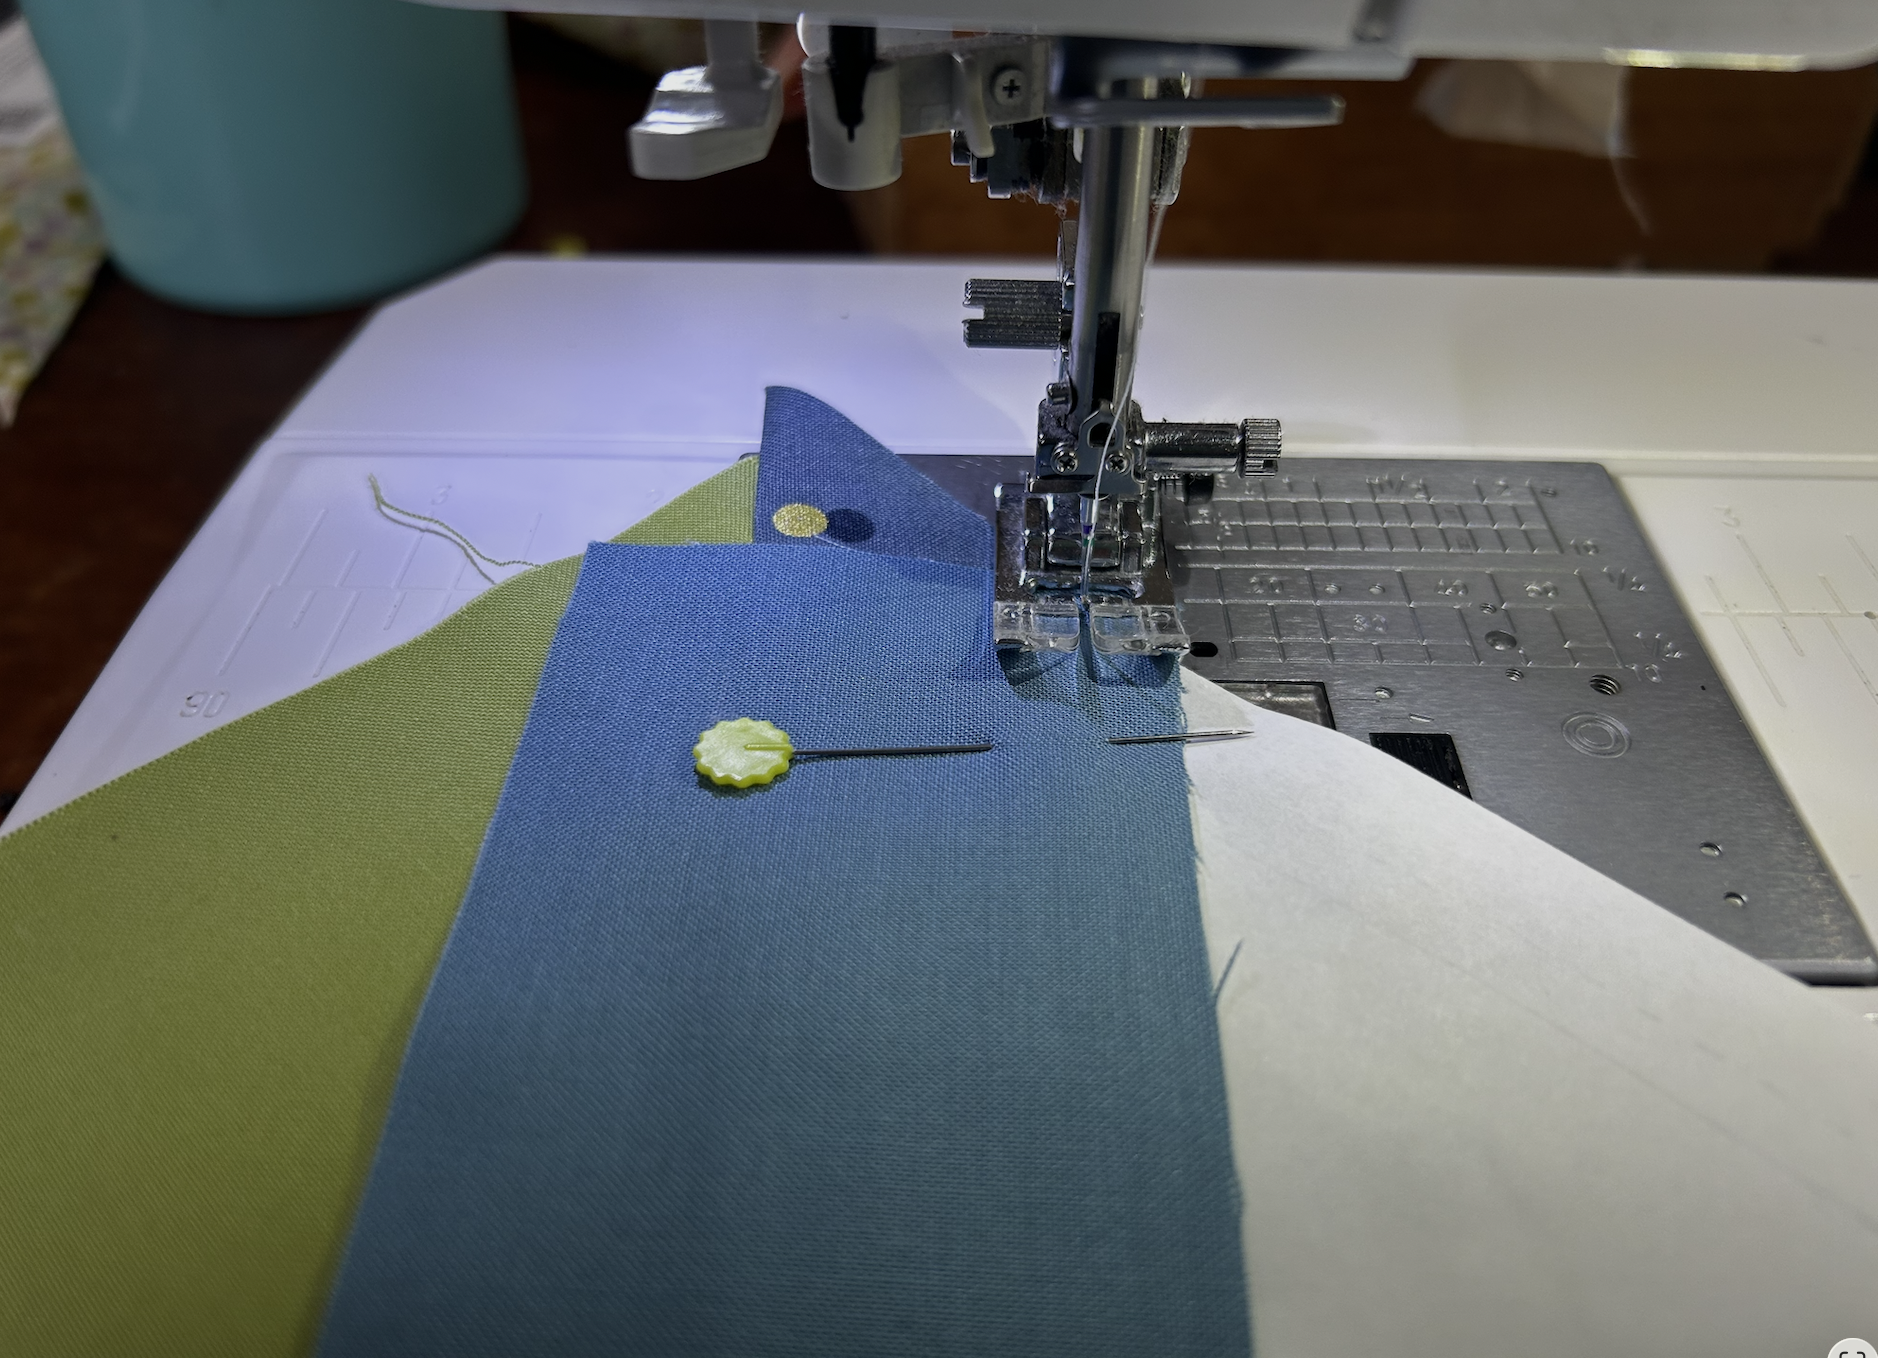
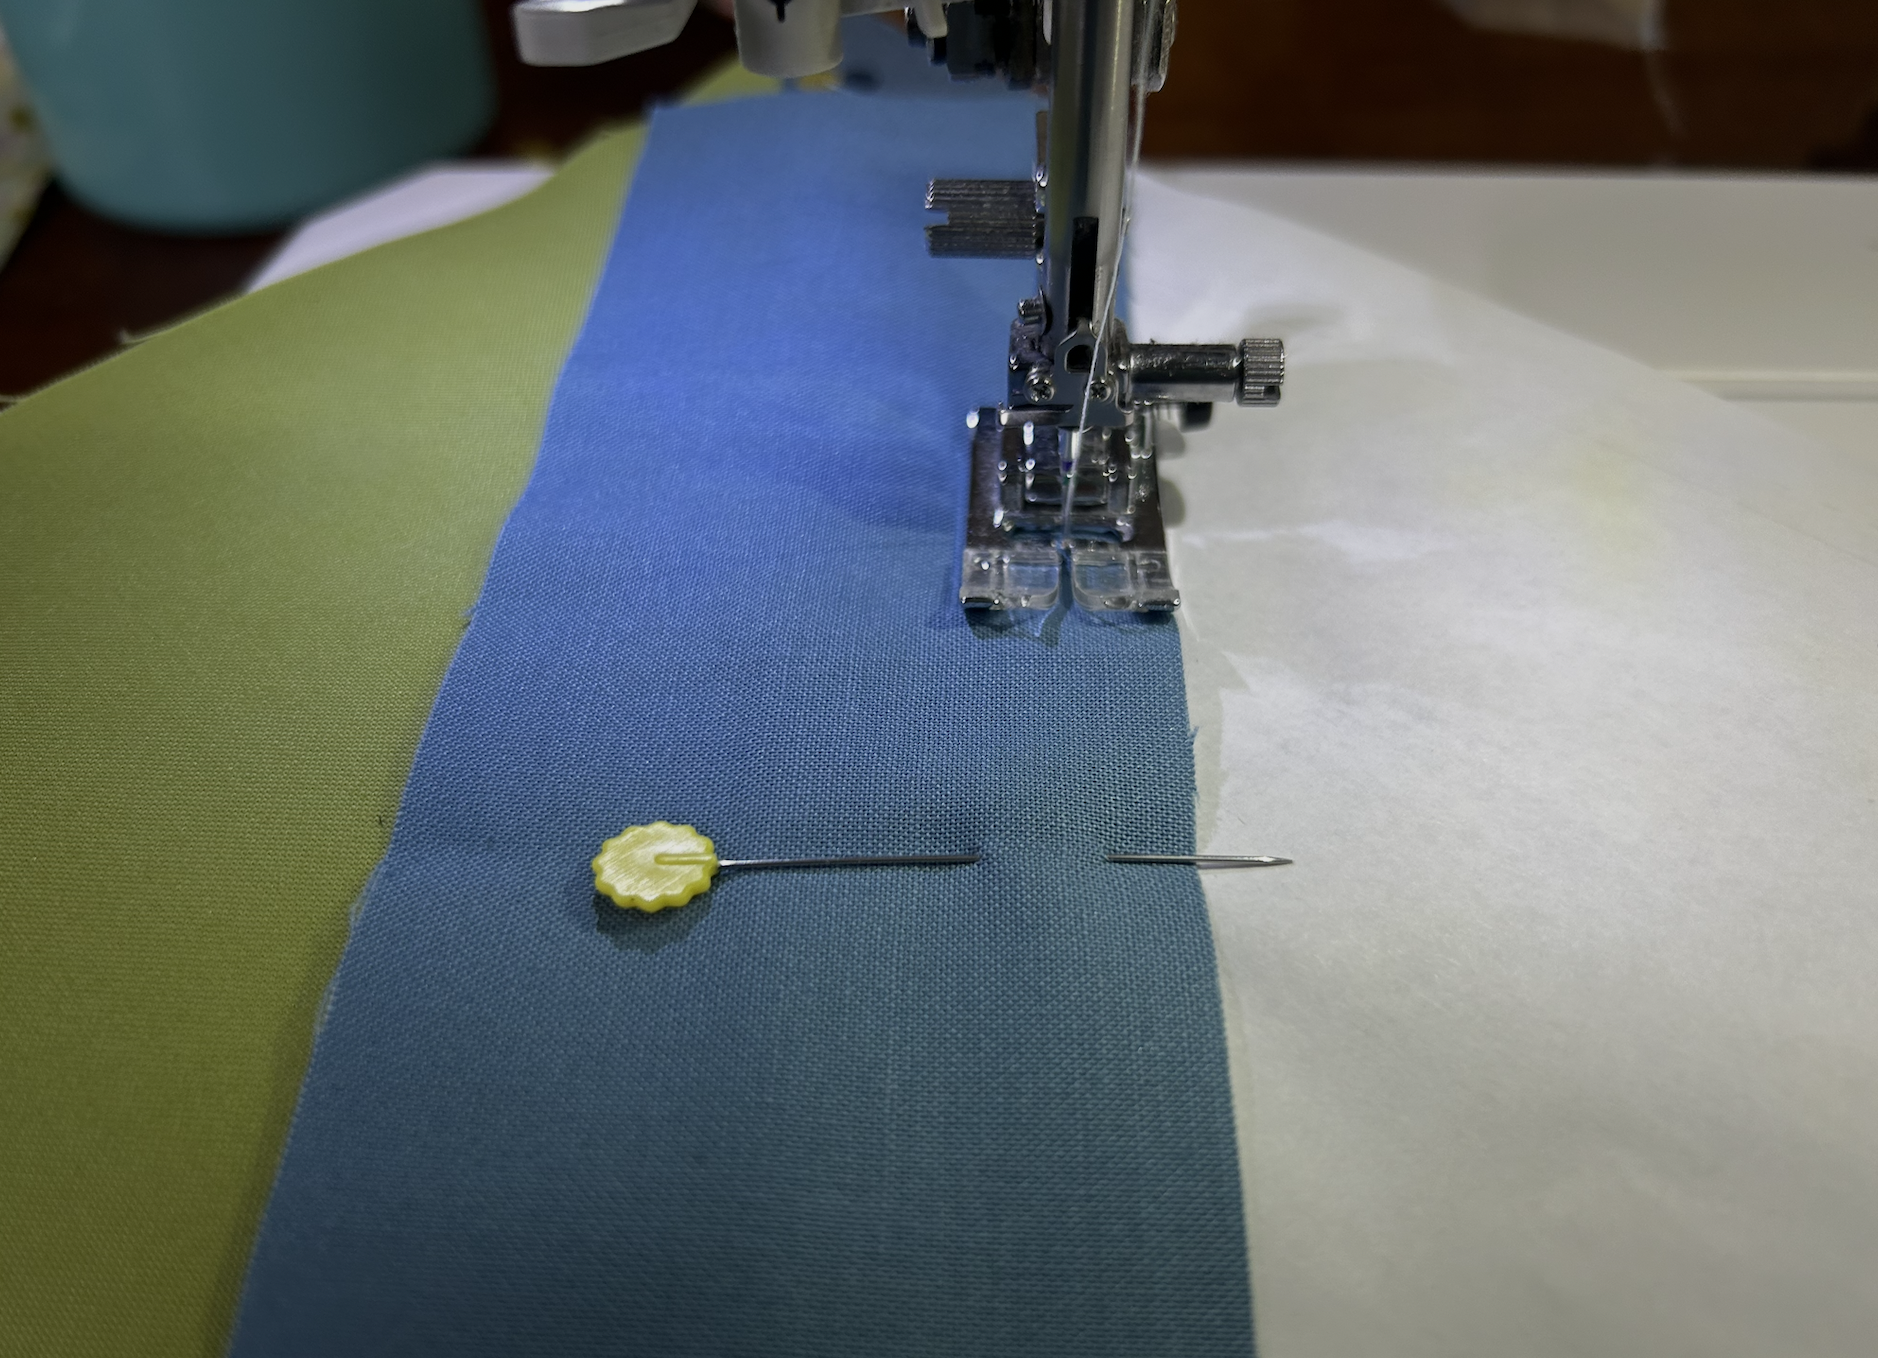
With the fabric side up, sew 1/4” away from the edge of the strip. Keep the stitch length at 1.5.
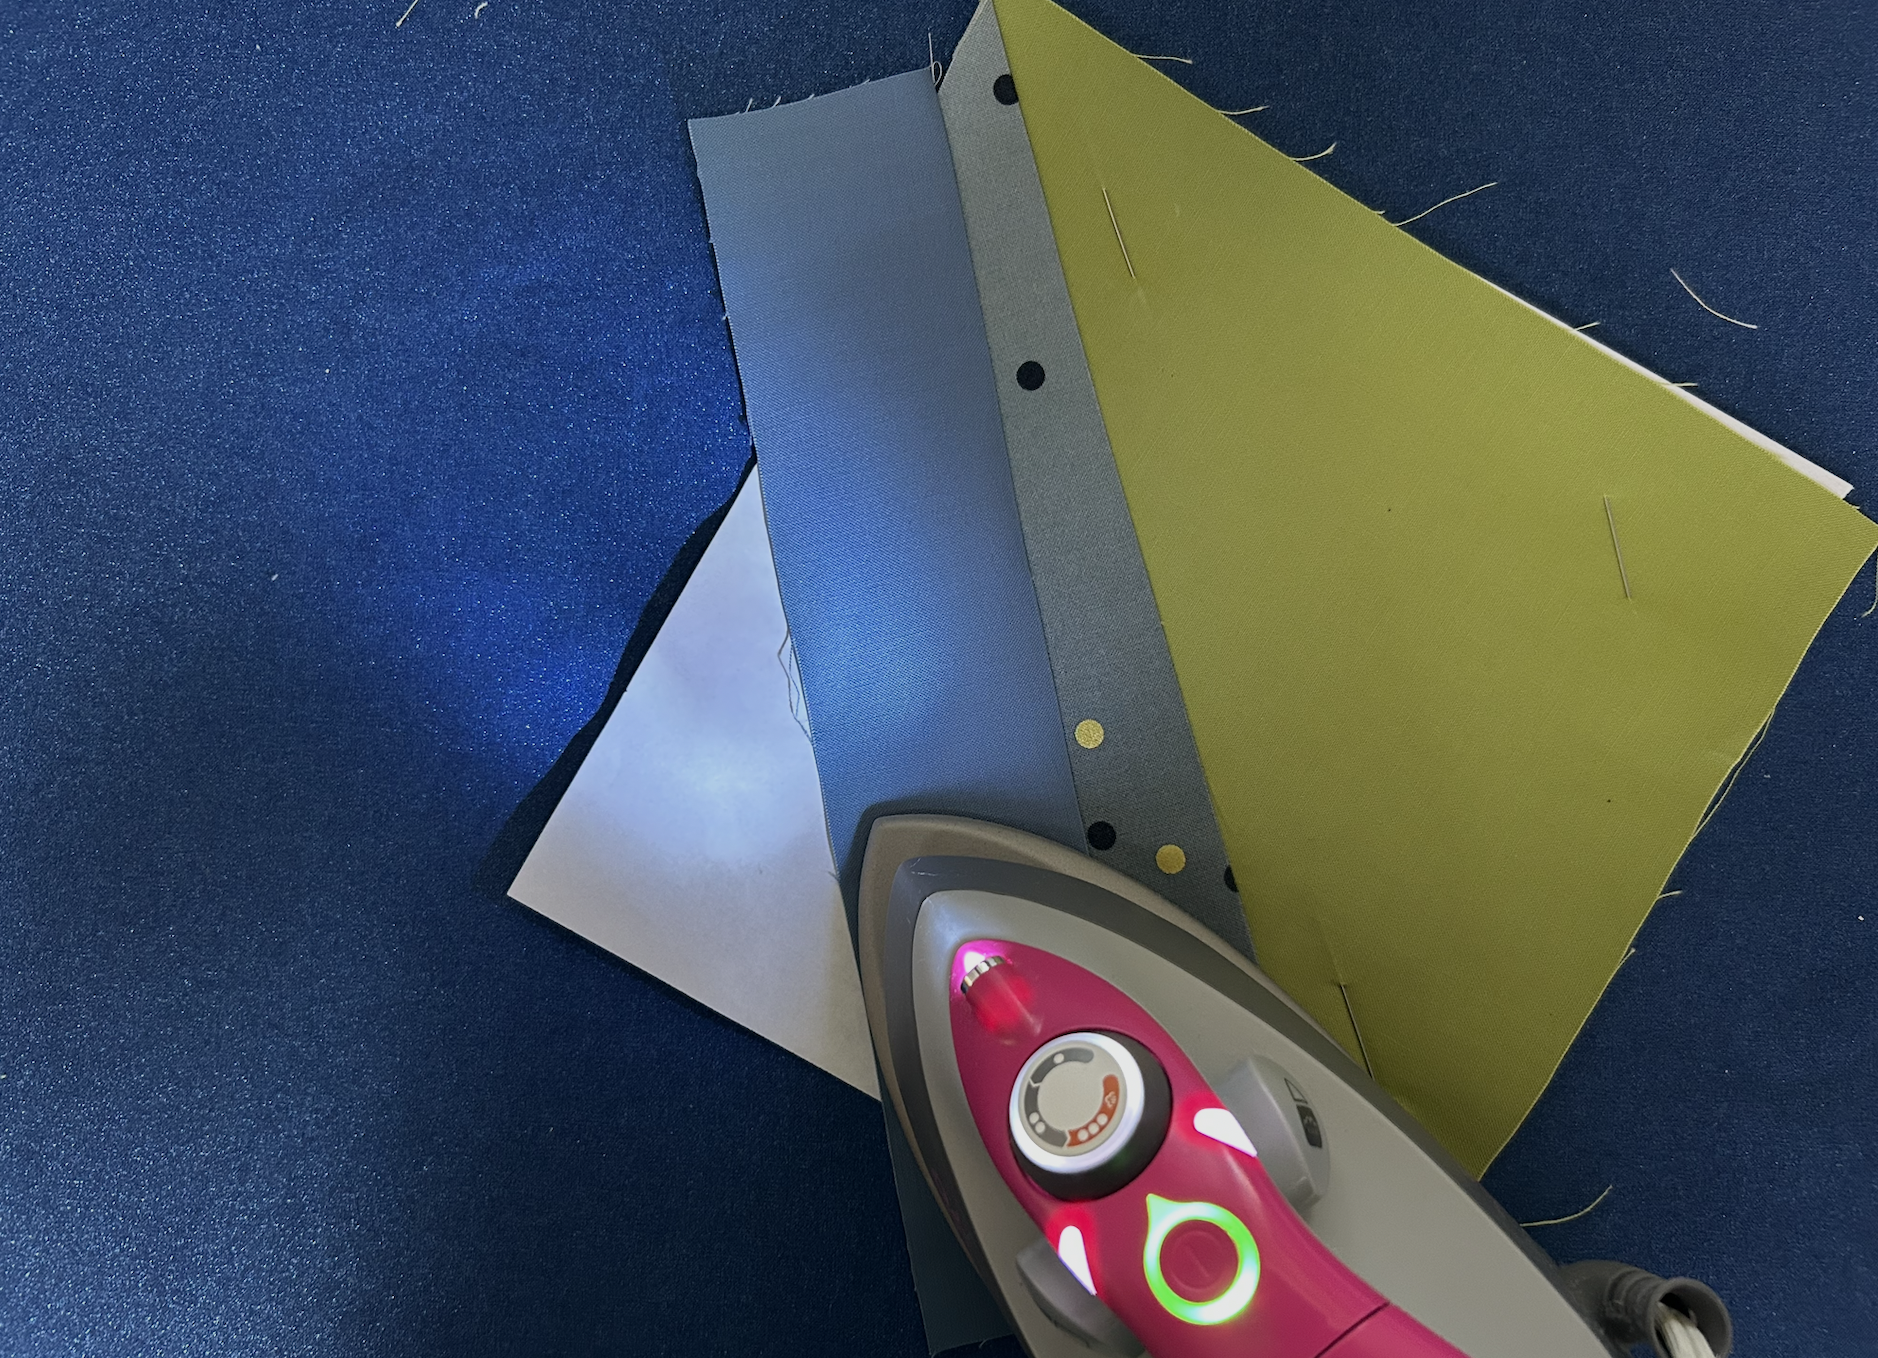
Step 6: Press
Set seam and press away from the large triangle.
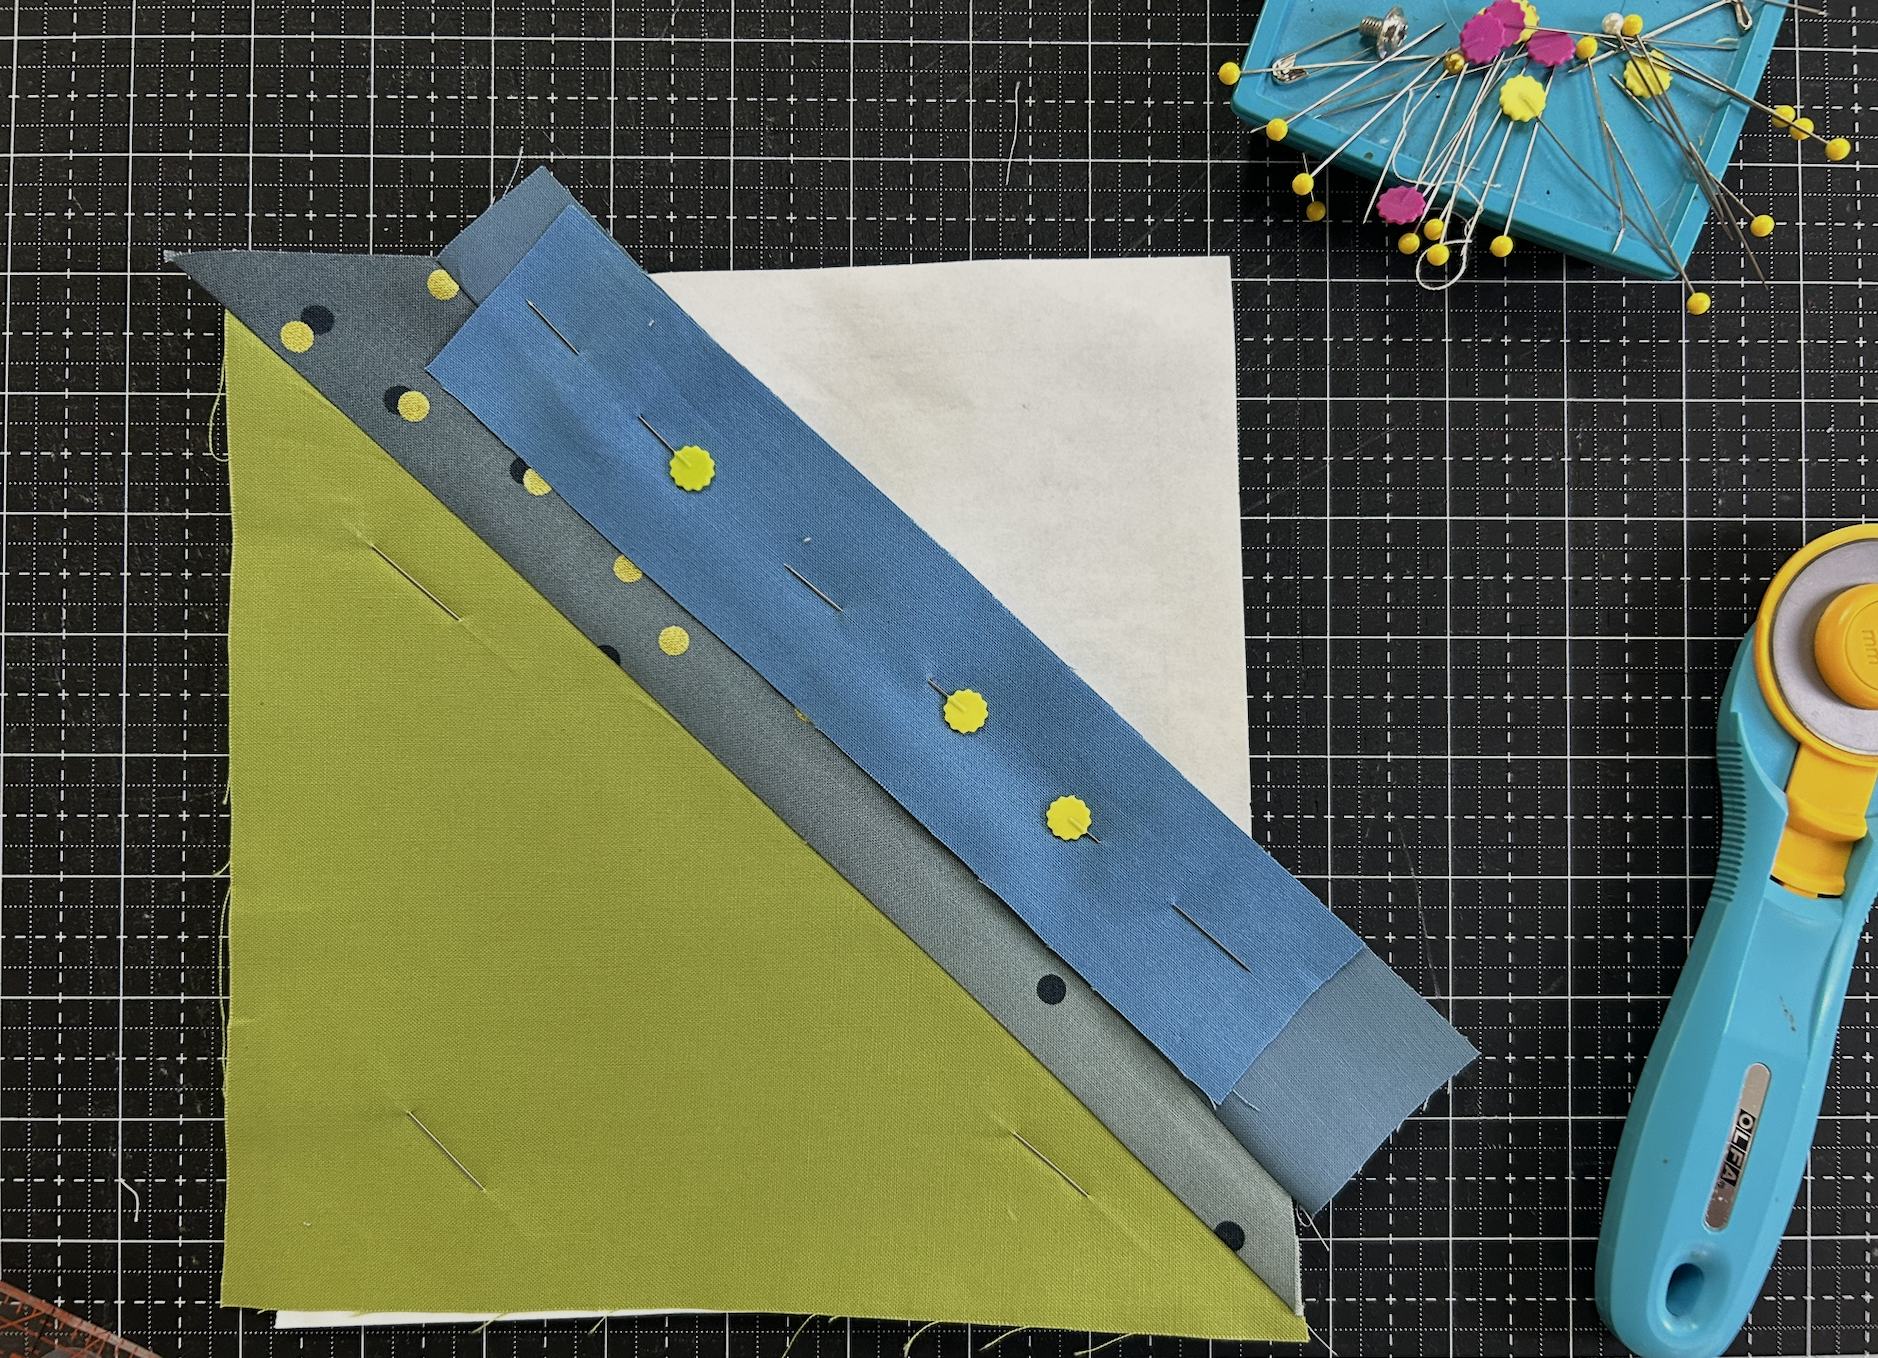
Step 7: Repeat
Then repeat the same steps until the entire paper foundation is covered with fabric.
Trim, if desired.
Pin on the next strip
Sew 1/4” away from the edge of the strip
Press
Repeat
REMEMBER: The fabric must cover the foundation completely and extend past the outer dotted lines.
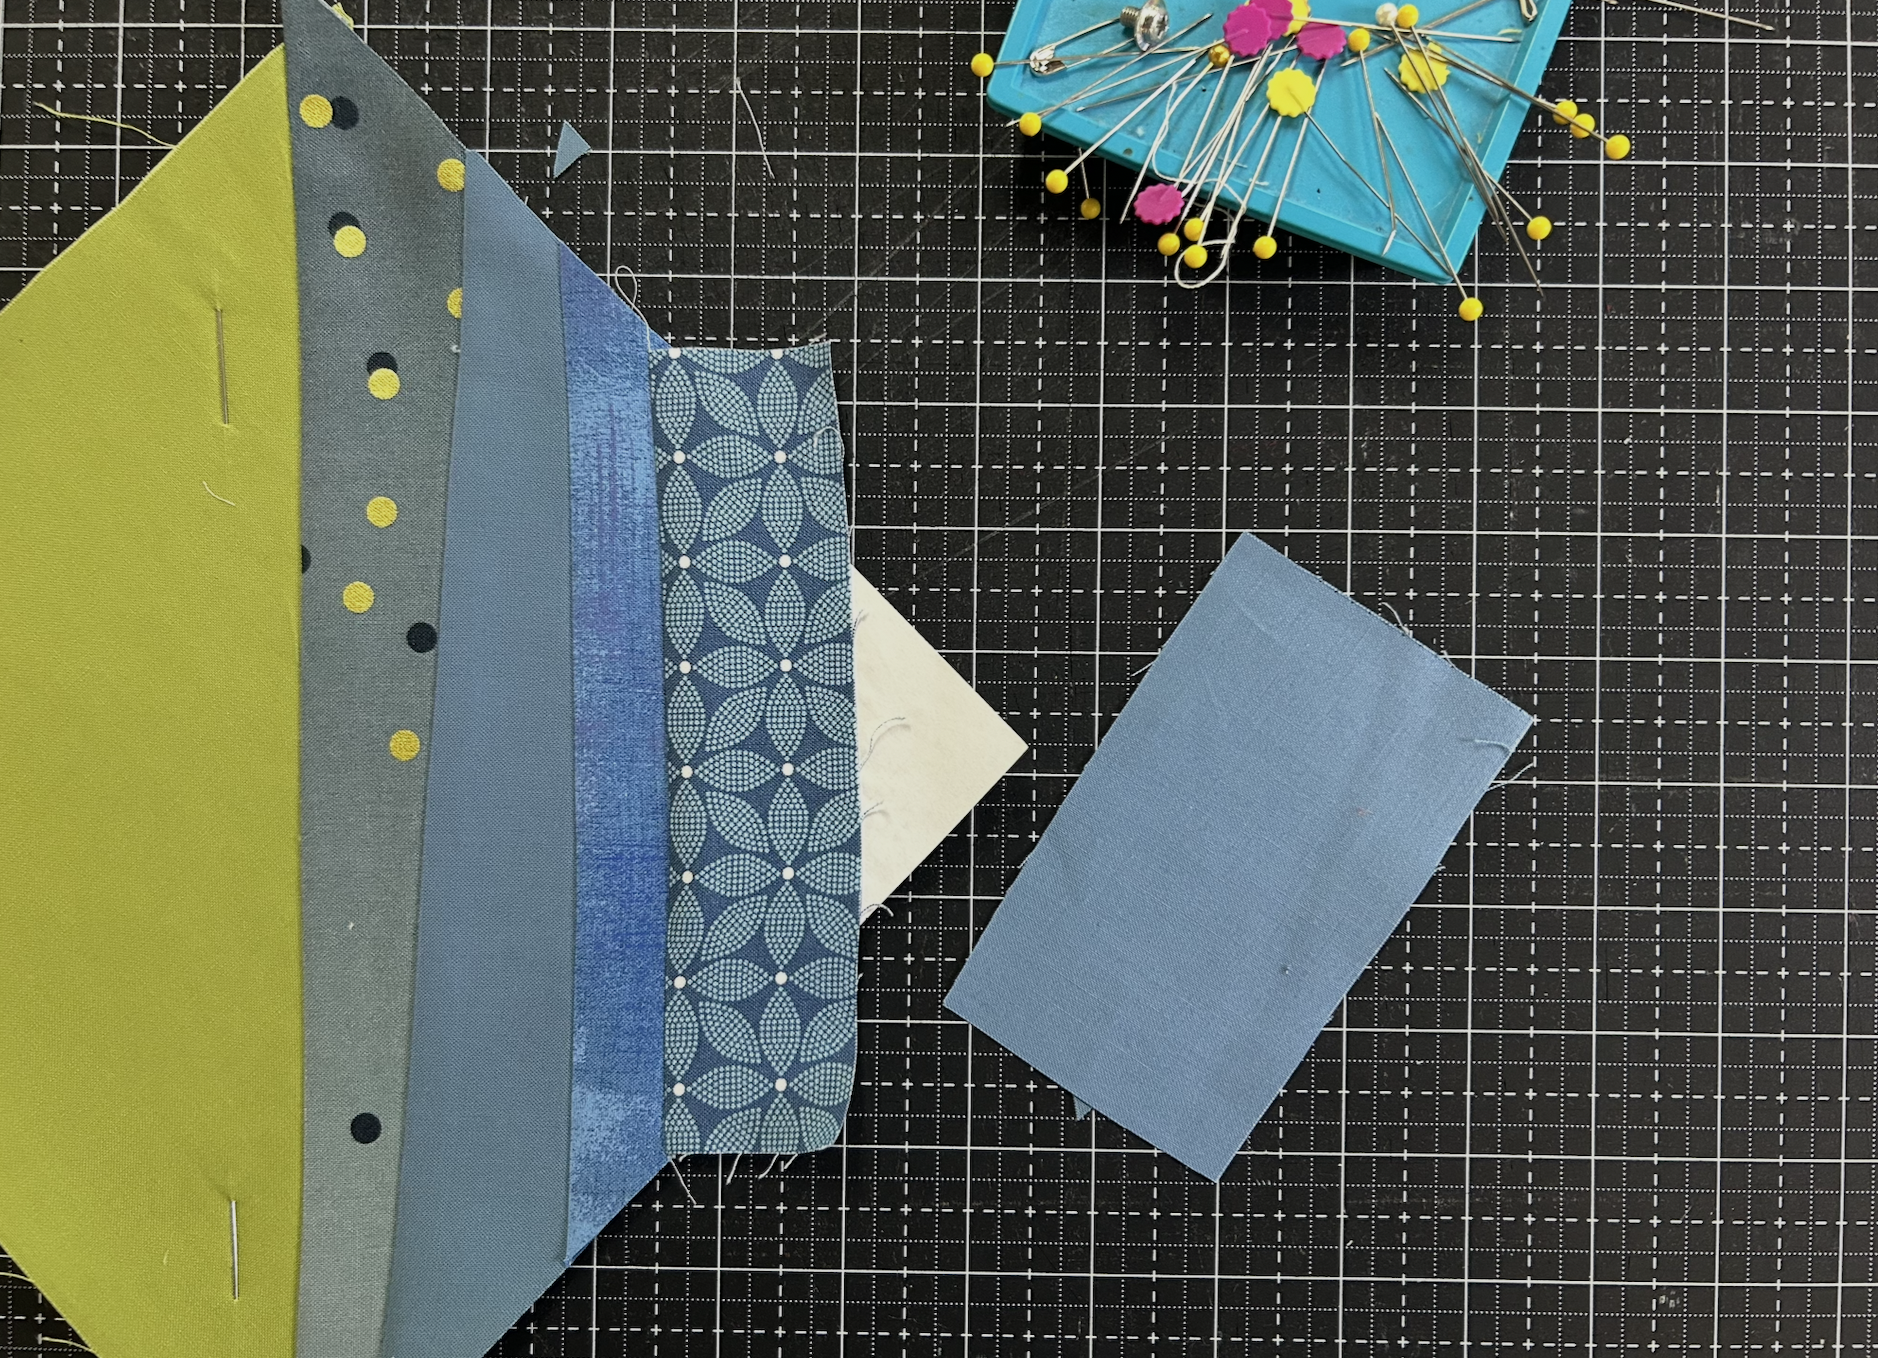
Step 8: Attach the corner Piece
One of the strings in your envelope is shorter and wider than the rest. Use this chunky rectangle for the final string. Its width will ensure that the corner of the block is completely covered.
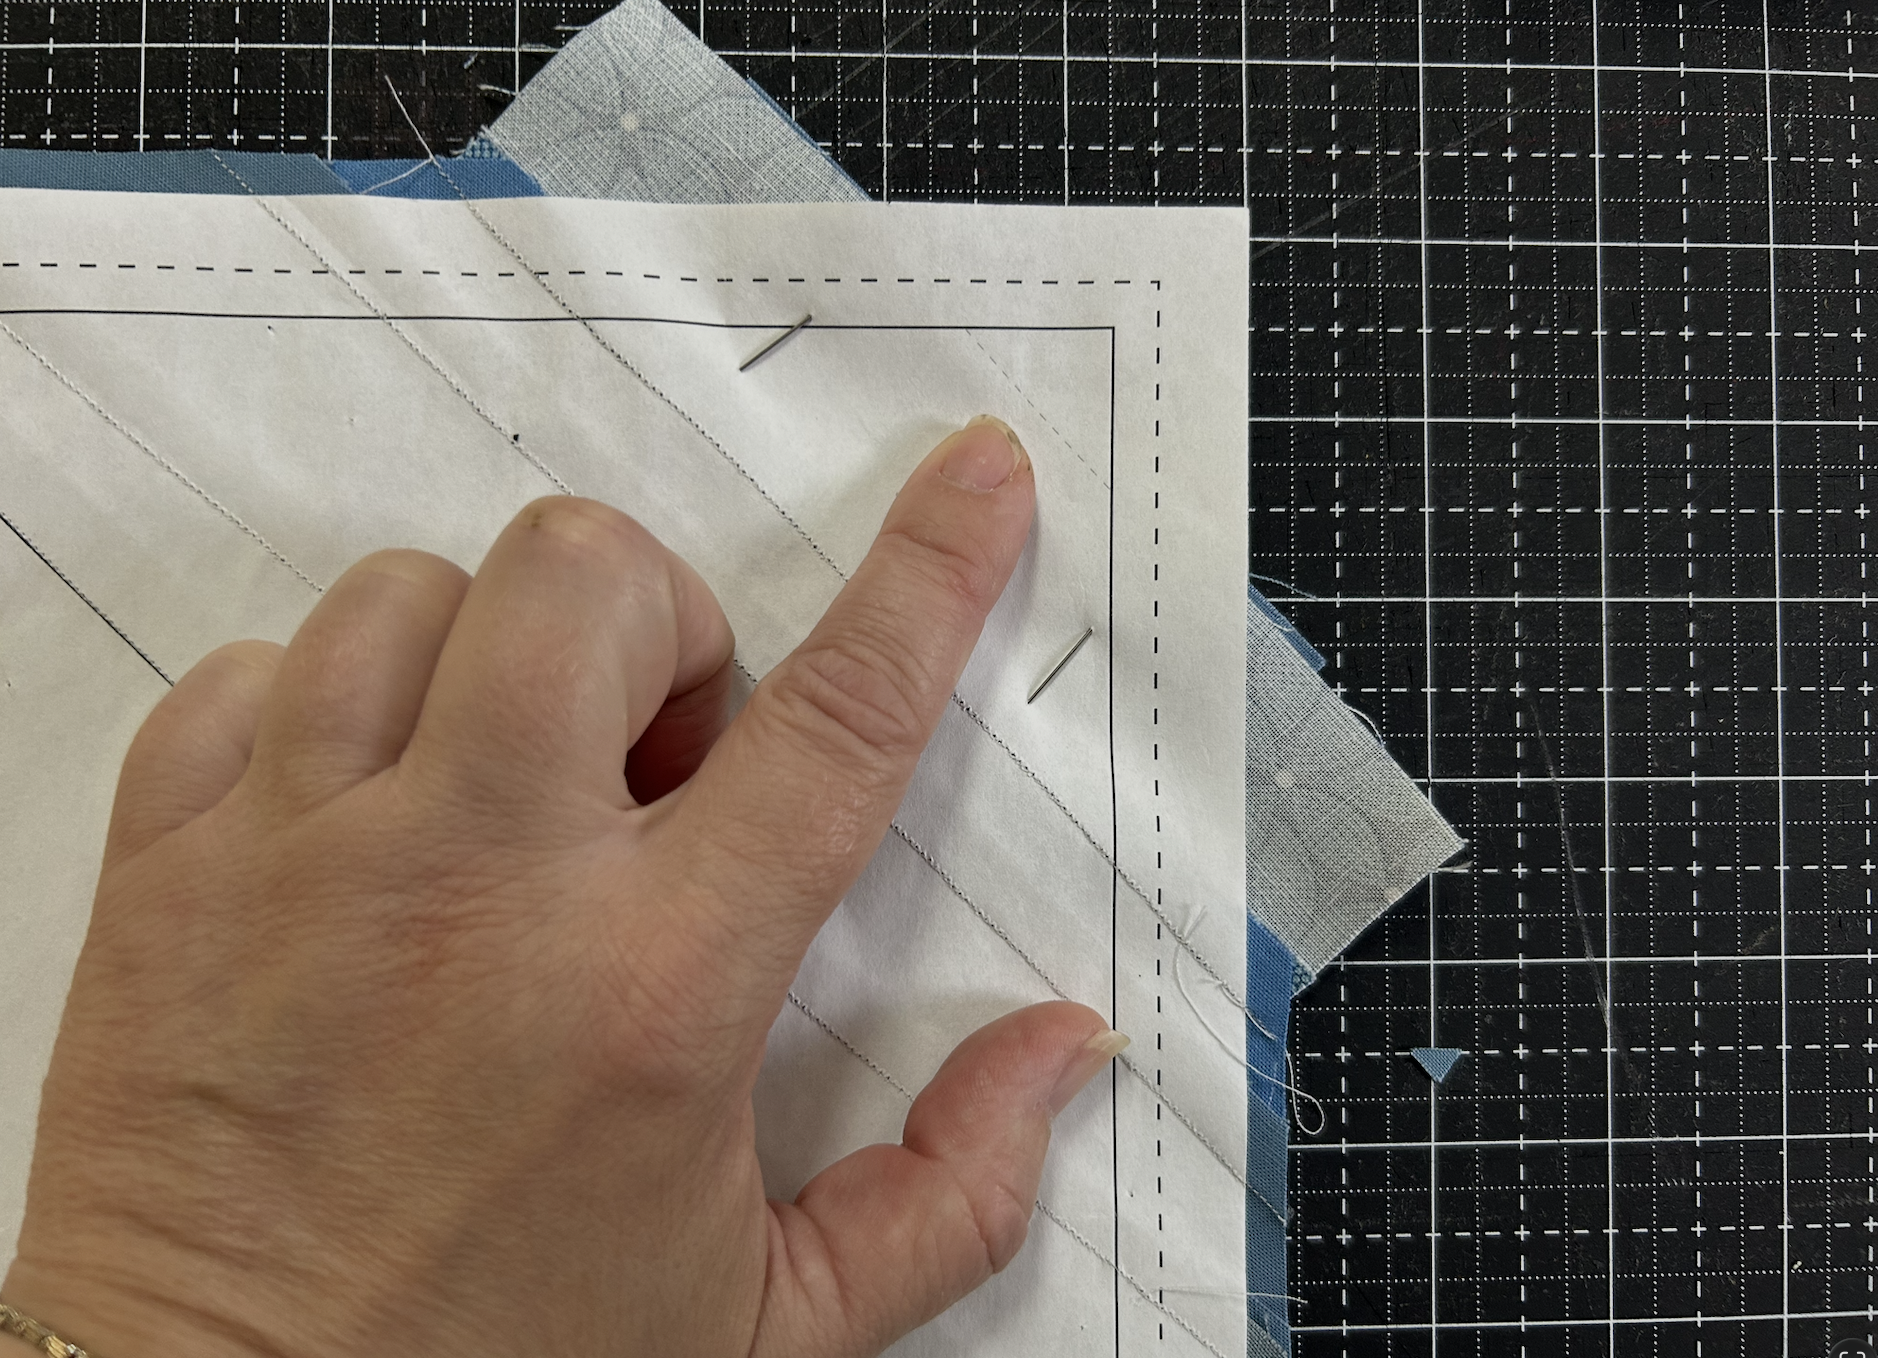
Before attaching the final string, check the paper side of the foundation and make sure that the seamline will be a good 1/2” away from the solid outer block lines. We don’t want the final string seam allowance in the block’s seam allowance.
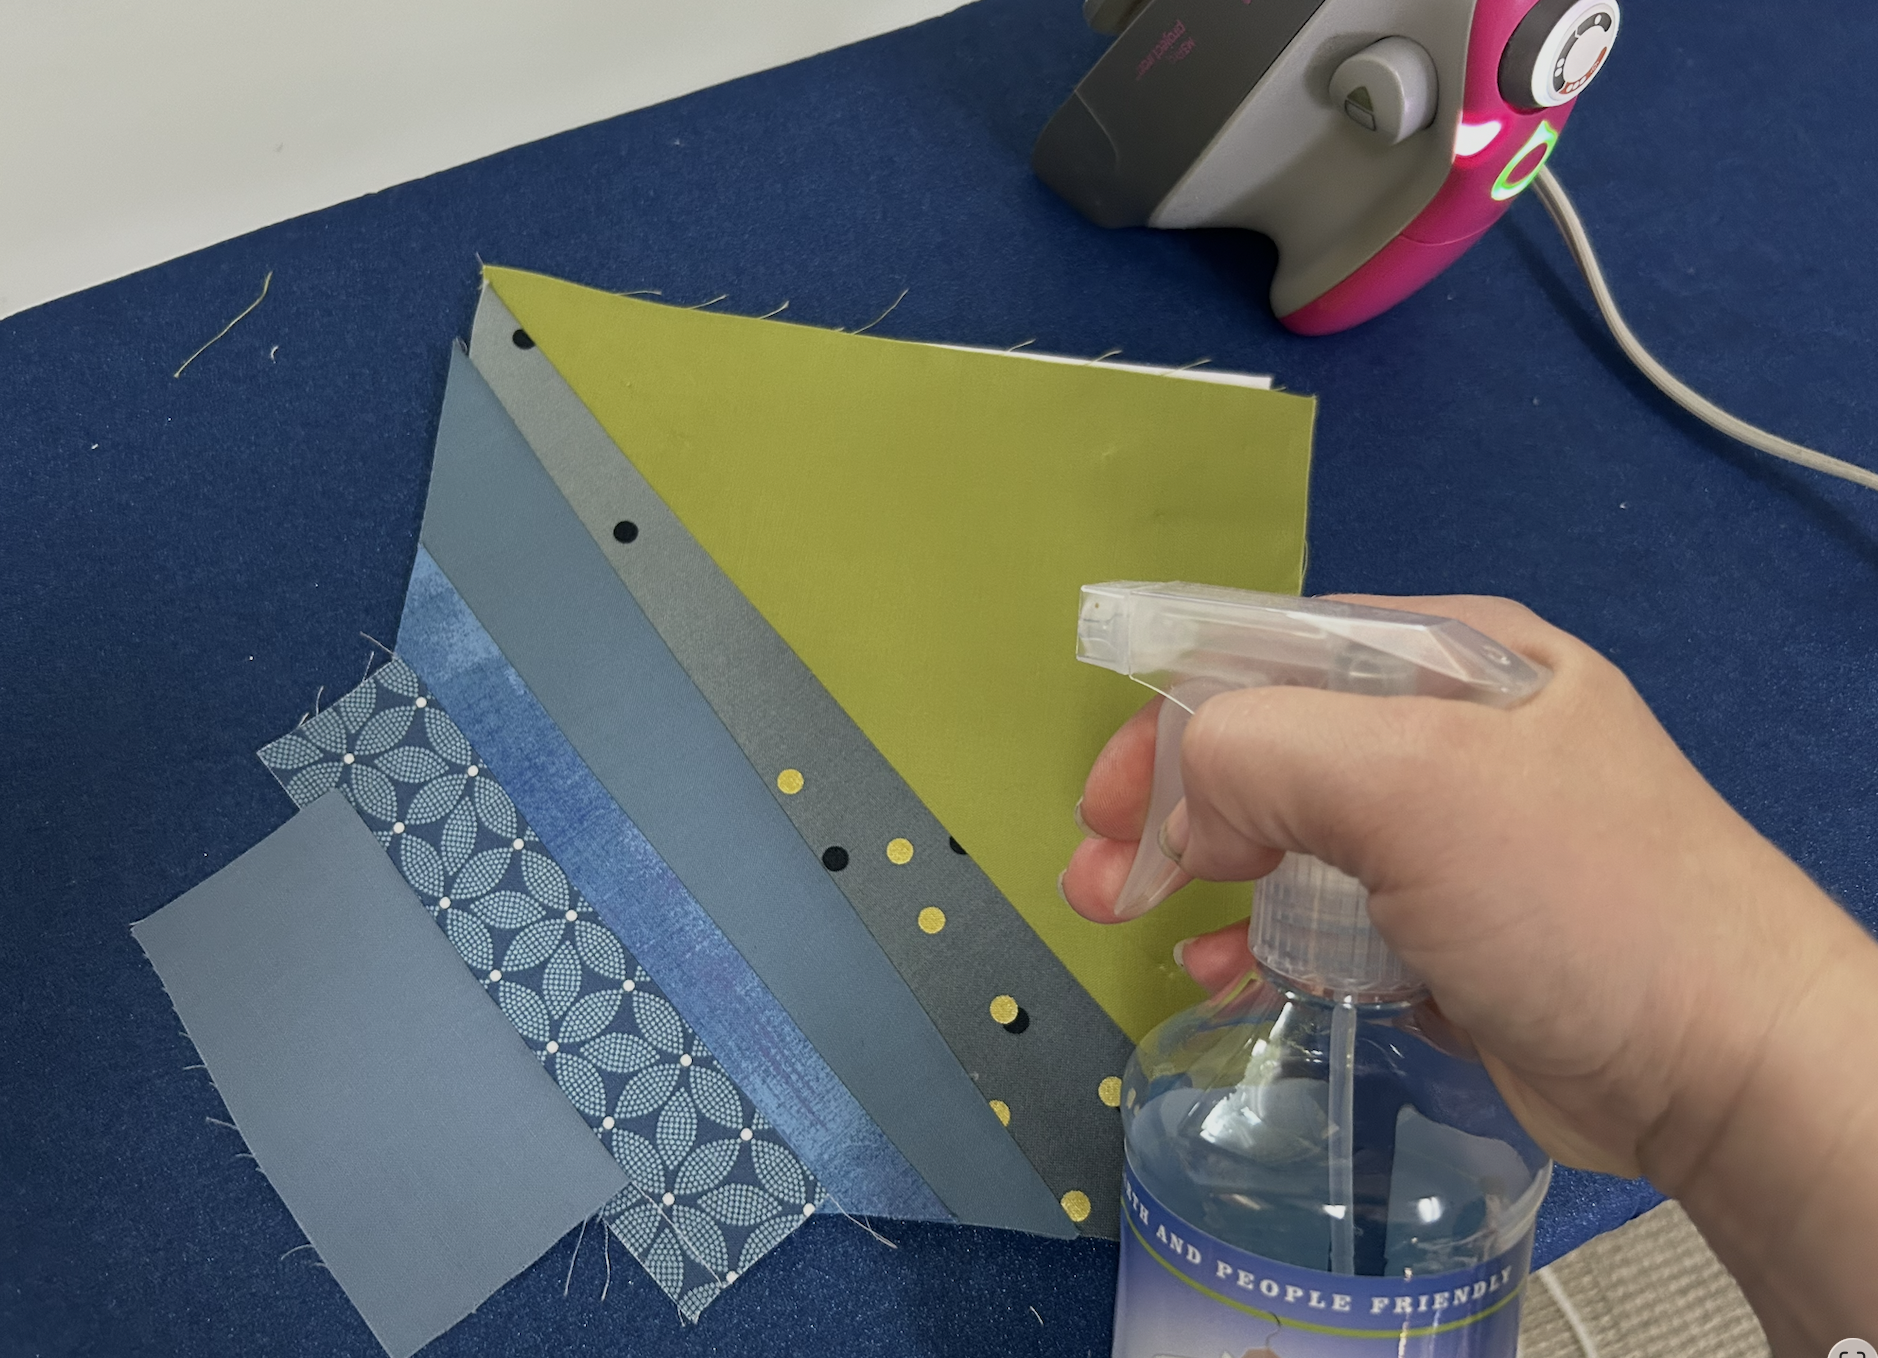
Step 9: Press and Trim
Give the block a good final press. Use steam and lightly starch the block if desired.
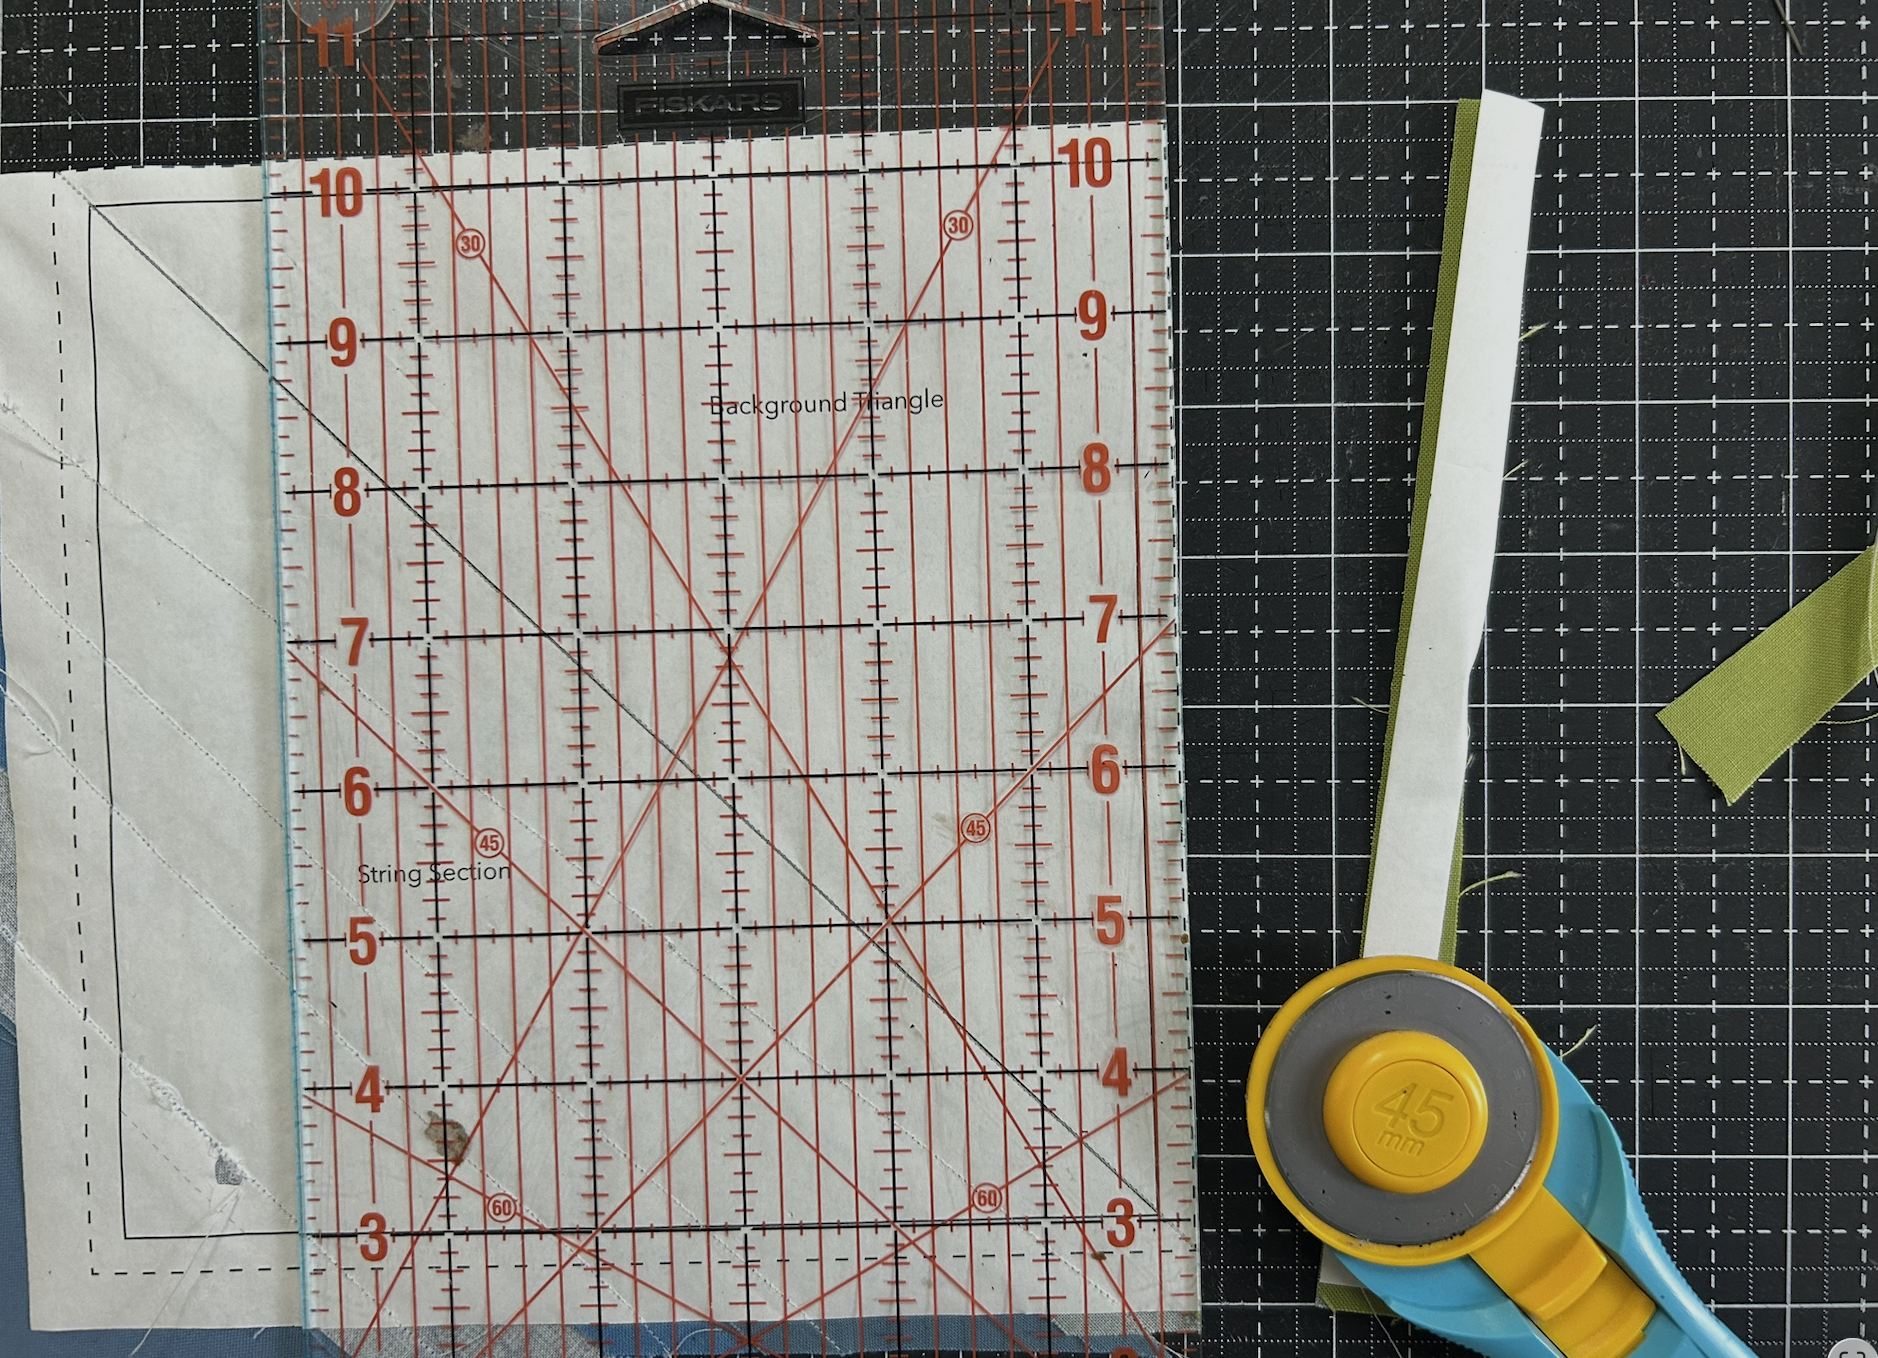
Trim block along the outer dotted line.
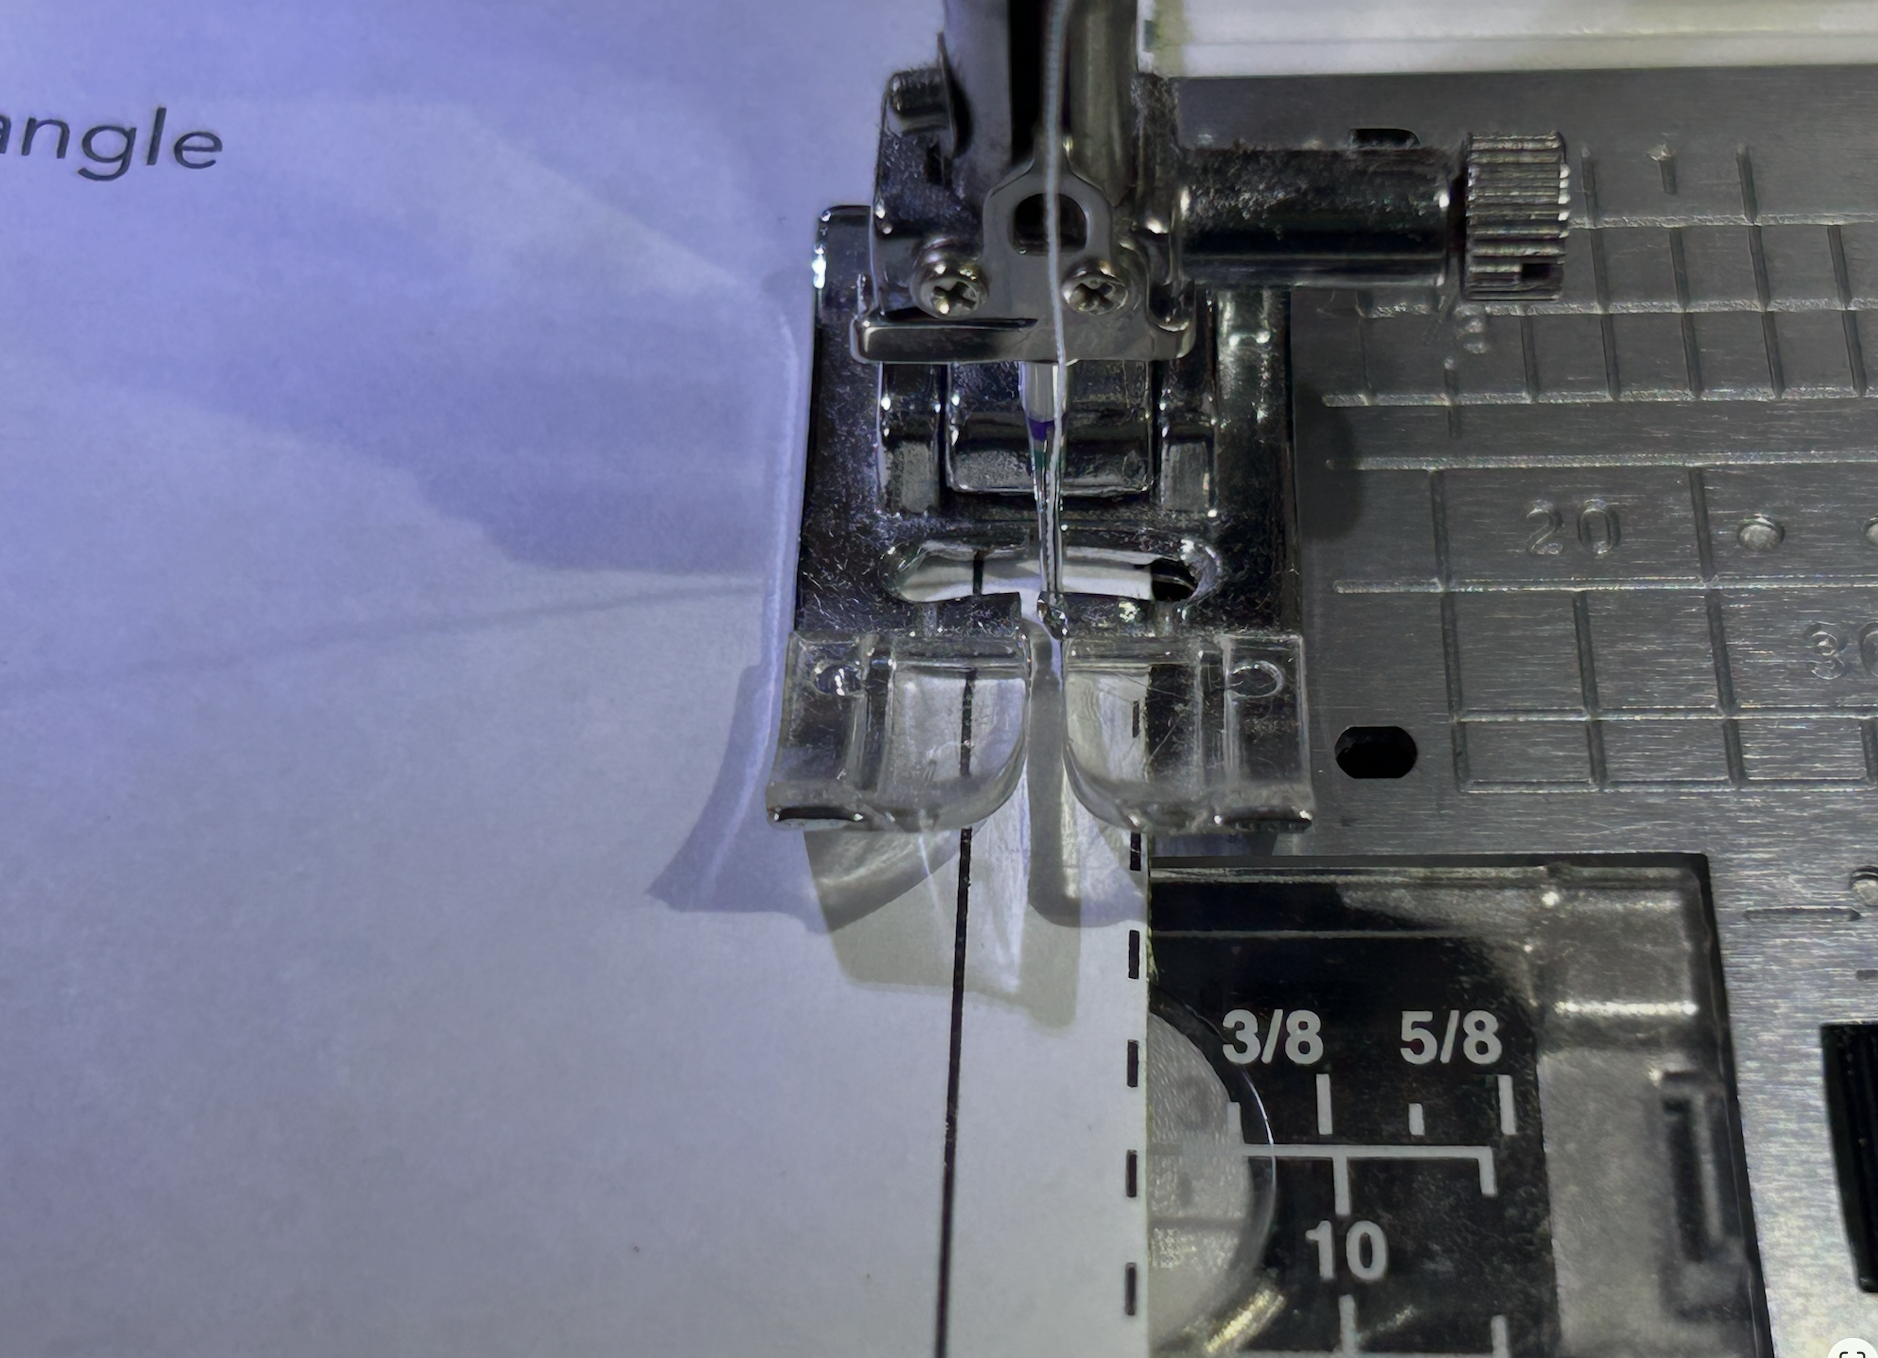
Step 9: Stay Stitch
With the stitch length still at 1.5, stitch around the edge of the block. Starting 1/4” from the edge of the paper, stitch between the solid and dotted lines. This will ensure that the block keeps its shape.
Clarification:
Because we are stitching so close to the edge of the fabric, it is easy for the block to get pulled down into the feed dogs. I found that if I started sewing a bit in from the top edge my machine was less likely to mangle the block.
When starting to stay stitch, instead of placing the block right in front of the needle, lift the presser foot and needle a bit and move the block backward so that the top edge is about 1/4" behind the needle and the needle is about 1/8" away from the right edge of the block. (Between the solid and dotted lines.)
Start sewing down the edge of the block about 1/8" away from the edge. Stop about 1/8” away from the bottom edge of the block and, with the needle down, rotate the block 45 degrees, and stitch down the other edge of the block. Continue stay stitching around all 4 sides.
As long as you stitch between the solid outer line and the dotted lines (the trimmed edge), you are just fine.
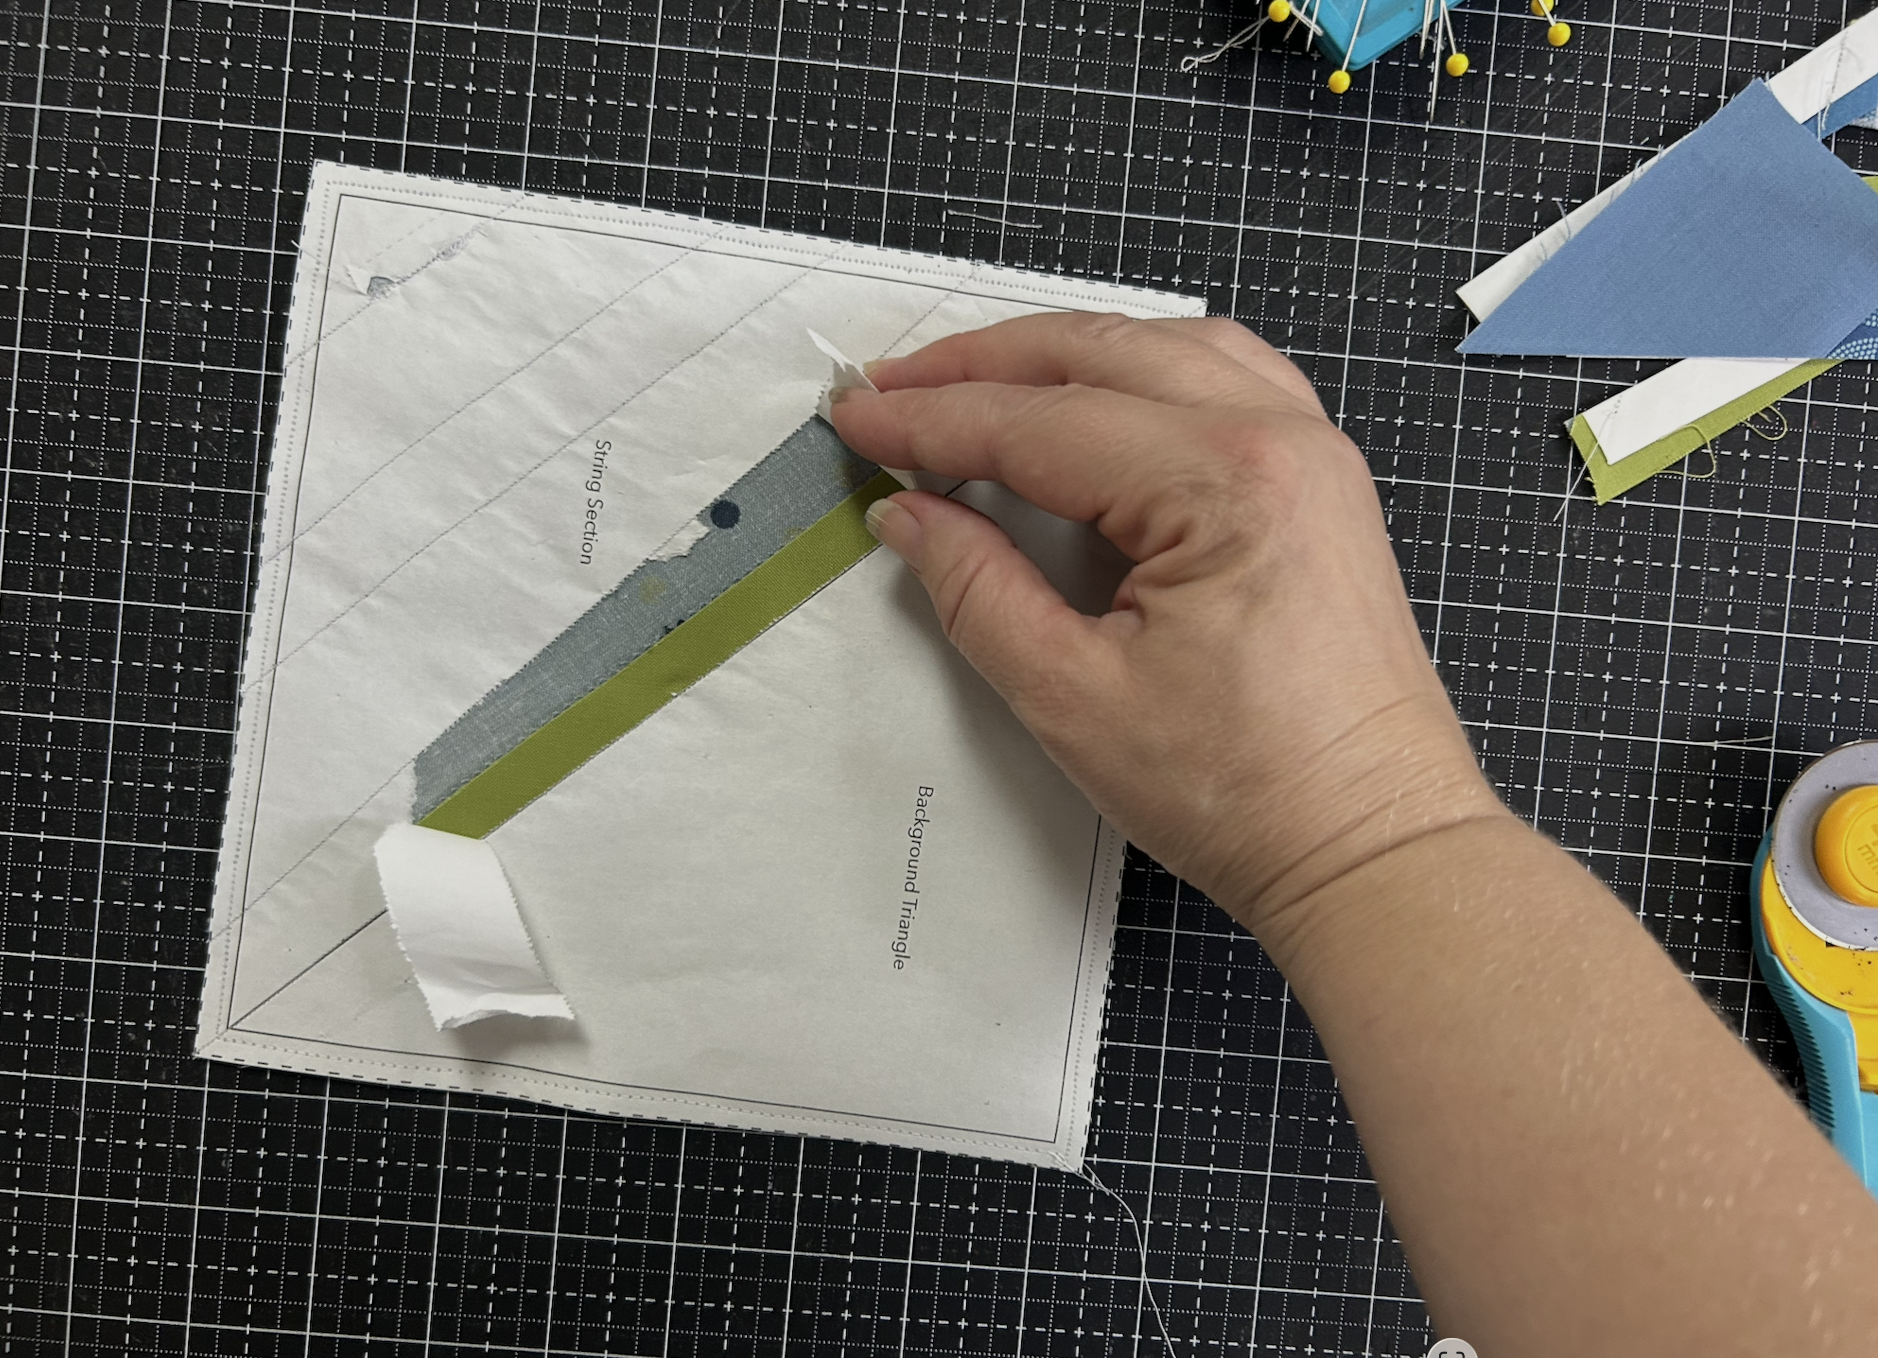
Step 10: Remove Papers
Carefully tear out all of the papers.
Step 11: Final Press
Give the block a final press. Do NOT move the iron back and forth. Just place the iron on top of the block and lift it until completely pressed.
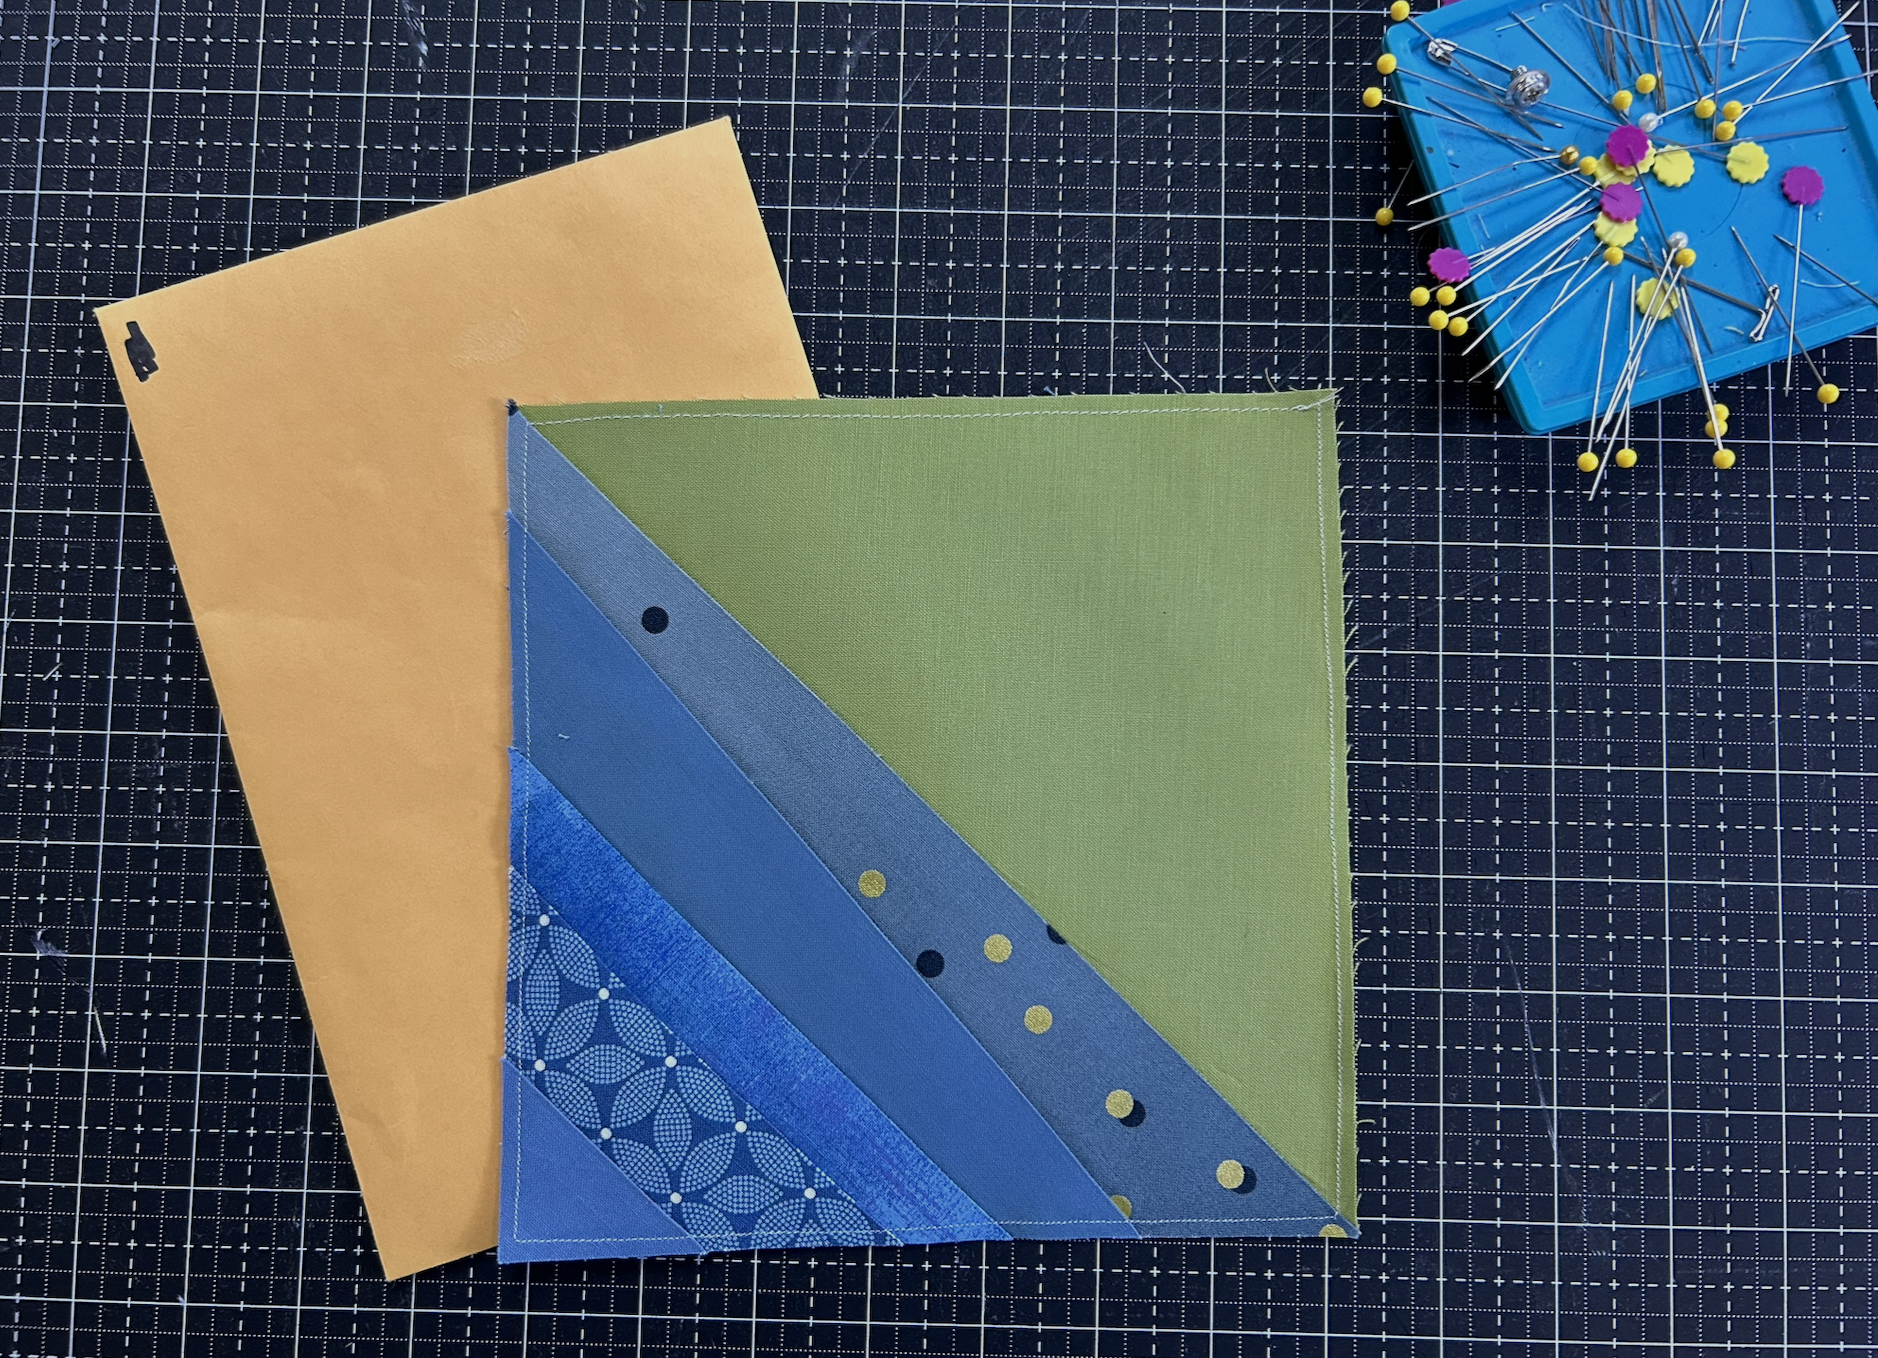
Step 12: Turn in Block
Put the block back in the envelope and turn it in at the September meeting (Sept 12th) or at Sew Me STL (Oct 9-11) or by mail by October 1. The LAST DAY to turn in blocks is at SewMe (10/11). If you mail the block please put it in a small ziplock before placing it in the envelope. We have had issues with the mail service shredding the envelopes.
Thanks so much for your help making these blocks! We can’t wait to see it all come together!
