
Cheater Quilt Binding
I really like the look of a hand finished binding. I just don't like doing it. Especially on quilts I am not crazy about or ones that are going to get a lot of wear and tear. I kept telling myself that if I pinned well and went slow I could machine bind my quilts but it NEVER worked for me. I would get so mad that the quilt I had put so much work into had a crummy binding.
Then I remembered Miss Mary. For a few months before we moved, I was part of a sewing group that met Monday mornings and sewed baby blankets for the NICU (I was the youngest member of the group by a good 30 years). Miss Mary would sew on all the bindings. She used what I think is called a serpentine stitch. It looked great, was easy and, best of all, impossible to mess up.

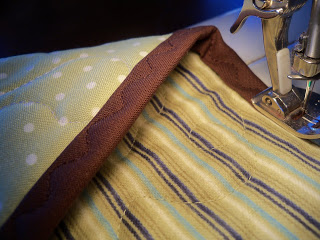
This is what the stitch looks like. Look for a wavy dotted line on your machine - I only have 7 stitches on my old Bernina and I have it so you will too. :) I set my stitch width to 4 and length to 2.
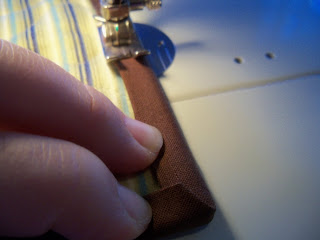
I sew my binding onto the front as usual, fold the binding to the back and start the serpentine stitching. Keep the foot centered on the binding and it should stay centered on the front of the binding too.
I peek on the underside of the quilt from time to time to make sure everything is in order - the great thing is that it always is!
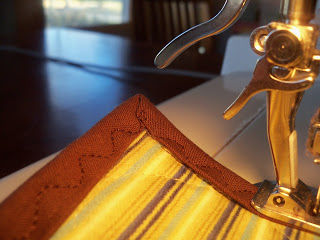
I take the corner like usual. There is always some sort of funny pattern at the corner, but I don't mind that at all.
This method isn't for everyone or for every quilt but it I love using it for baby quilts. It adds a fun decorative touch, plus I can move on to piecing my next quilt that much quicker! I finished my daughters puffy quilts and the Baby Tree quilt this way but the Big Tree Quilt will be finished by hand.