Scrappy Mountain Tutorial
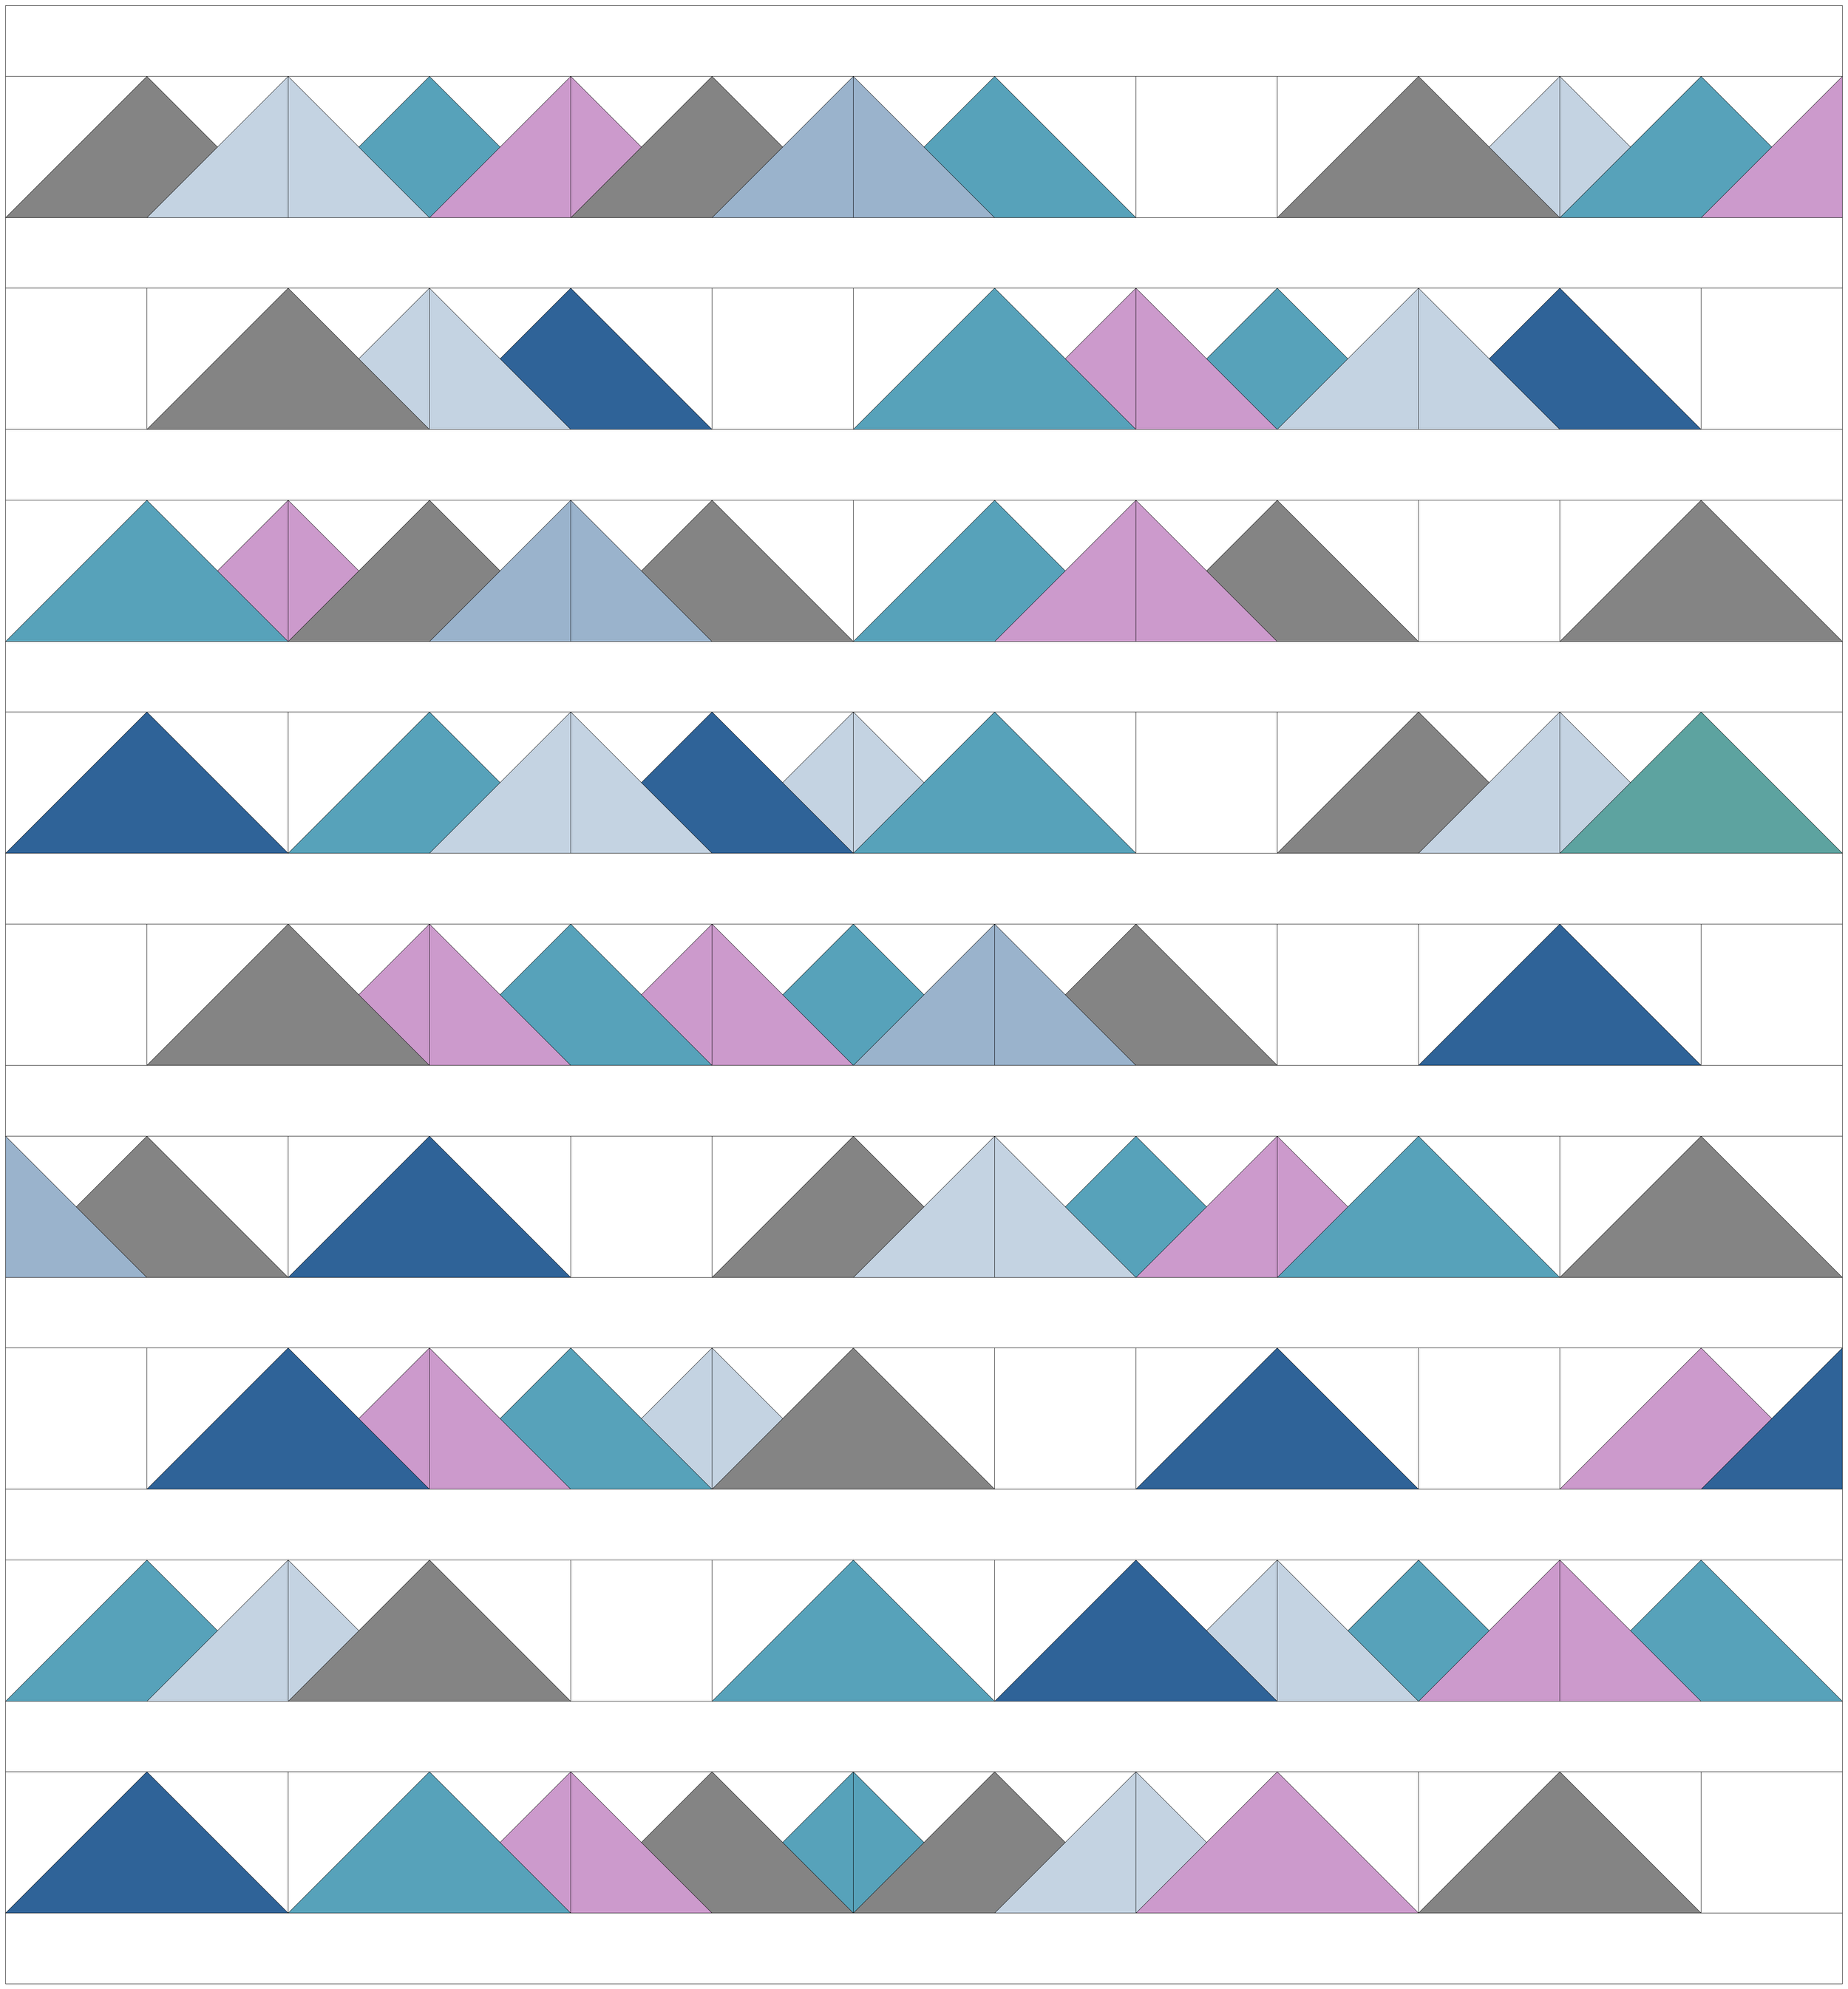
Sewing Scrappy Mountain quilt blocks is an absolute blast! These blocks have a charming, rustic vibe that’s perfect for cozying up any room or adding a pop of personality to your projects. Plus you can use all those little fabric scraps you’ve been saving!
In the tutorial ahead, I’ll walk through a simple, foundation paper-pieced method that keeps your seams crisp and your piecing precise—no stress, just fun! You’ll learn how to build these classic mountain shapes from scraps of all sizes, turning leftover bits into stunning peaks and valleys. Grab your scrap bin, your favorite audiobook, and let’s make some mountains that are as fun and scrappy as you are!
In addition to the written tutorial below, I have a video tutorial on YouTube. In it, I walk you through foundation paper piecing a Scrappy Mountain quilt block in tons of detail.

I’ve also got a FREE Scrappy Mountain Mini quilt pattern for you! It will give you some guidance on how to sew the blocks together once they are pieced.
(Keep on scrolling for the tutorial!)

How to Foundation Paper Piece Scrappy Mountains
To make the Scrappy Mountain quilt blocks shown in this tutorial, you will need 3” x 6” Scrappy Mountain foundations. These are available as a pre-printed foundation pad or as a printable pdf. You can find both in my pattern shop. You will also find other Scrappy Mountain foundations in a variety of different sizes, and a quilt pattern that uses 5 sizes of Scrappy Mountain blocks.
The steps and tips shown in this tutorial can be applied to any size of Scrappy Mountain. Just refer to the pattern for the correct size of background pieces.
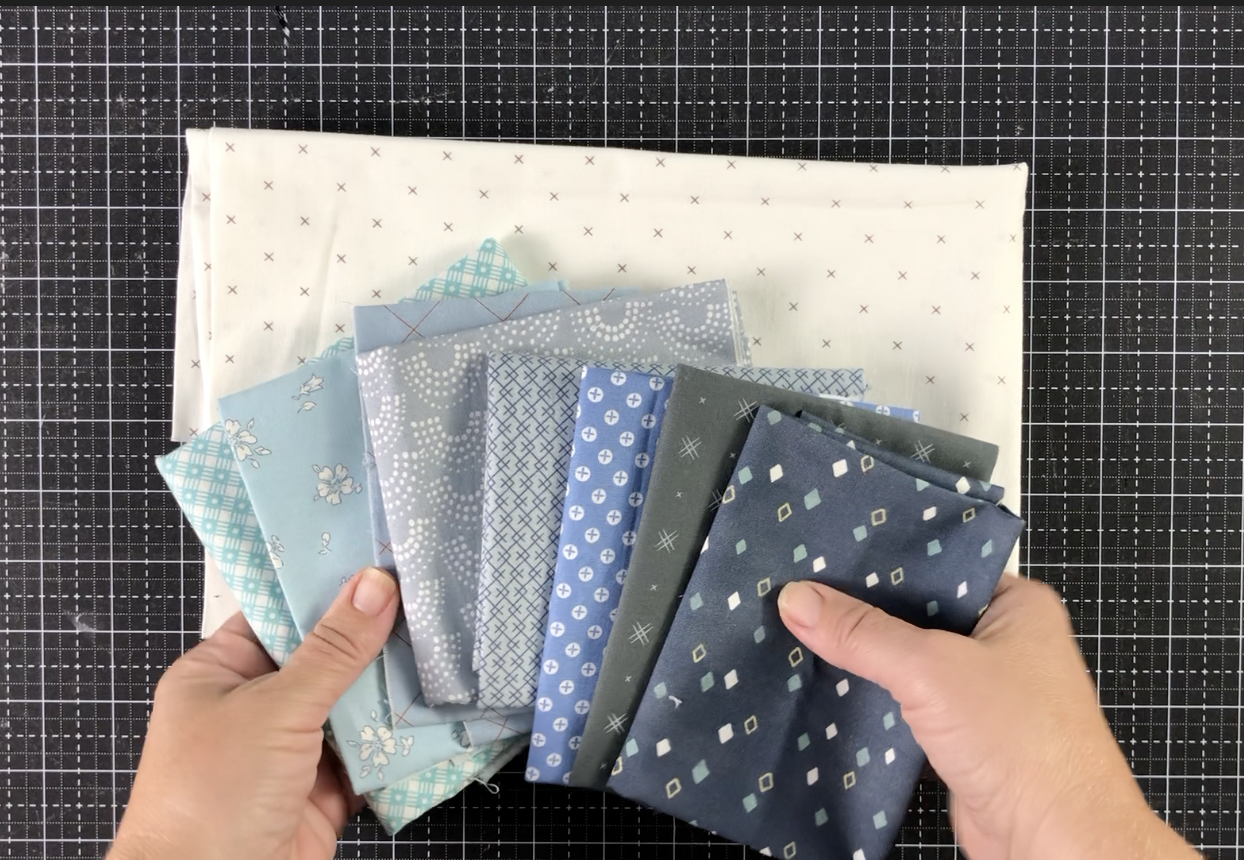
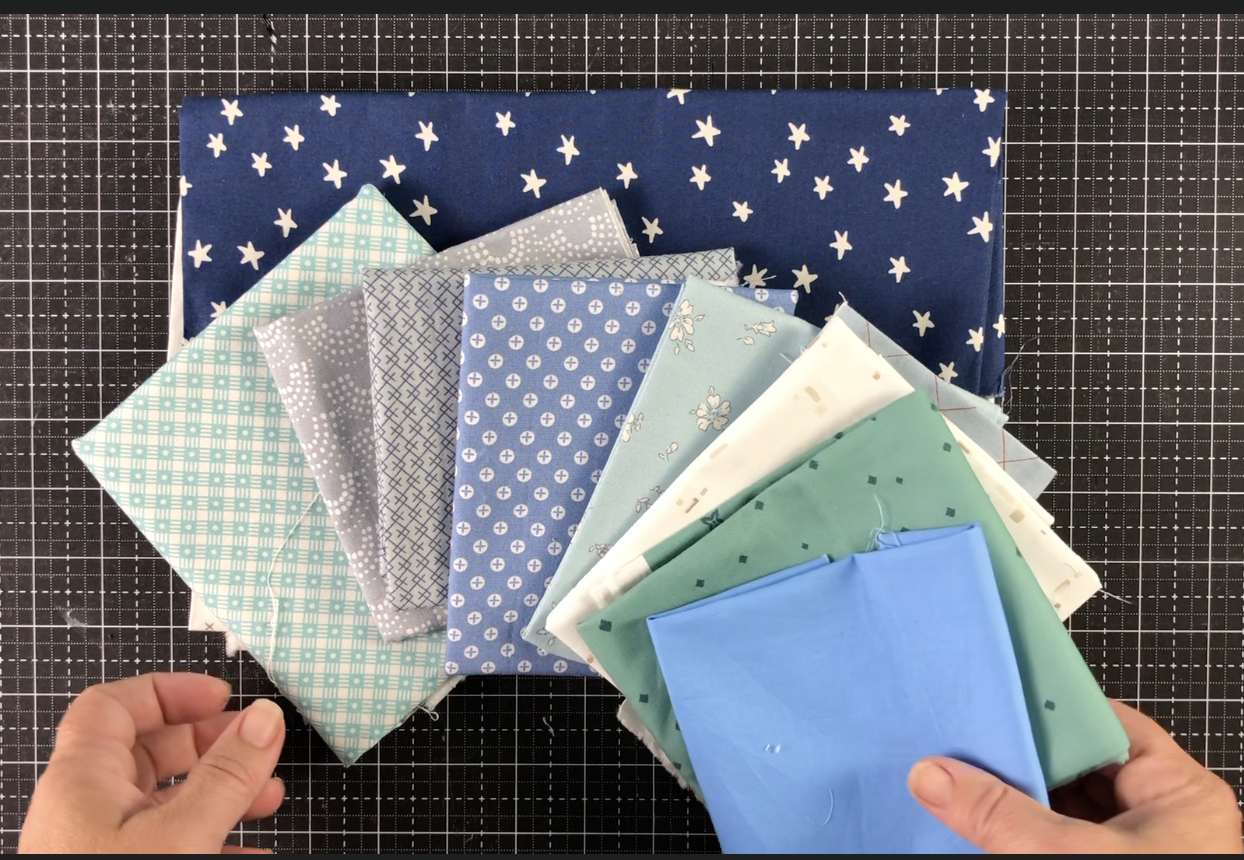
Choose your fabrics.
This is a very important step in the process. I recommend either using a very light or very dark background fabric with little to no print. Then choose fabric scraps, pre-cuts, or yardage that contrast well with the background and each other. For example, I would pair dark and medium mountain fabrics with a light background.


2. Cut background fabric.
Refer to the pattern for specific fabric dimensions. You may cut all your background fabric now, or cut as you go. Cut the smaller squares in half on the diagonal. Cut the larger squares in quarters along the diagonals.

3. Choose your first mountain foundations.
Build a mountain range with foundations and label each section with the fabric you plan to use, especially where the foundations will join. If possible use fabrics that differ in value or color for overlapping mountains.
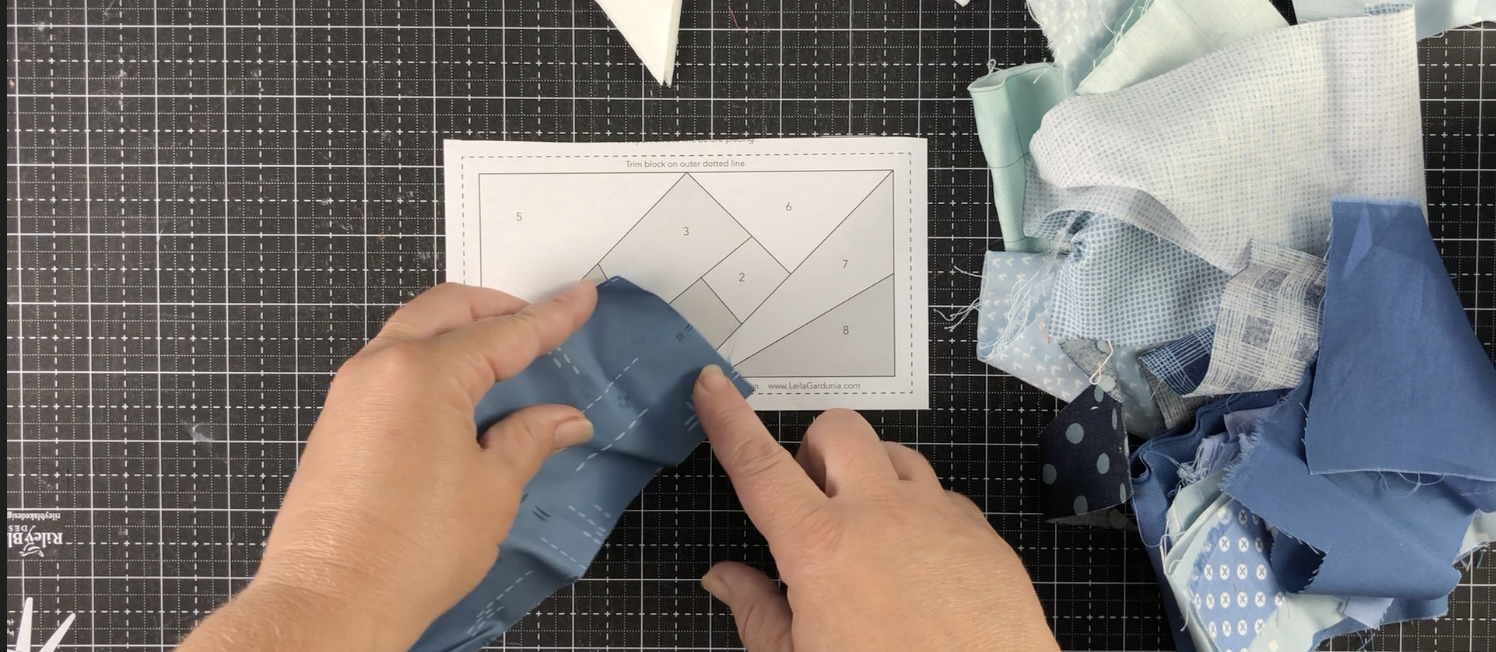
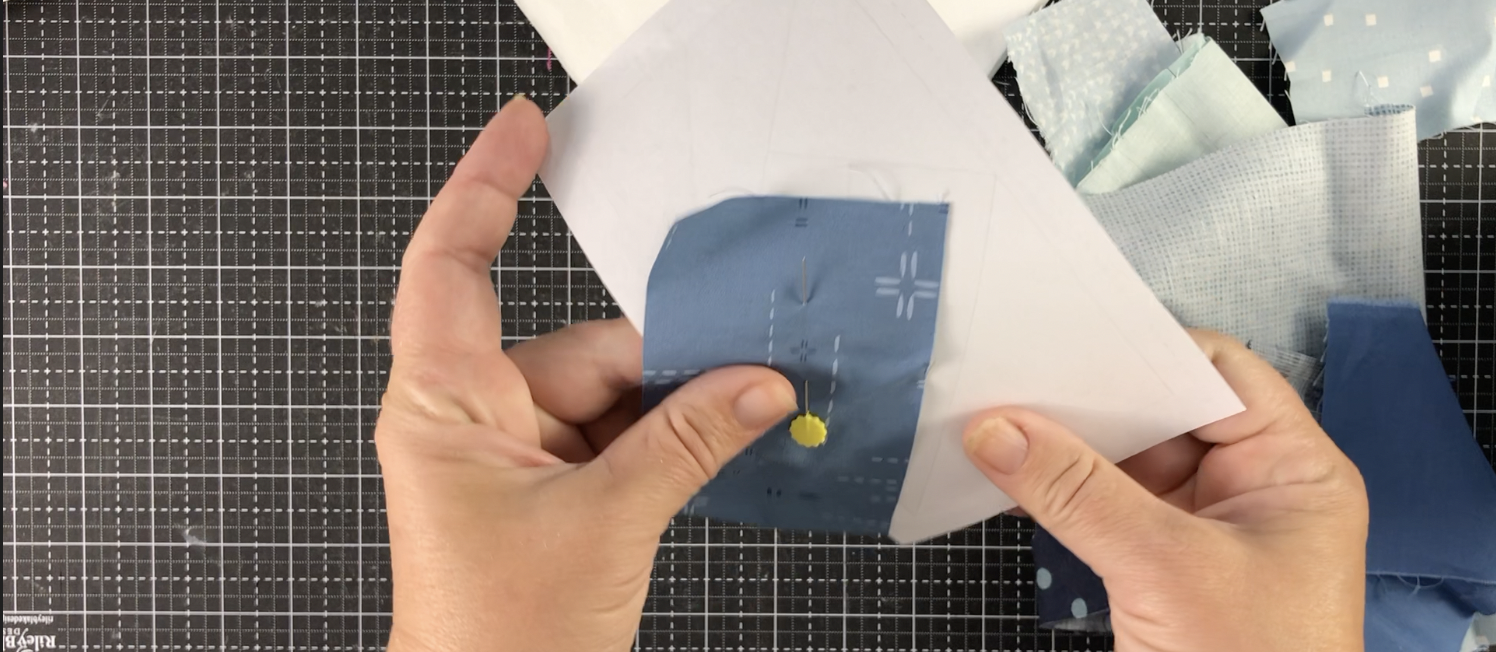
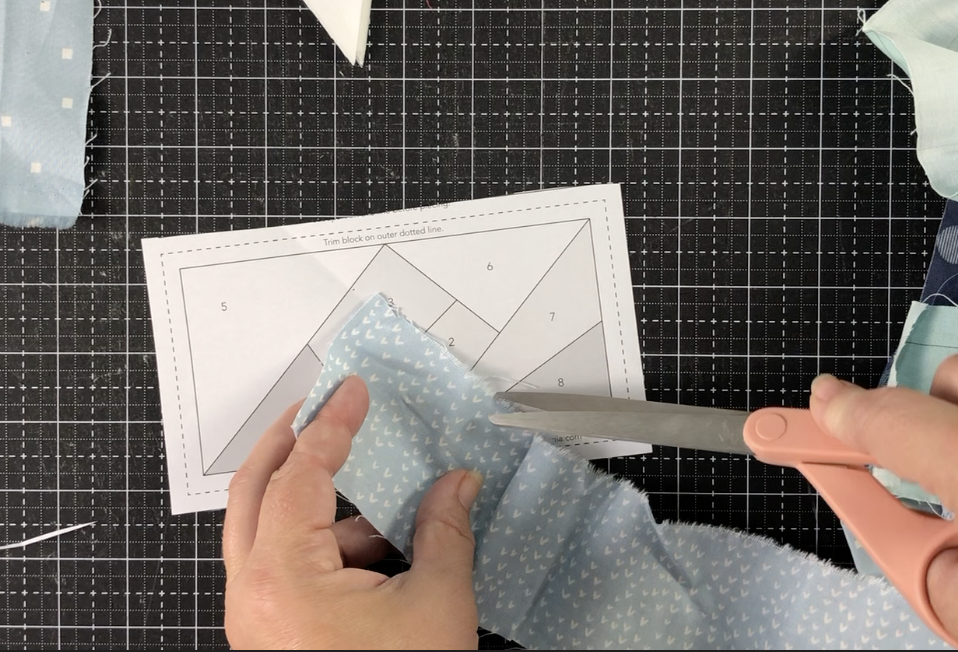
3. Place the first piece of fabric.
Each section of the foundation is labeled with a number indicating the piecing order. Choose your fabric for section 1. Lay it wrong side of fabric to the wrong side of the foundation. Hold up to the light and make sure it covers section 1 by at least 1/4”. Secure fabric with flat head pins or a dab of glue.
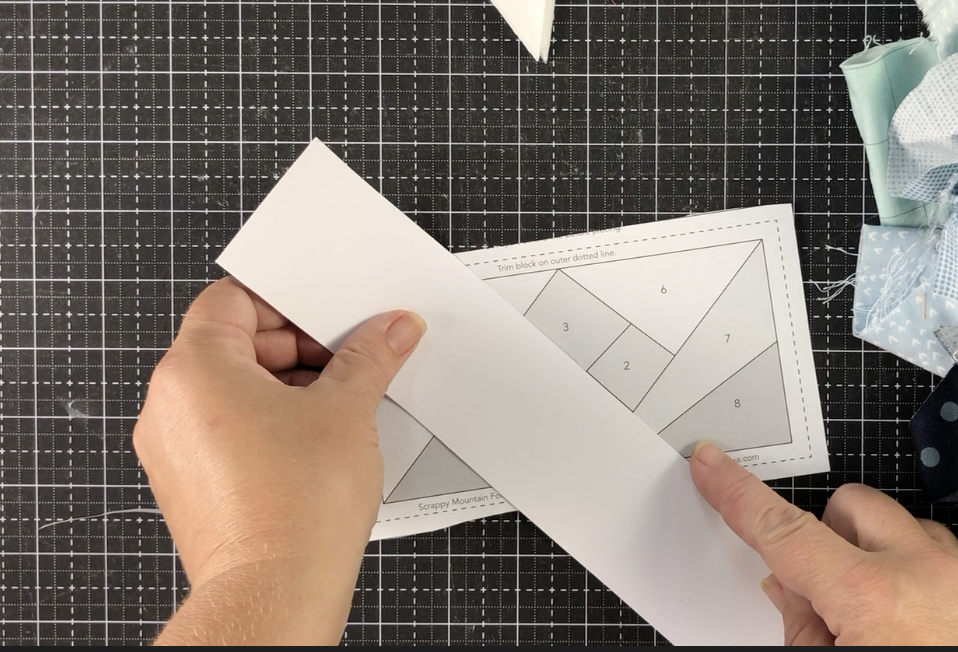
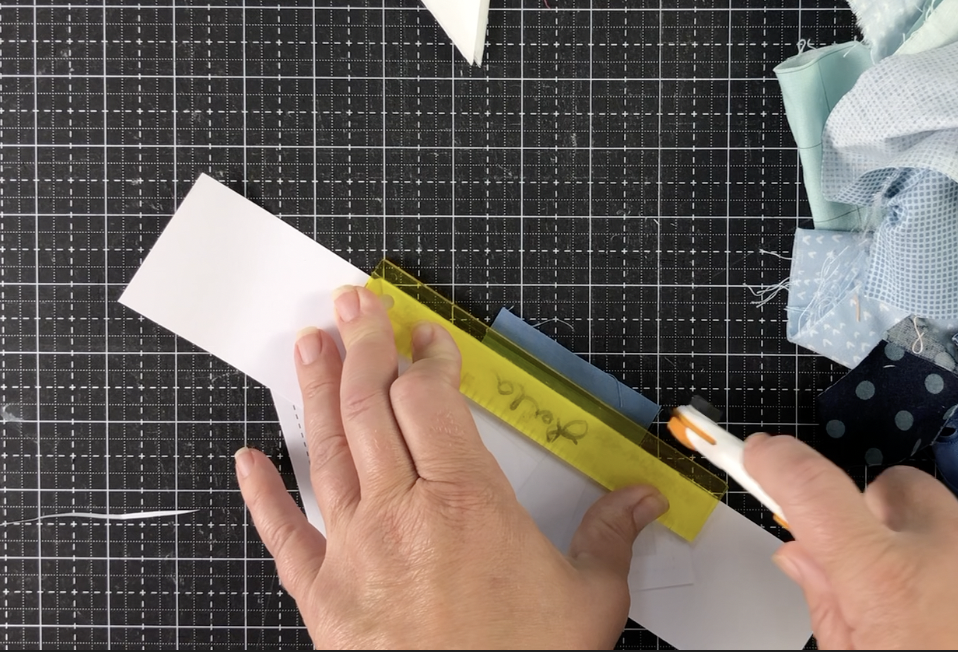
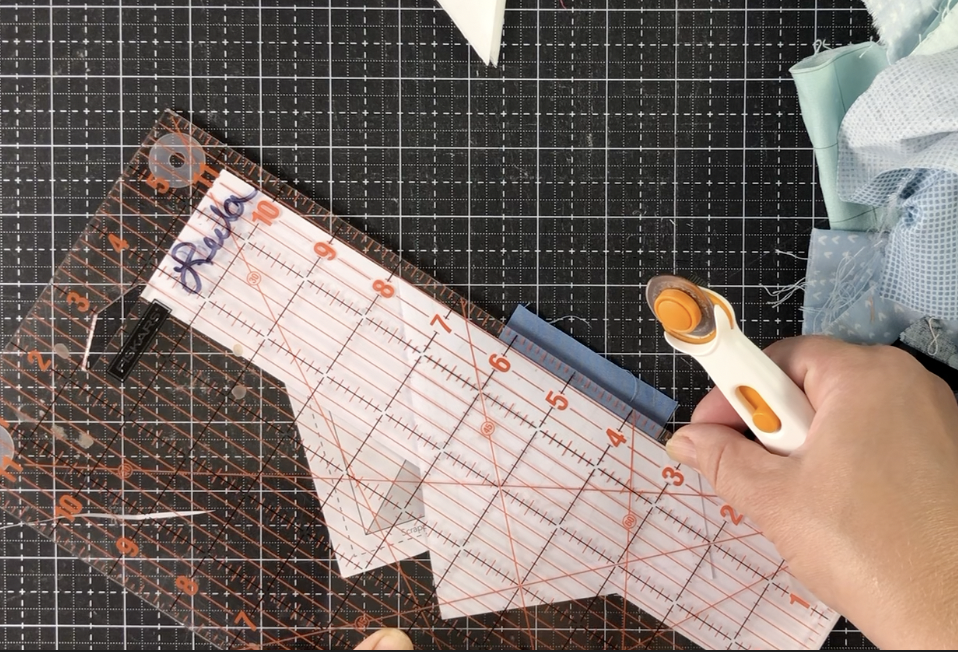
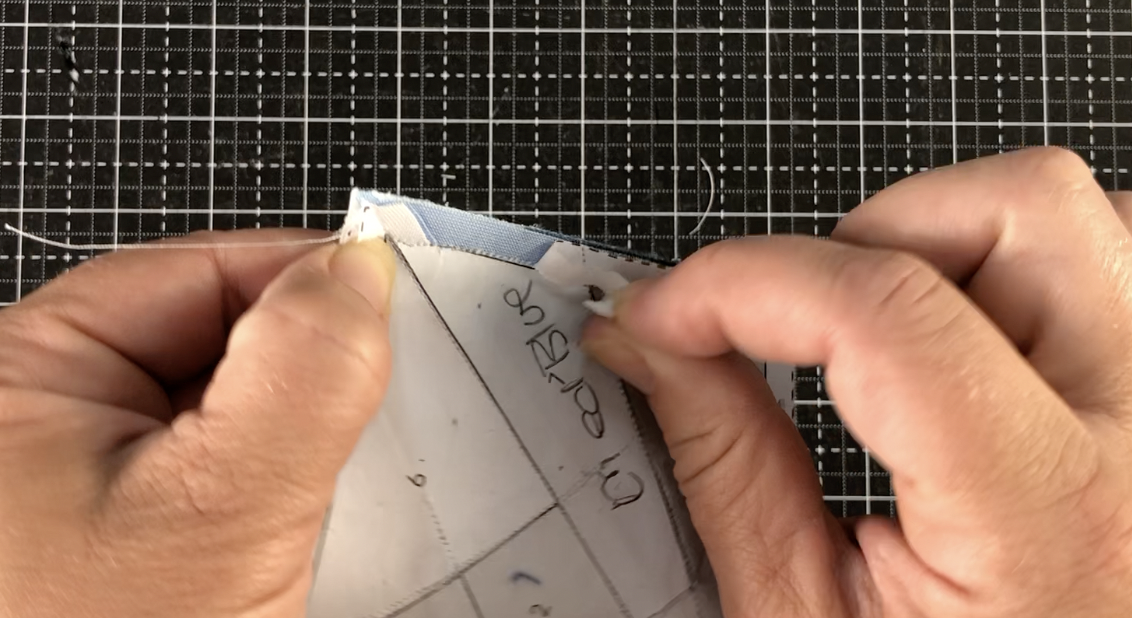
4. Trim fabric.
Locate the line that runs between section 1 and section 2. Using a postcard or piece of card stock as a guide, fold the foundation back along the line between sections 1 and 2. Trim the exposed fabric ¼” away from the foundation fold. I like to use an Add-a-Quarter ruler to trim, but any ruler will do.

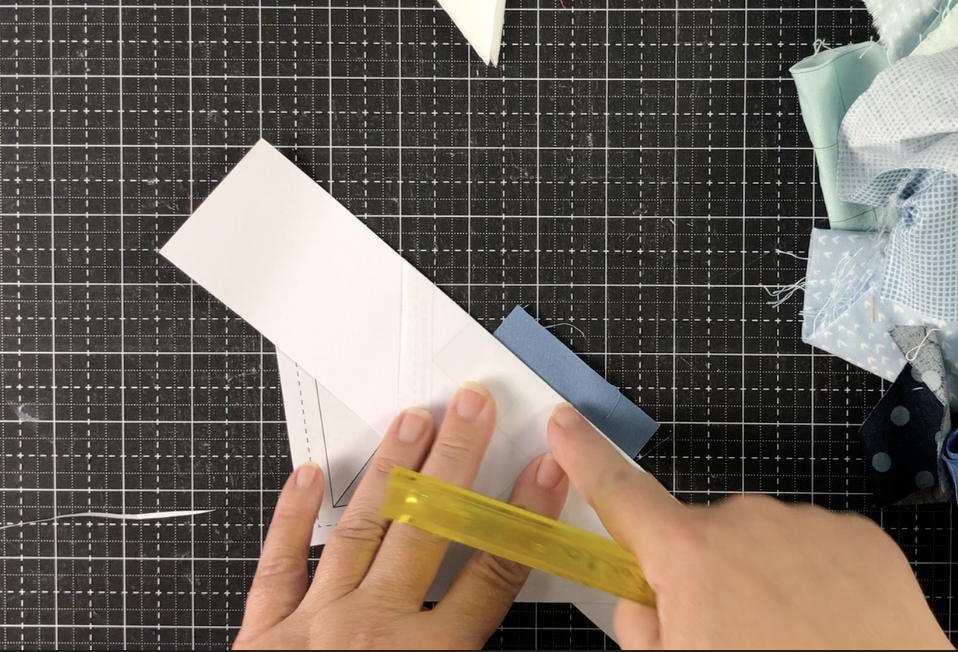
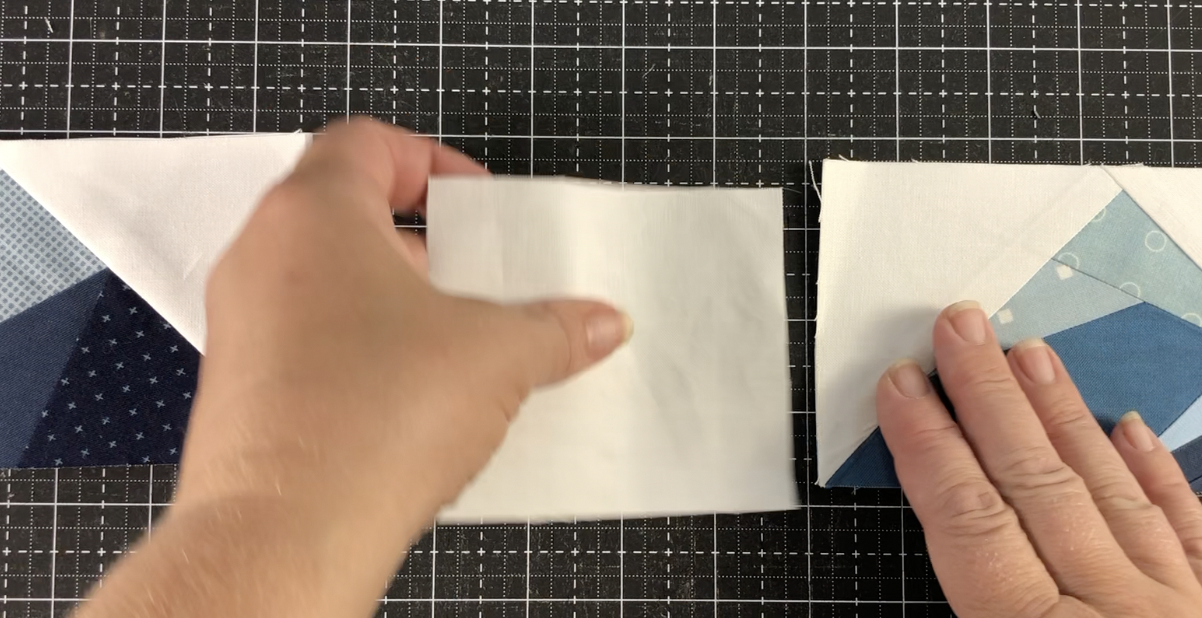
5. Choose and place the fabric for section 2.
Fold the paper back down and choose flip the foundation over to the back side. Place the section 2 fabric on top of the section 1 fabric, right sides together and lined up along the trimmed edge. Check to make sure it will open to cover and overlap section 2 by at least 1/4”. Pin in place.


6. Sew the first seam.
Reduce the sewing machine stitch length to 1.5. This allows the papers to be pulled off easily.
Flip the foundation over to the printed side and sew on the line between sections 1 and 2, starting and ending at least ¼” before and after the line. Press the section 2 fabric open. Check that the second fabric covers section 2 completely and extends into the neighboring sections by at least ¼”.
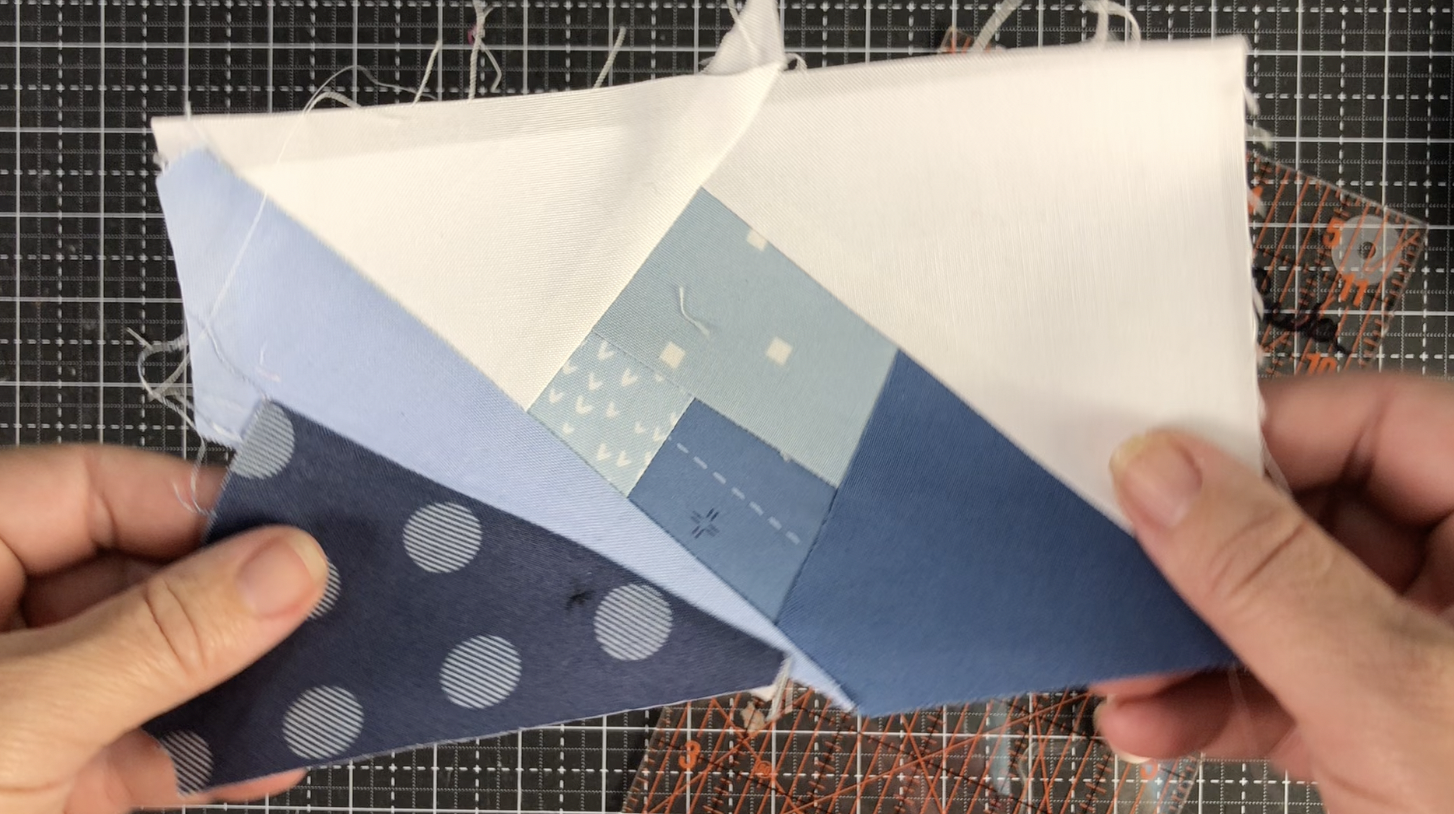
7. Repeat steps 4-6 until the foundation is completely pieced.
Refer to the video tutorial for detailed instructions.
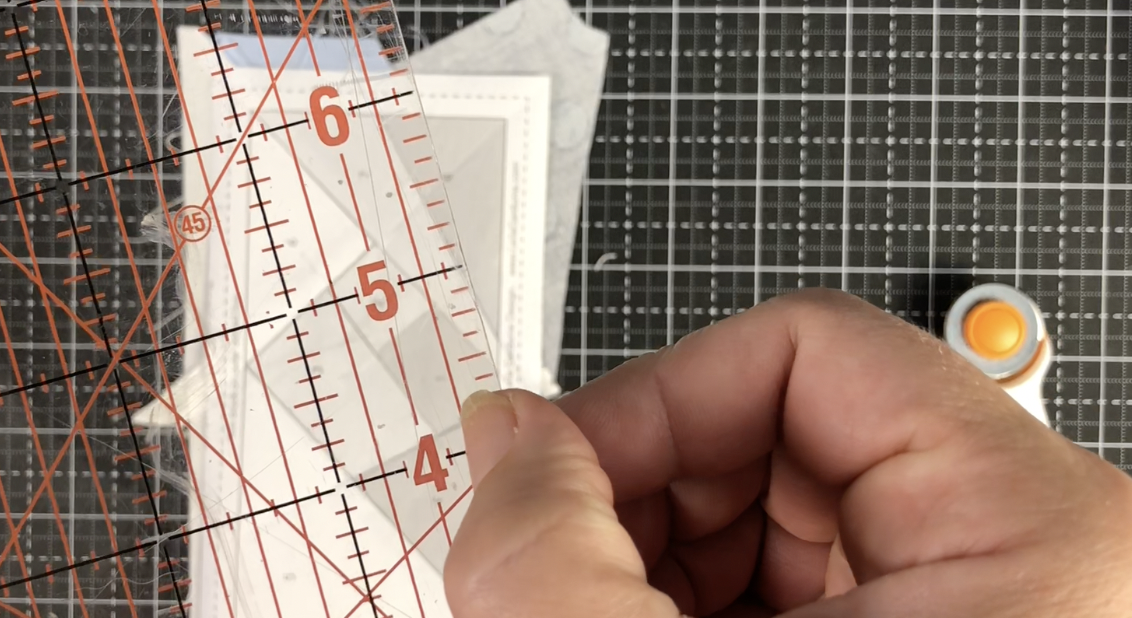

8. Trim the block.
The easiest way to trim the block is to line up the quarter inch line on the ruler with the outer solid line of the quilt block. Trim all four sides.
To prevent stretching, do not remove the papers until the quilt top is complete.


9. Sew blocks together.
Lay out the quilt blocks. Pin together and sew (still with a 1.5 stitch length) on the solid outer line. Remove only the paper from the seams and press the seam allowances open.
10. Add spacers and sashing strips.
If desired, cut 3 1/2” high background strips and sew them between the mountain ranges. Sew them to the quilt blocks with a 1.5 stitch length, remove paper from the seams and press toward the background strip. A design wall will help you see which blocks and spacers you with to place where.
When your rows are pieced, you may want to cut background strips to place between them. The strips can be any height, but I think 2” strips work well in smaller projects.
If you want a bit more guidance as you put the Scrappy Mountain blocks together, you can download my Mini Scrappy Mountain quilt pattern. It is designed to use 3” x 6” Scrappy Mountain blocks, but you could modify it to use other sizes of Scrappy Mountain blocks.
11. Finish
Press and lightly starch the finished panel well. Baste, quilt and bind as desired. You can print out my Basting and Binding Guide here.