
Fusible Fabric Snowflake Tutorial
Learn how to make a fusible fabric snowflake that you can use to decorate throw pillows, wall hangings, placemats and more! In this post I’ll show you how to prepare your snowflake fabric, cut out the snowflake, and fuse it onto your background fabric.
The first part of this post gives instructions for making a snowflake pillow cover. The second part uses the same steps to make a mini qullt. Ready to get started? Let’s go.


What is Heat n Bond?
This snowflake is raw edge appliquéd using Heat n Bond Lite. Heat n Bond Lite is a lightweight interfacing that has adhesive on both sides. When you take the interfacing out of the package, you will find that one side is bumpy and the other side is paper. You place the bumpy adhesive side on the wrong side of the fabric that is going to be appliquéd onto the background. Iron it in place, then cut out the desired shape, remove the paper to expose the second adhesive side of the interfacing, and iron onto the background fabric. It is a great tool for fast and easy appliqué projects.
This snowflake tutorial give instructions for how to use Heat n Bond to make a cute snowflake throw pillow!
Make the Fusible Fabric Snowflake

Cut out a piece of Heat’n’Bond Lite - a fusible paper-backed interfacing (found at most fabric/craft stores). Cut a square that is a couple of inches larger than the desired size of your finished snowflake. Mine was about 16” square.
Following the manufacturers instructions (found with the Heat n Bond), iron the bumpy side of the interfacing to the wrong side of your snowflake fabric. Use medium heat with no steam. Hold the iron in place on the paper liner for 2 seconds. Repeat until entire surface is bonded. If the interfacing is not completely bonded to the snowflake fabric, repeat. Allow to cool.

3. With the paper side out, fold the fused fabric/interfacing in half on the diagonal.

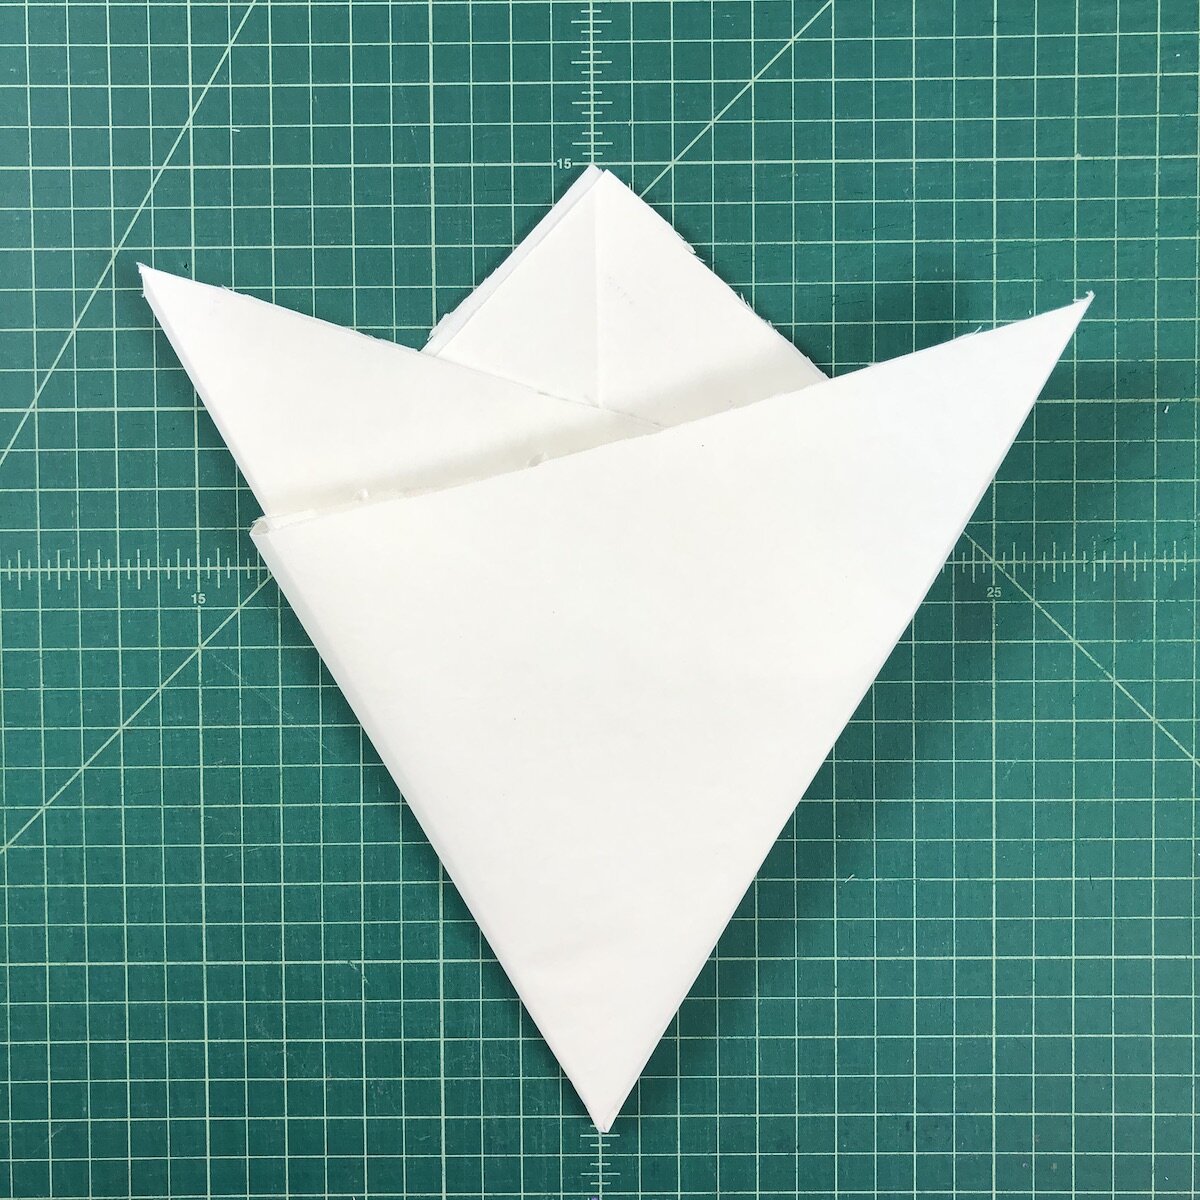
4. Find the center and fold in thirds. This might take a few tries. Adjust the folds until you get it right.

5. Fold in half again.

6. Trim upper edge as desired. This is where personal preference and imagination come into play. Each snowflake will be different and amazing. If you are nervous about cutting into your fabric, practice on a piece of paper first.

7. Begin to cut the interior of the snowflake. The snowflake was too thick for me to cut, so I unfolded it to do the majority of cuts.
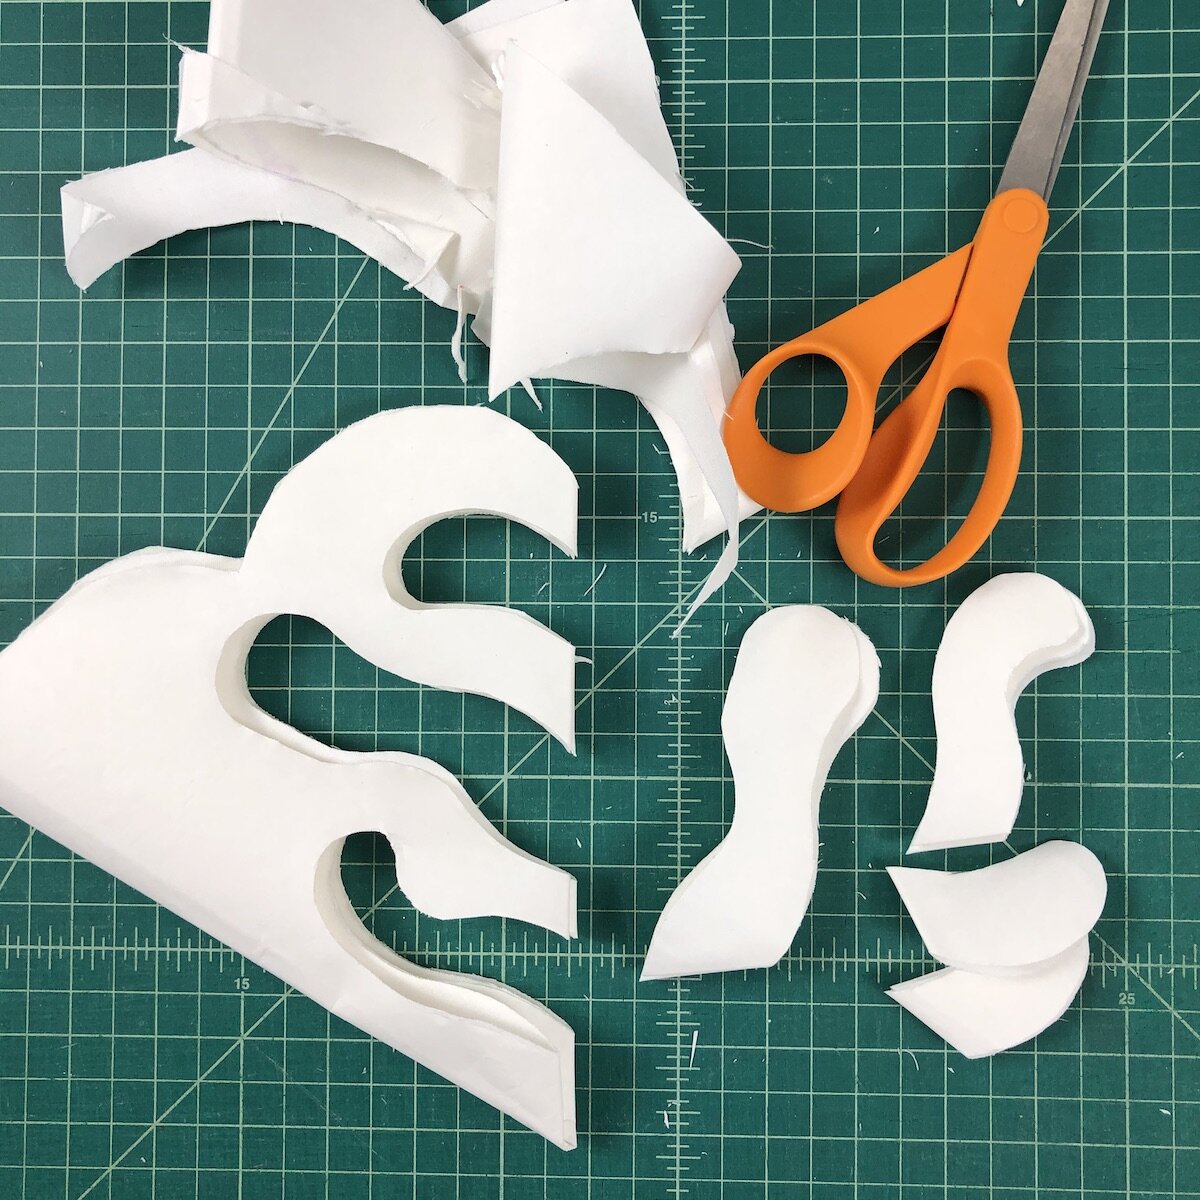

The closer together the cuts, the more lacy the look. I like to make cuts on one side first and then the other.

8. Open up the snowflake and evaluate. I decided the outer edges were a bit boring, so I folded the snowflake back up and added some cuts along the edge. (See next photo.)
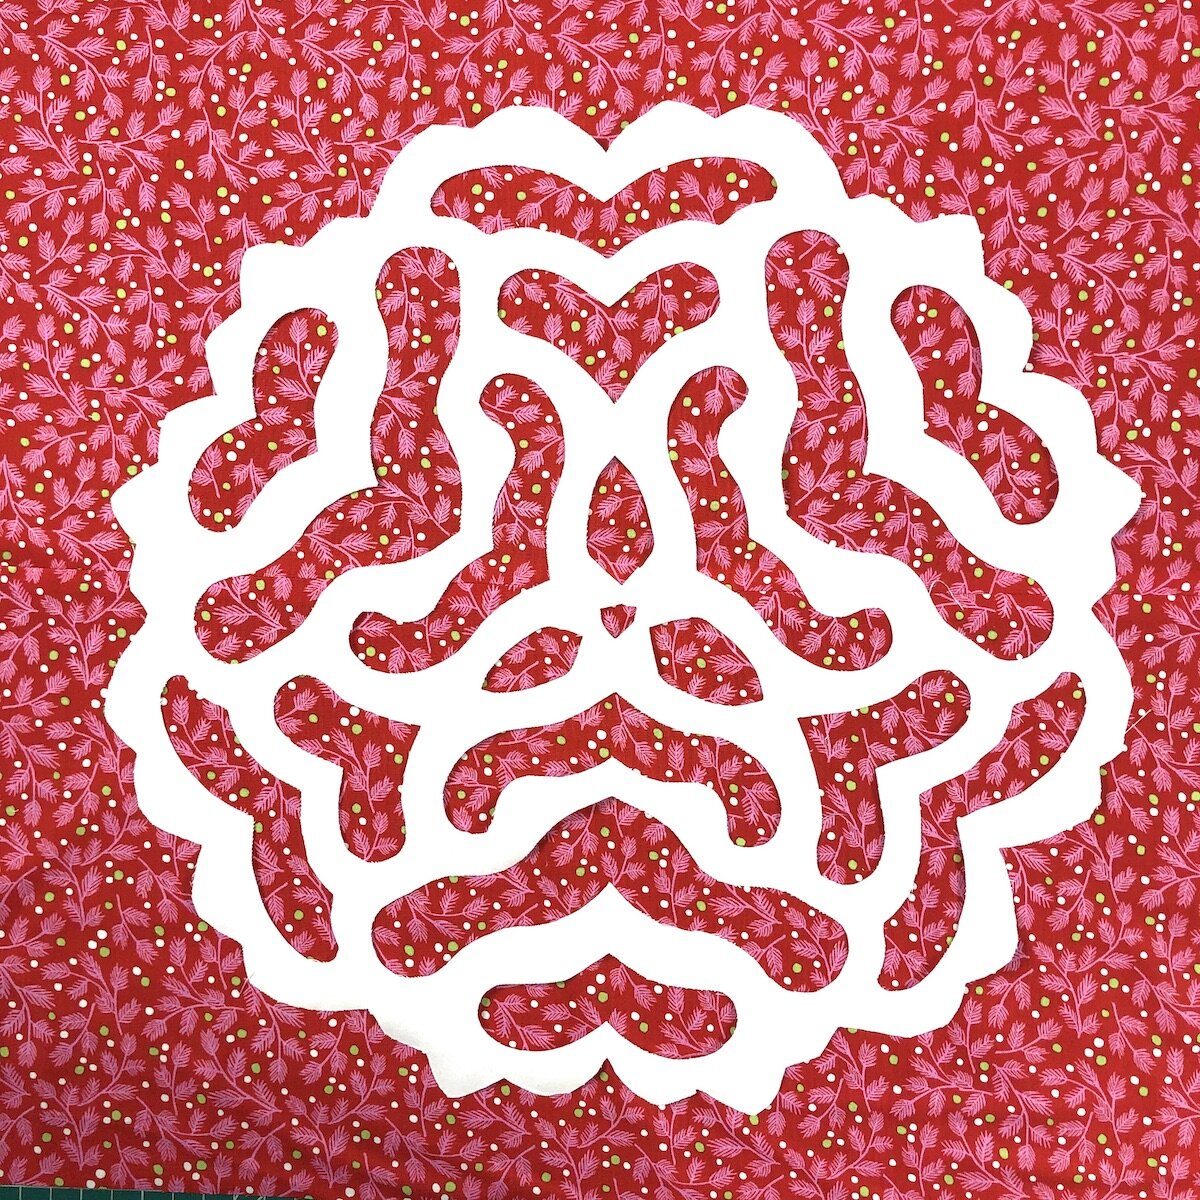
9. Decide what fabric you want to place your snowflake on. After pulling out and auditioning ALL my reds and greens, I decided on this fun red and pink print.

10. Carefully, pull the paper backing away from the fabric.
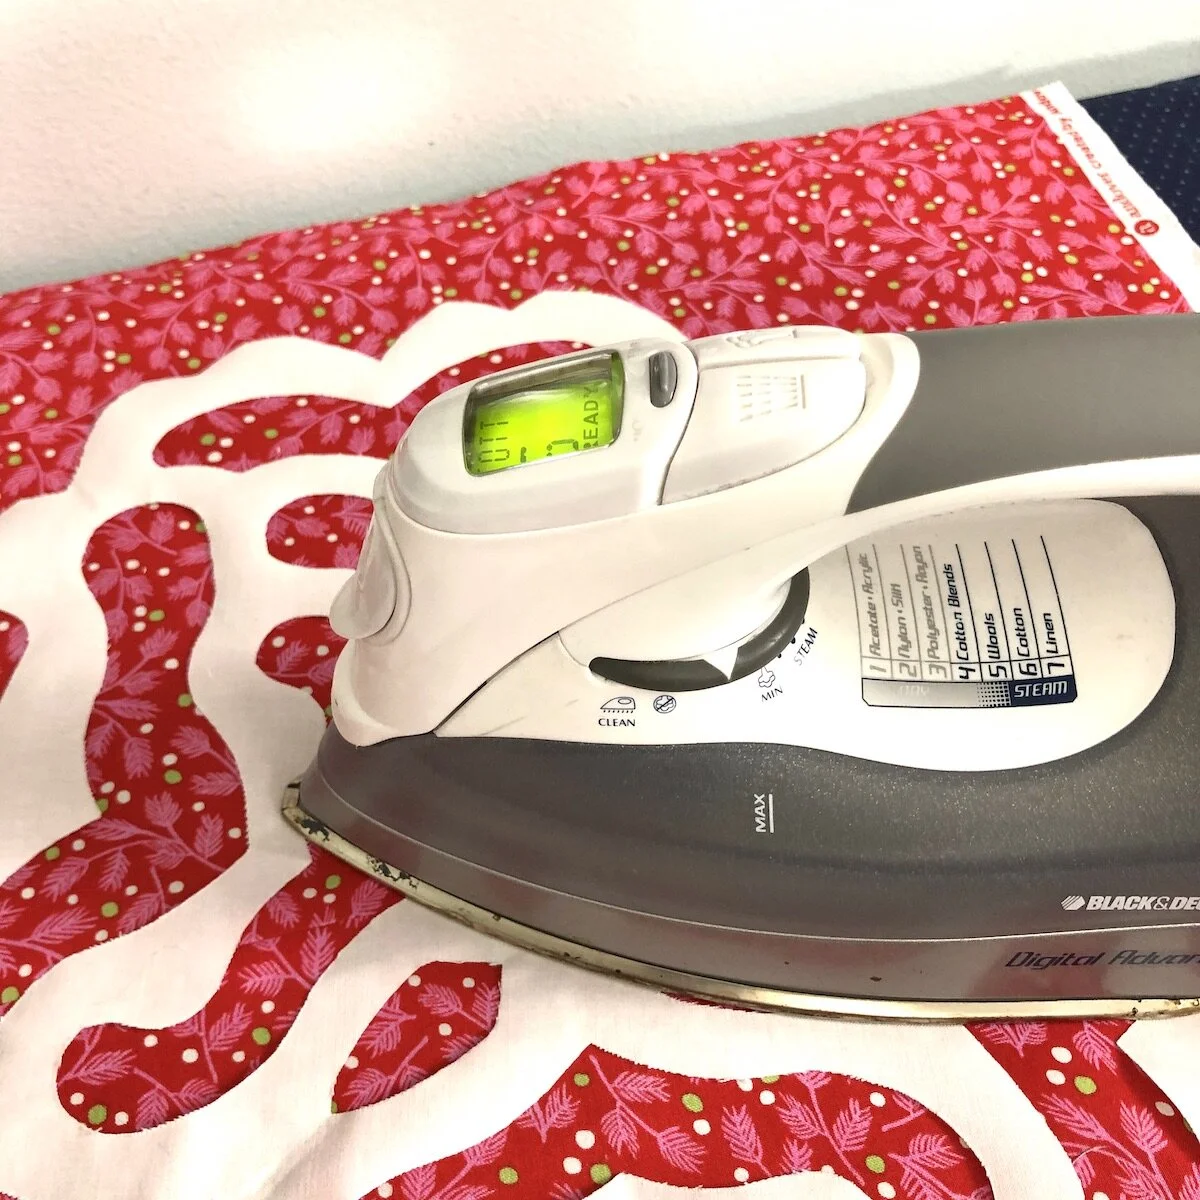
11. Center the snowflake on your background fabric, adhesive side down. Press and hold iron for 6 seconds on each section until entire piece is bonded. Make sure that all of the edges are secure. (It always takes a bit longer to iron than I think it will.)
12. If desired, you can zigzag around the edges of the snowflake to secure them, but I’ve found that with things that will be laundered rarely, this is not strictly necessary, as dense quilting will hold the edges down. I plan on quilting with a 1/2” grid, so decided against zigzagging the snowflake in place. However, if your project will receive heavy use and be laundered regularly, you may want to.
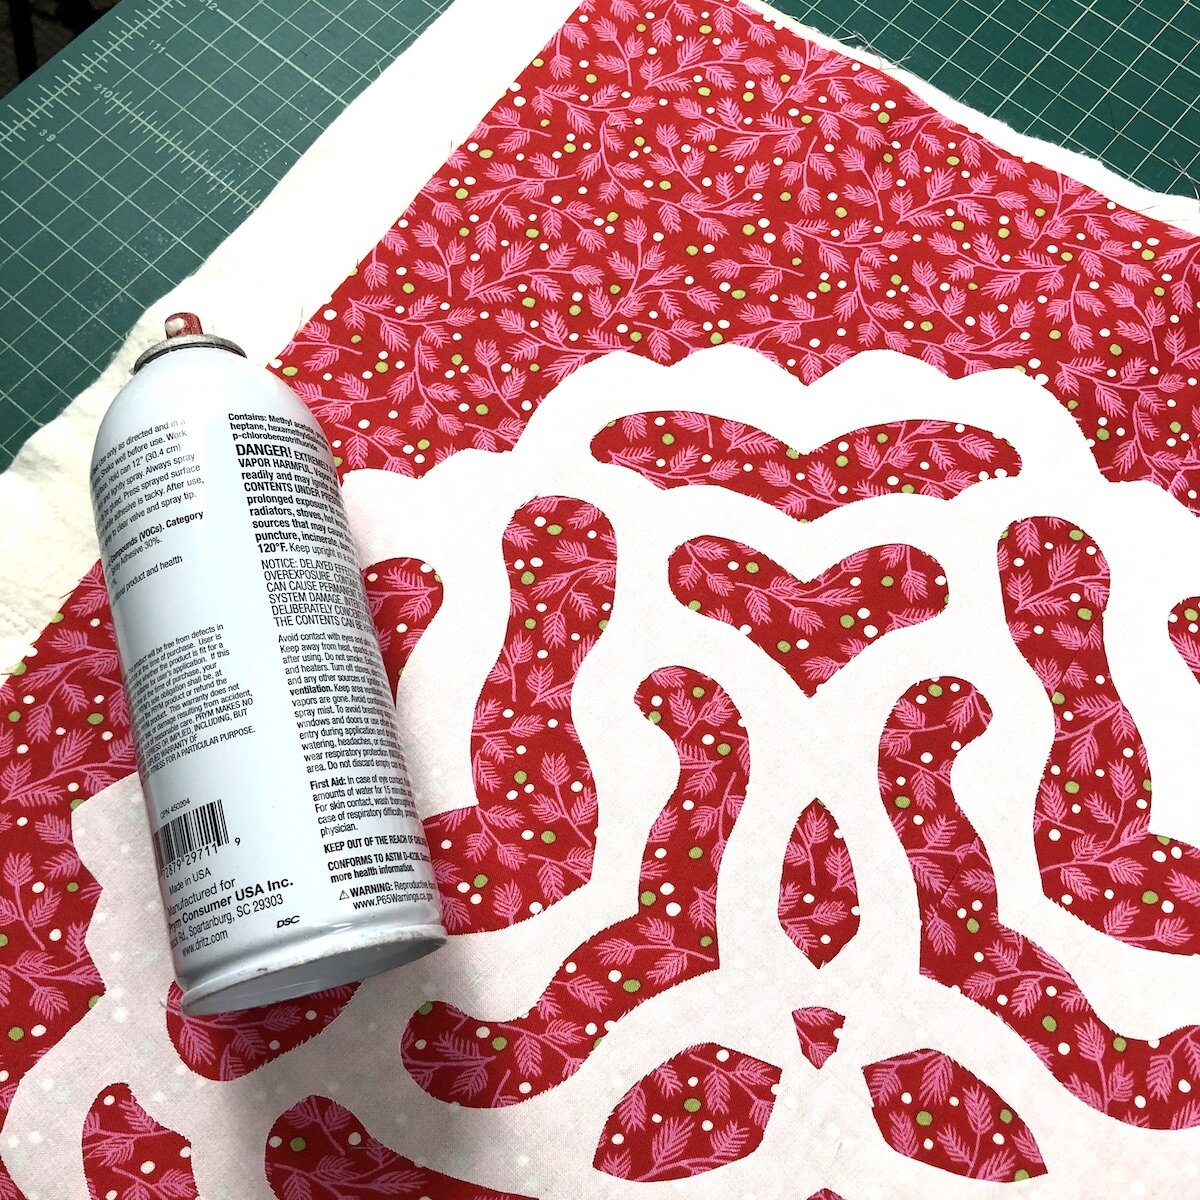
13. If making a quilted pillow cover or wall hanging, baste the snowflake panel, batting, and backing together. I used a spray baste, but pins or thread basting also work well.
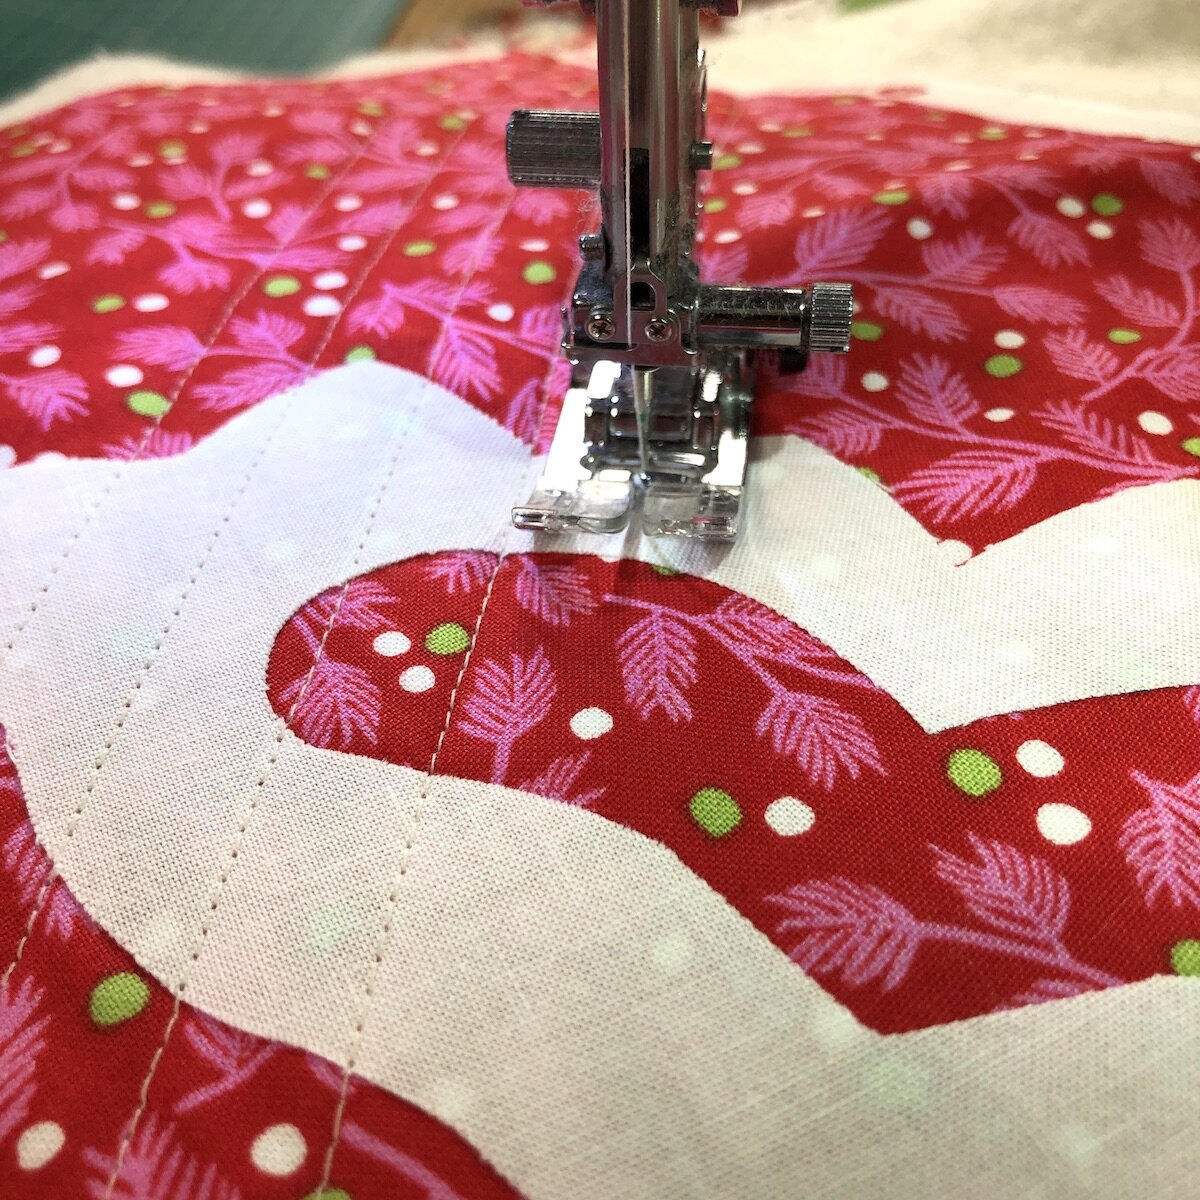

14. Hand or machine stitch the layers together. I decided to quilt a 1/2” grid.
15. Trim the quilted panel to size. I trimmed mine to 18 1/2”.
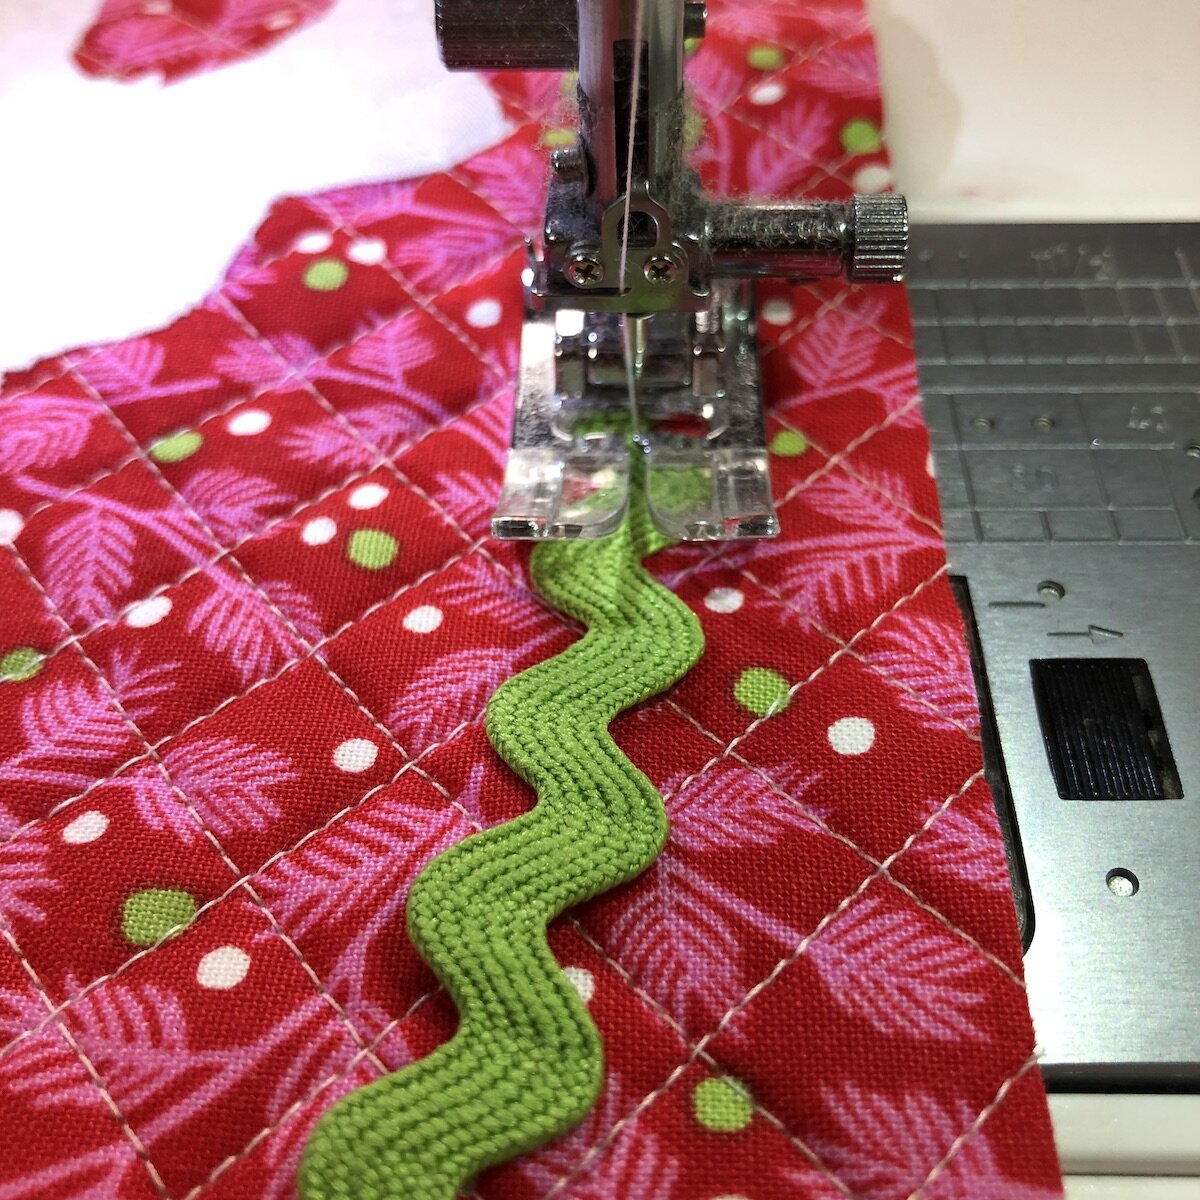
16. Optional: Add embellishments. I decided to add some fun rickrack to my quilted pillow. To do so, simply lay the rickrack in place and stitch down the middle.
17. If you are making a pillow cover, use Crazy Mom Quilts Envelope Backed Pillow Tutorial to make the pillow enclosure. This is my favorite method.


I love how it turned out and how it looks on our couch!
Keep reading to see how I used the same process to make a mini quilt with snowflakes.
Snowflake Mini Quilt Option

For this mini quilt, I sewed together scraps of creams to make a background fabric (approximately 36” square). Then made seven snowflakes in aqua, teal, and gray to decorate it with. I played around with the placement of the snowflakes and then ironed them onto the background. After basting, I quilted it with a serpentine stitch. I love the texture it gives!


This is a fun technique with lots of possibilities. I hope you give it a try! Have fun!