Easy Child's Reversible Apron Tutorial

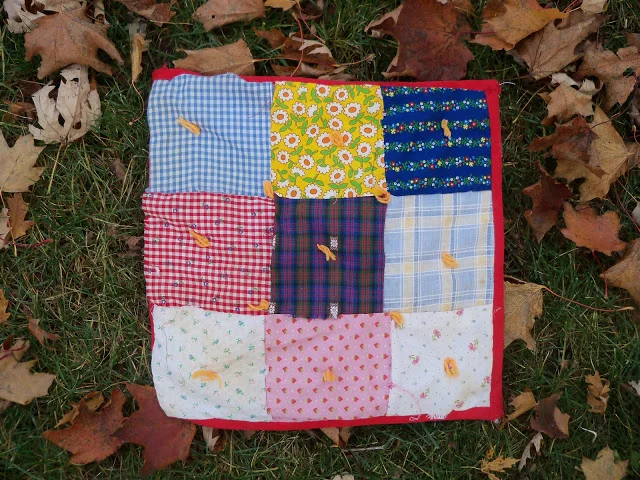
Here is a blast from the past! First published on the Moda Bakeshop site in 2014. (Can you tell from the pictures?)
Do you know a small child who likes to help in the kitchen? My five girls certainly love to! How about making them an apron? It is perfect for cooking, eating, painting, and more.
This apron is:
Fully reversible with a large pocket on both sides
Ties at the neck and waist making it fully adjustable
Fits children ages 4-8.
But do you know what the best part is? It only takes 3 fat quarters to make! Perfect for a quick gift.
Come on, let me show you how to make it!

Materials
You will need 3 Fat Quarters (18” x 22” pieces of fabric)
One for the front of the apron
One for the back of the apron
One for the ties and pockets
Cutting:

Trim the fat quarters.
Trim two fat quarters for the front and back of the apron to 18 x 21 inches. If you need to cut them a bit smaller to square the fabric up or cut off the selvages, it isn’t a problem at all, just make sure both pieces are the same size. I like to lay the front and back apron fabric on top of each other as I cut to make sure they are the same size.
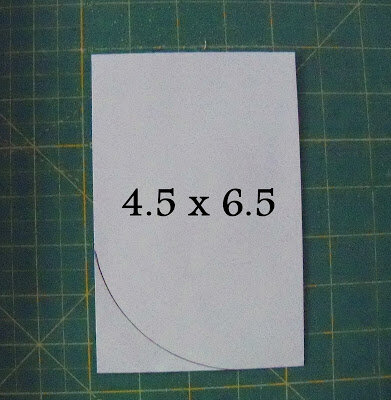
Cut a piece of paper 4.5” x 6.5”.
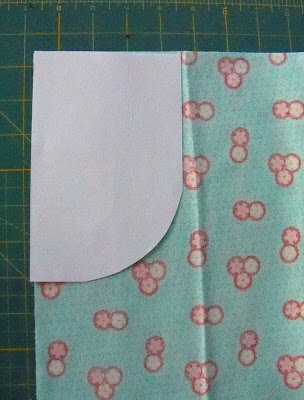
Use paper as pattern.

Cut off the corners of the two fat quarters.
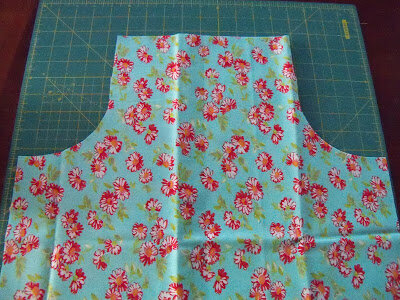
Now we have the basic apron shape!
Cut a piece of paper 4.5 x6.5 inches in size. Use a bowl to draw a soft curve in one corner. Cut off the corner following the line. This is your pattern piece for the apron.
Place the pattern piece in the upper left hand corner of the fabric. Pin. (You can pin and cut through the front and back apron fabric at the same time if you wish.)
Cut along the pattern.
Repeat on the other side of the apron. This is the main body of the apron.

Cut the ties and pockets.
With some careful cutting all of the pockets and ties can be cut out of one fat quarter:
First: Cut two 2.5 x 18 inch strips for the waist ties
Second: Cut two 2.5 x 14 inch strips for the neck ties
Third: Cut two 7 x 12 inch rectangles for the pockets
Sewing:

Sew one end and one side of the ties.

Turn the ties right side out.
Fold each of the 2.5 inch wide tie pieces in half length wise. Press and pin if desired.
Sew along one short end and the long side of the tie with a 1/4 inch seam. Remember to back stitch at the beginning and end of the stitching.
Trim off the corners of each tie.
Turn the tie right side out. I used the handle of a spoon to poke the sewn end of the tie back into the casing.
Continue to push the end up into the casing and pull the casing along the spoon handle until you see the end of the tie poking out. Grab the end of the tie and pull it out.
Iron the tie flat.
Repeat for all of the waist and neck ties.

Zigzag edge and trim corner

Turn over edges 1/4”.
Next, take the 7×12 pocket pieces and zig zag along each edge.
Trim about a 1/4” off of the bottom corners.
Turn over the bottom and side edges 1/4” and press.
Turn under the top edge 1/4” and press. Turn the top over another inch and press again.

Stitch along the top of the pocket.

Fold pocket in half and iron.
Top stitch along the edge of the top fold. Repeat this process for both pocket pieces.
Fold the pocket piece in half and press down the middle until you have a nice sharp crease.

Place pockets on the front of each apron piece.

After sewing around the edges, stitch down the middle.
Lay the prepared pocket in the middle of the bottom section of the apron and pin.
Starting at the top right hand corner, stitch along the outside edge of the pocket about 1/8th of an inch from the edge. Do Not Stitch along the top hemmed edge.
When done, find the pressed line in the middle of the pocket. Starting at the top, stitch along the fold, back stitching at the top and bottom of the pocket.
Repeat for the other apron piece.

Pin the shorter ties to the top of the apron.

Pin the longer ties to the sides of the apron.
Next pin the shorter neck ties to the top of one apron piece.
Pin them just slightly farther than 1/4” in from the sides. Use at least 2 pins so that the ties do not sift during sewing.
Pin the longer waist ties slightly more than 1/4” below the curved corner of the apron.
Secure the ties with multiple pins to the center of the apron so that they don’t flop around and get caught in the side seams by accident. (I speak from experience.)

Two sides of the apron prepped and ready to be sewn together!
Yay! It’s looking like an apron now! You should have two apron pieces, each one with a pocket and one with the ties pinned in place.

Backstitch over the ties as you sew the two apron halves together.

Top stitch around the edges.
Place the two apron pieces right sides together and pin all the way around.
Starting at the middle bottom, stitch along the edge of the apron using a 1/4 inch seam allowance (the edge of the presser foot).
Back stitch over the ties to give the seam extra strength. Be careful not to stitch along the sides of the ties or get them caught In the seam allowance.
Stop and back stitch about 6 inches short of where you started sewing.
Make small clips along the curved edges. This will help the fabric lay flat when the apron is turned right side out.
Turn the apron right side out and iron the edges.
Pin the opening shut.
Top stitch about 1/8 of an inch from the edge of the apron. This gives the apron a nice flat finish and closes the hole at the bottom.

Ready to have fun with her apron!
Done!
One super cute reversible apron for your favorite child!

I like to tie the neck ties in a double knot with just enough room that they can pull it on and off by themselves.

I think this apron would be brilliant with a boyish fabric on one side and a girly fabric on the other. Or what about making some to keep at Grandma’s house or to go with the play kitchen? So many options! Have fun making one!